We don’t always remember all the passwords we use in our daily digital routine. We most certainly can’t always recall the passwords of all the WiFi networks we have ever connected to. If your device is set to connect to a WiFi network automatically when in range, you don’t need to enter a password every time your device is switched on and is near to the WiFi range. It will automatically connect to the WiFi network when it is in range.
Because of that, we often can’t recall the WiFi password when we need to enter it on another new device. How do we find out the password of a WiFi network your computer is already connected to? This short guide will show you how to check the WiFi password in Windows 11.
How to find your WiFi password on Windows 11
This guide is assuming you have a Windows 11 computer that is already connected to a WiFi network and that you want to find and see the password of the WiFi network so that you can use the password on another device.
To check the password of a WiFi network your PC is connected to in Windows 11, follow the steps below.
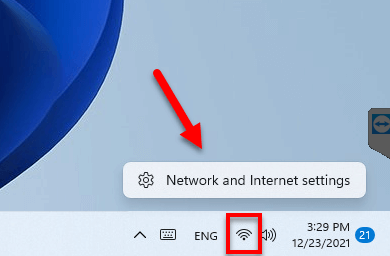
1. Right-click the WiFi or network icon on the taskbar corner in Windows 11, and select Network and Internet settings.
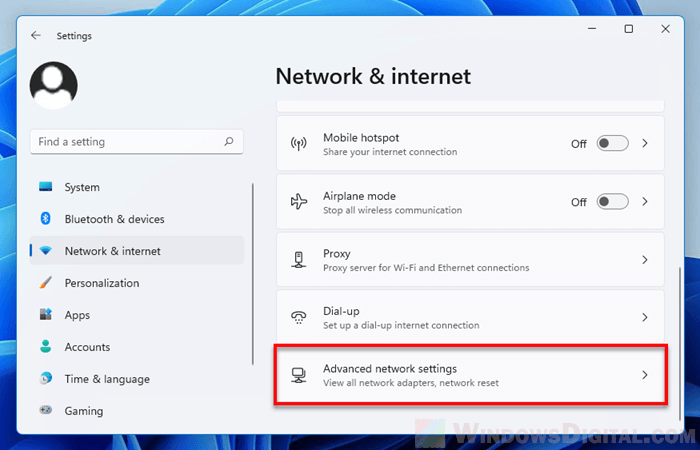
2. In the Settings window, under “Network & internet”, scroll down and select Advanced network settings.
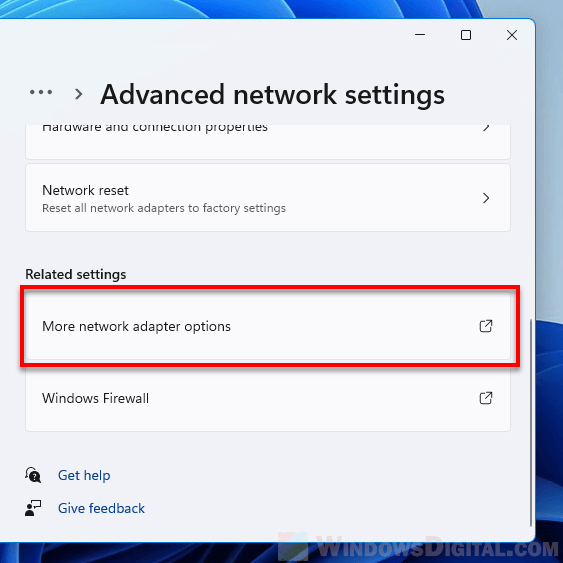
3. Under Related settings, select More network adapter options. This will open the Control Panel’s Network Connections window.
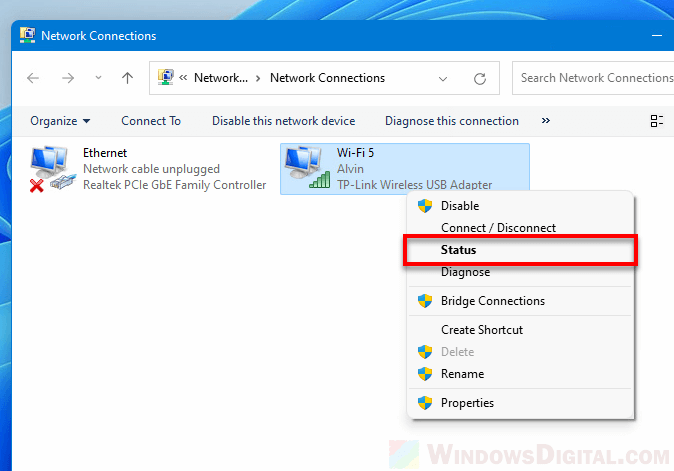
4. This window will list all your previously and currently connected WiFi or Ethernet networks. Right-click the WiFi network you want to find the password from, and select Status.
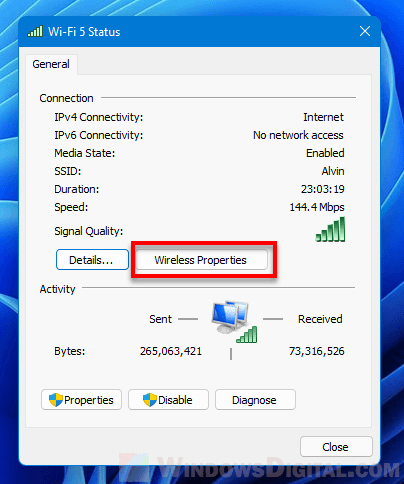
5. In the Status window, click Wireless Properties.
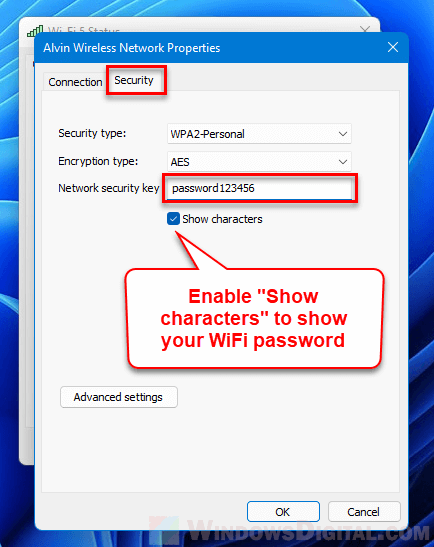
6. Next, in the Wireless Network Properties window, click the Security tab. Then, enable the checkbox that says “Show characters” to make the password visible. The WiFi password will be shown in the Network security key field.
You can then use the password on your other device to connect to the same WiFi network. In most cases, you don’t have to worry about the security type and encryption type of the WiFi network. Your device will usually be able to automatically detect and use the correct security and encryption type for the WiFi network.
Check WiFi password through Router/Modem
Another method is of course to check the WiFi password directly from the router’s settings. This requires users to know how to access to the router to be able to see or change the password of the WiFi network.
Generally, you can access to your router by accessing to the default gateway IP address, which is usually 192.168.0.1, 192.168.1.1, 127.0.0.1, etc. These are just some of the commonly used gateway IP addresses for most home networks.
You can check the default gateway IP address of your network by following the steps above until step 4. After clicking Status, click Details. From there you can find the default gateway IP address next to “IPv4 Default Gateway“.
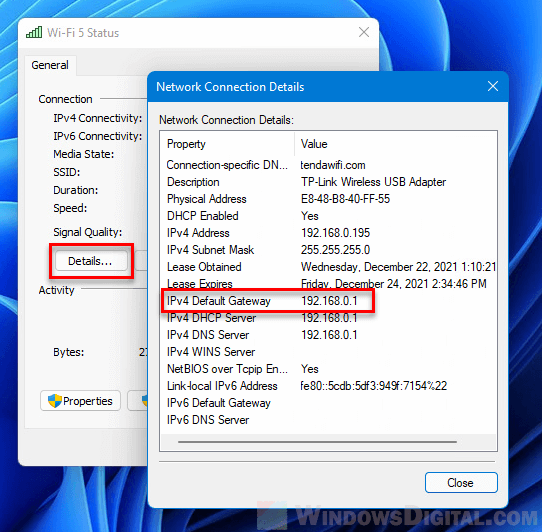
Once you have the IP address, you can then enter it onto your web browser’s address bar to open your router’s web interface. You also need to know the login credentials to your router. The router’s login details are usually provided either by your ISP or whoever helped setting up your network. You can also try to check the router and see if there is any label that shows the login details.

Once logged in to your router, look for options called Wireless, Wireless Settings or something similar. From there look for the WiFi settings that show both the WiFi name and its password. If there is a checkbox that says “show password” or “show characters”, be sure to enable it to make the password visible.
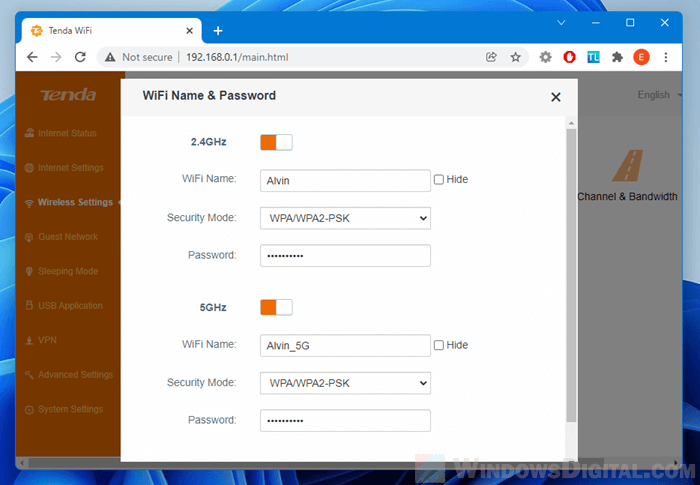
For some routers, because of security reason, the routers won’t show the password. But they will allow you to change the WiFi password to a new password.
