Do you have a folder or drive you don’t want certain user account to have access to? In Windows 11, you can use the folder’s security properties to configure what permission a user can have towards a folder to limit user access to the folder. This guide will show you how to restrict user access to a folder or an entire drive in Windows 11.
Pro tip: How to Take Ownership of a File, Folder or Drive in Windows 11
Restrict user access to a folder/drive in Windows 11
By configuring the security properties of a folder or drive, you can restrict a specific user account or a group of user accounts from accessing the folder or drive. For example, you can allow or deny the permission to read, write, modify or view the folder contents for a specific user account or a group of user accounts (e.g. Guests). To limit user access to a folder or drive in Windows 11, follow the steps below.
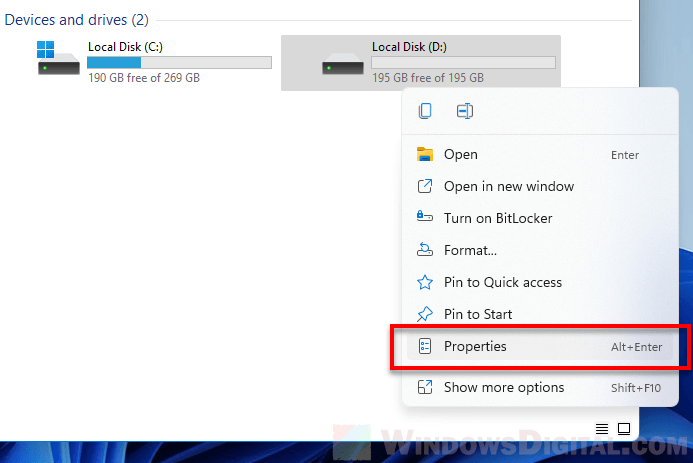
First, right-click the folder or drive you want to limit user access, and select Properties.
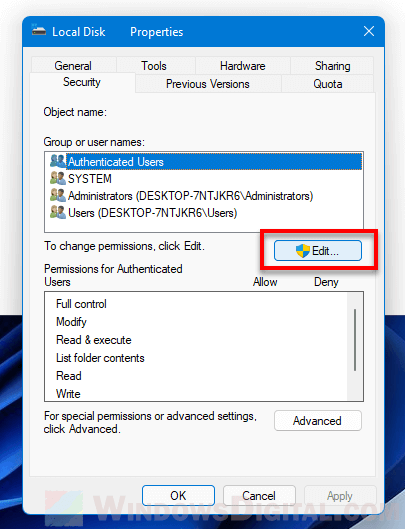
In the folder’s properties window, click on Security tab. Under “Group or user names”, click on the Edit button.
Tip: If you can’t edit the permissions of the folder or drive even with an administrator account, it likely indicates that your user account does not have ownership of the folder or drive. Read: How to Take Ownership of a File, Folder or Drive in Windows 11.
In the “Permissions for This Folder / Local Disk” window, click on Add.
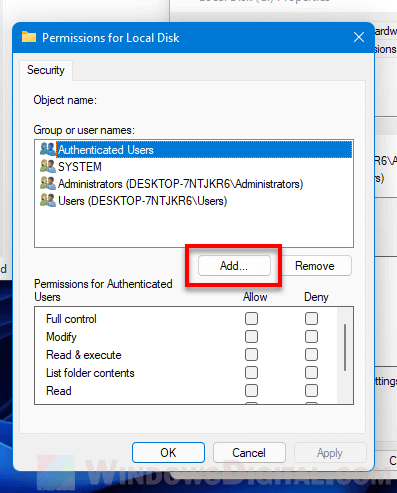
In the “Enter the object names to select” field, enter the user account or group name you want to limit access.
If you want to restrict only a specific user account, enter the username of the user account. As for Microsoft account, enter the email address of the Microsoft user account, for example, [email protected].
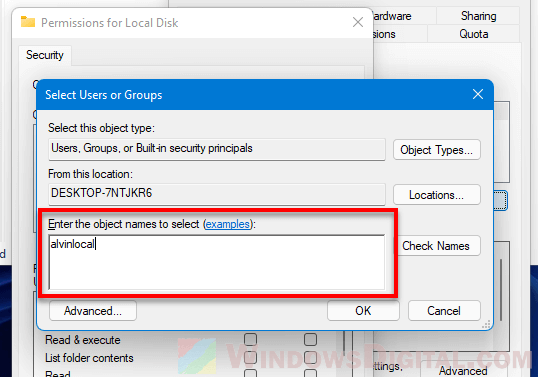
To restrict a group of user accounts, for example, if you want to restrict all guest user accounts, enter Guests. If you want to restrict everyone, enter Everyone. For a list of group/object names you can use, click on the examples link in the “Select Users or Groups” window. The link will open a Microsoft’s documentation page which will show you a list of object names you can use.
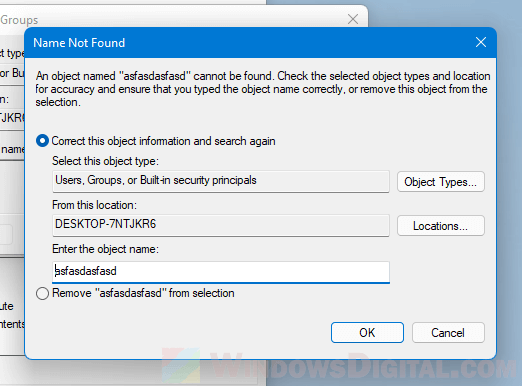
If an entered user name or group name is invalid or does not exist, you will get a “Name Not Found” error. Check the spelling of the username and try again.
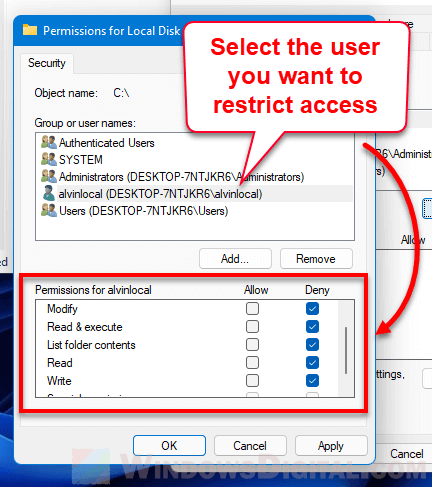
Once you’ve added the user account or group name you would like to restrict access, back to the permission window, select the user account you’ve added, then configure the permissions for the user account by checking the checkboxes under Deny to restrict or Allow to permit for each permission.
What does each permission do?
- Full Control: Allows the user to read, write, change and delete the files and subfolders in the folder. Additionally, it also allows user to change the permission settings for the files and subfolders.
- Modify: Allows reading, writing and deletion of files and subfolders.
- Read & execute: Allows viewing and listing of files and subfolders as well as executing of files.
- List folder contents: Allows viewing and listing of files and subfolders in the folder, as well as executing of files; inherited by folders only.
- Read: Allows user to view and list the files and subfolders.
- Write: Allows user to add files or subfolders to the folder, and also allows writing to the files in the folder.
If you want to restrict a user or group from all permissions, check the Deny checkboxes for all permissions. The restricted user will no longer be able to view, read, change or delete the folder or files and subfolders in it, nor they can change the permission of this folder.
After you’ve done configuring the permission settings, click OK to save the changes. You will be prompted for confirmation about setting the deny permissions for the user account. Click Yes to continue.
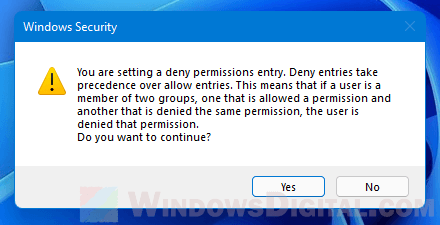
The warning basically means that, if a user account is denied a permission, if the user is also a member of a group, for example, the “Everyone” group that is allowed the same permissions, Windows will prioritize denying the permission for the user account.
What error would a user see if the user does not have any permission?
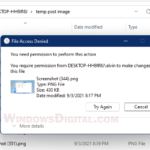
If the all permissions to a folder or drive are denied for a user account, the folder or drive will still be visible to the user, but it will return “Access denied” error when the user try to open it.
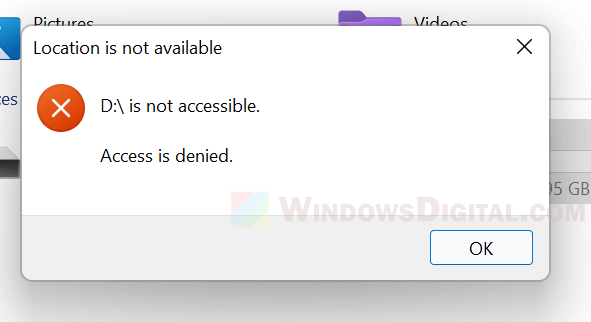
If you also want to hide this folder so that it will not be visible to anyone, you can do so by right-clicking the folder > Properties > enable the Hidden option. To learn how to hide an entire drive, read: How to Hide a Drive in Windows 11.
