If there is an application, software, program or game you wish to block from accessing the internet, you can block the app using Windows Firewall so that no traffic can go in or out of the program. This tutorial will show you how to block a program from connecting to the internet using Windows Defender Firewall in Windows 11.
Also see: How to Know Which App is Using The Internet in Windows 11
Block an app from using the internet with Windows 11 Firewall
To block an app from accessing the internet, we will use Windows Defender Firewall with Advanced Security to set up inbound and outbound rules to block incoming and outgoing connections for the app.
How does it work? – By blocking incoming connections for a program, connections from outside of your computer to that particular program cannot be initiated. Thus, traffic and data cannot flow inward by the program to your computer. In the contrary, by blocking outbound connections for a program, that particular program will not be able to initiate any connection going-out of your computer, thus, blocking the program from sending any traffic or data to the internet.
Follow the steps below to block both incoming and outgoing connections for a program (to completely block the program from connecting to the internet).
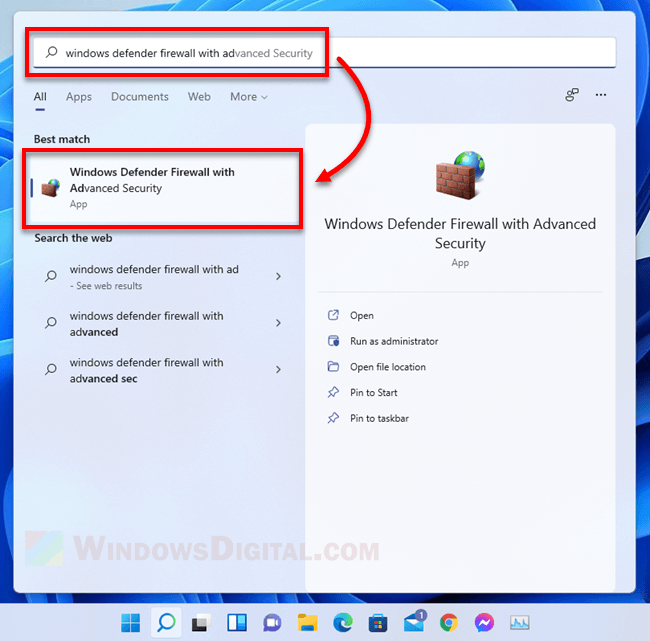
- On the Windows desktop screen, go to Start, then search for and open “Windows Defender Firewall with Advanced Security“.
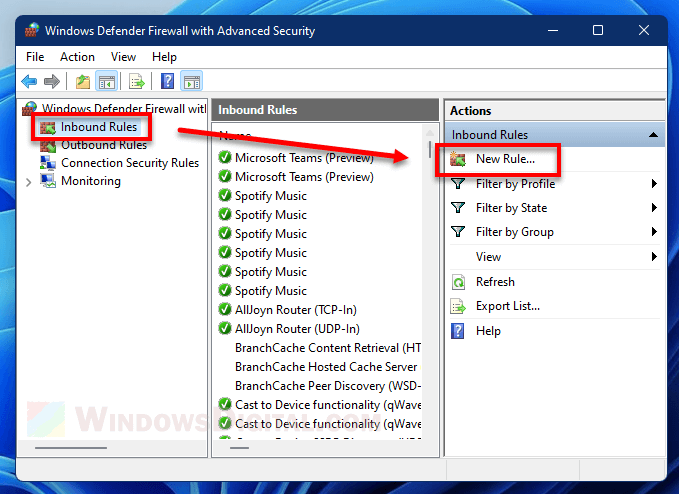
- In the Advanced Security window, on the left pane, click on Inbound Rules.
- On the right pane, click on New Rule (in the “Actions” column).
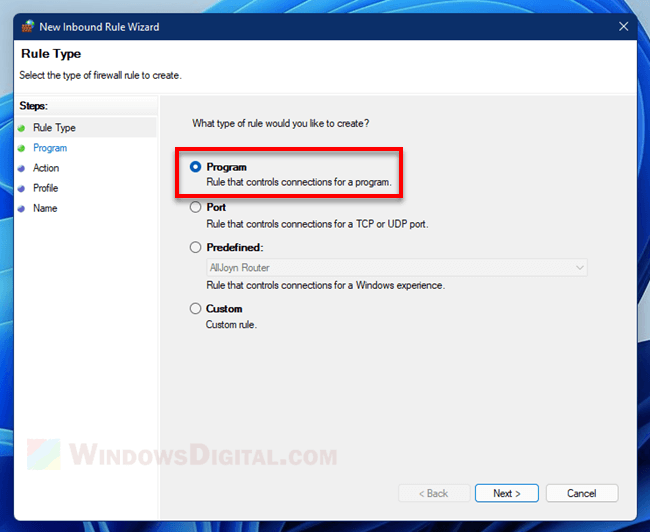
- In the wizard window, select Program and then click Next.
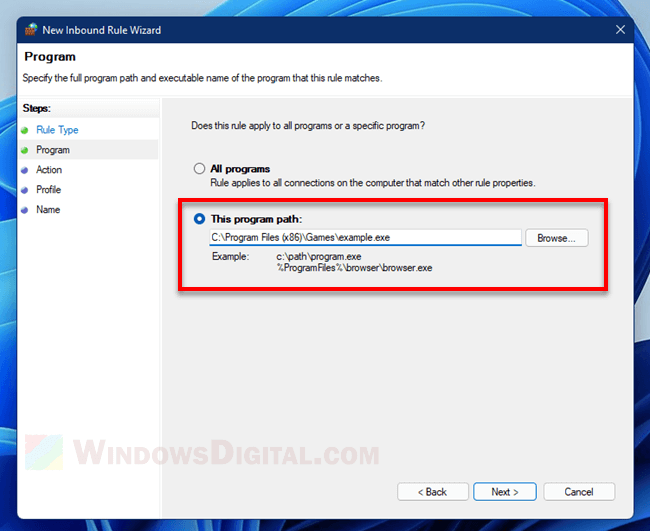
- Next, under “This program path“, enter the path to the program, or click on Browse to browse to the program you want to block. Click Next to continue.
- On the next screen, select “Block the connection“.
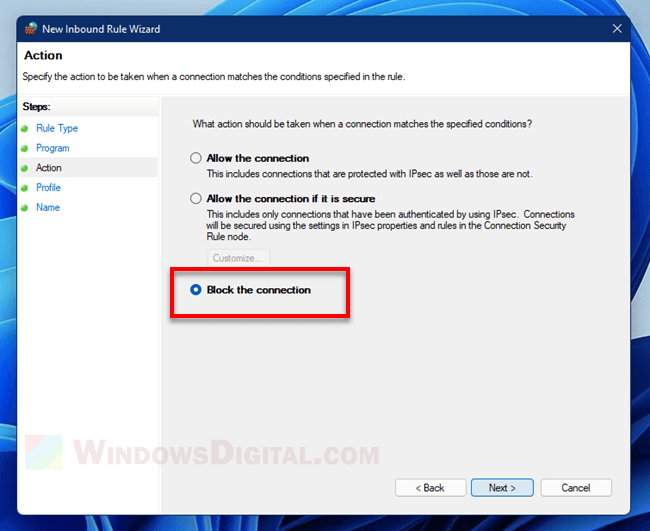
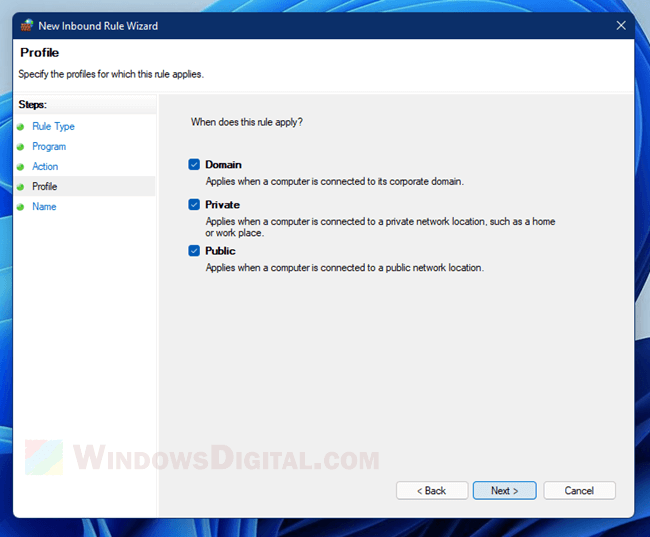
- When prompted for “When does this rule apply”, select the network profile which when connected you want the program to be blocked. If you are not sure, select all three Domain, Private and Public to block the program when you are connected to any of these network profiles.
- Next, enter a name for this rule. It can be any name you like. The name and description is to make it easier for you to identify this rule among the list of all added rules.
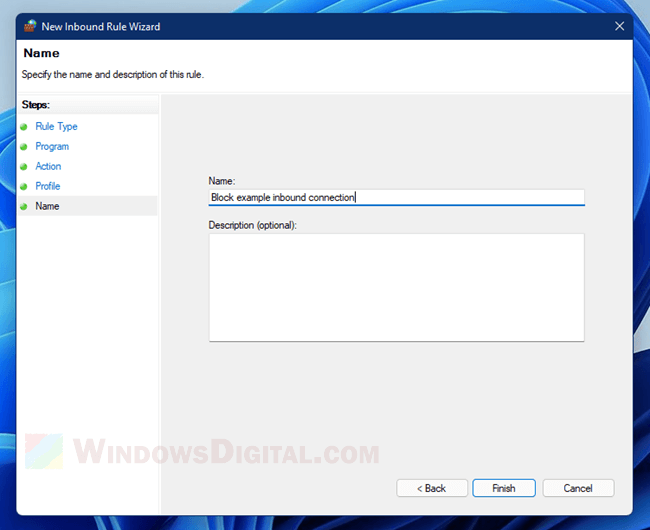
- Click Finish to add the rule.
- Then, back to the Advanced Security window, on the left pane, click on Outbound Rules.
- In the “Actions” column, click on New Rule.
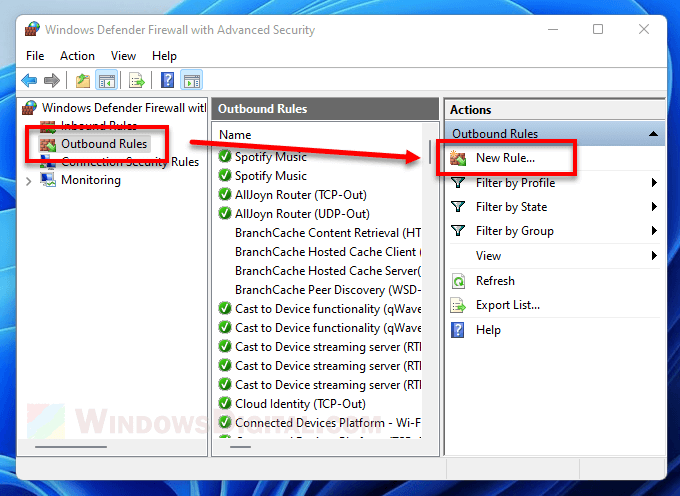
- Repeat step 4 to 9 to add an outbound rule to block outgoing connection for the program.
After adding both inbound and outbound rules to block connections to or from a program with Windows Defender Firewall, that program will no longer be able to access the internet.
Block only inbound or outbound connection for a program
Optionally, you can partially block a program by blocking only its inbound or outbound connections depending on what you want to achieve. You can set up only one rule on either of the inbound or outbound rules for a program to block only one way connection instead of both.
For example, if you block only the incoming connections for a program, the program will not be able to receive any traffic from the internet, but it can still send traffic out to the internet.
Windows Defender Firewall need to be turned on in order for this feature to work. In Windows 11, Windows Firewall is enabled by default and should always stay on to protect your PC from potential threats. To check if Windows Firewall is properly turned on on your PC, go to Start > search for and open “Windows Security” > Firewall & network protection. Make sure “Firewall is on” is displayed on all three network profiles.


