Firewall is a critical security defense to keep your PC and device safe from potential threats that may come from networks you’re connected to. In Windows 11, if there is no other third party firewall software installed, Windows will use its default Windows Defender Firewall to protect your PC.
We recommend you leave the firewall protection on at all times and don’t allow any suspicious app through firewall. If you are confident you understand the potential risks and would like to temporarily or permanently disable the firewall, this guide will show you how to disable the Windows Defender Firewall, or allow an app through firewall in Windows 11.
Also see: How to Block a Program From Accessing Internet in Windows 11
Page Contents
How to disable firewall in Windows 11
Note: Disabling firewall may put your PC at risk of potential attacks and threats from hackers. If you want to disable Firewall, make sure you understand what you are doing and can access the potential risks. We will not be held responsible for any damage or loss caused by this action. Please continue at your own risk.
To disable the Windows Defender Firewall in Windows 11, follow the steps below.
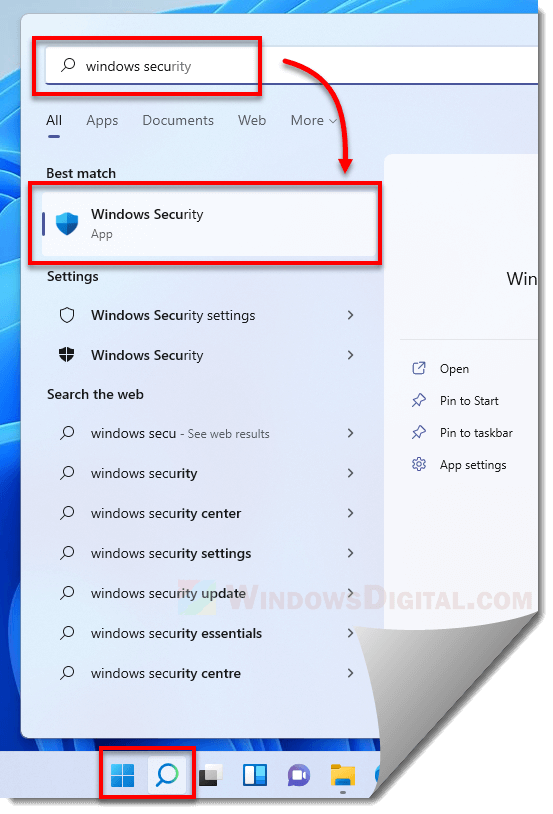
- On Windows 11 desktop, click on Start. Then, search for and open “Windows Security“.
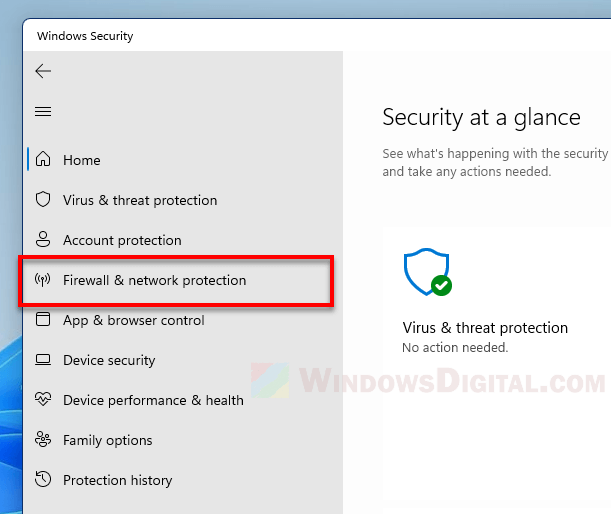
- On the left pane, click on Firewall & network protection.
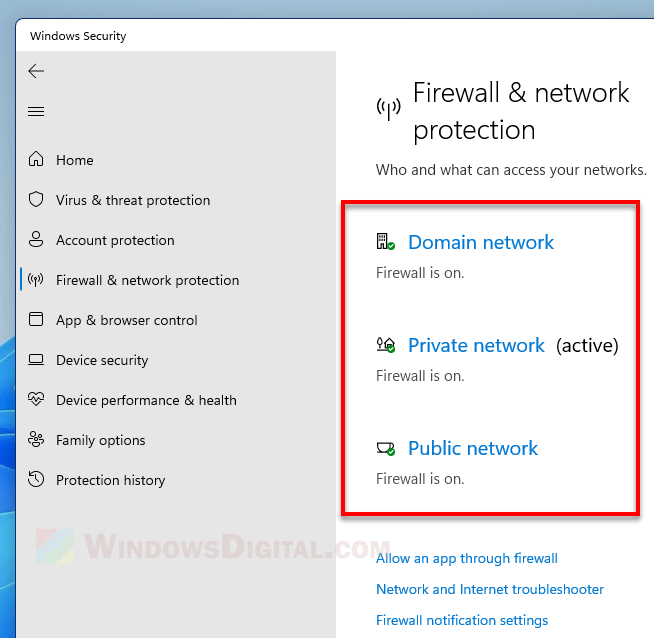
- Click on the network profile you want to disable the Windows Firewall on. The currently active network profile will have an “(Active)” written beside it.
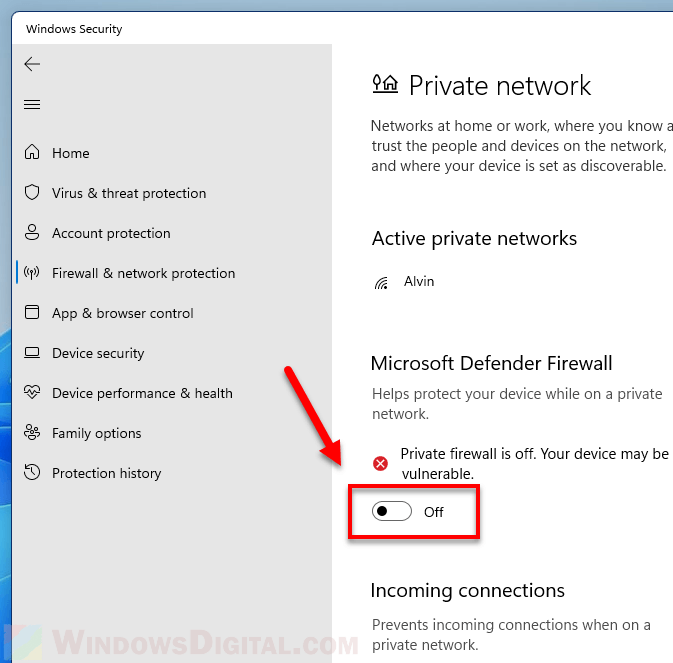
- Under Microsoft Defender Firewall, click on the radio button to turn off the firewall.
- When UAC asks for confirmation to make this change, click Yes to proceed.
To turn the Windows Firewall back on, follow the same steps above until step 4 and then click on the radio button again to turn on the Microsoft Defender Firewall. When in doubt, you can click on the Restore settings button to restore all the Windows Defender Firewall settings you have configured back to their default.
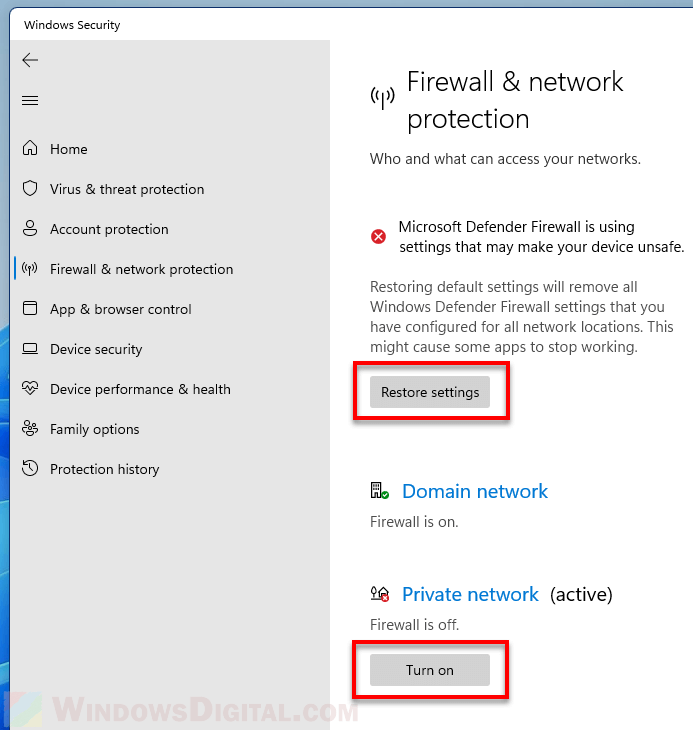
Depending on which network you’re on, you can turn off or on the Windows Firewall for any of the three common network profile types individually. Regardless which network profile you choose to turn off the firewall on, it may cause your PC to be vulnerable to potential threats and attacks.
- Public networks are networks you connect in public places such as airports, cafes and hotels.
- Private networks are usually networks that you trust such as your home or work network.
- Domain networks are usually business networks at a workplace that are joined to a domain.
How to allow an app through firewall in Windows 11
If you are having issue with only one certain app, you don’t need to disable the entire firewall just to make the app works. Instead, you can allow only that particular app through Windows firewall (unblocking only the app) without disabling the whole firewall. Here’s how to do so.
Warning: Manually adding a suspicious app through firewall may put your PC at high risk of threats and attacks. You should only allow an app through firewall if you are sure that the app can be trusted. Please do so at your own risk.
- Click on Start, then search for “Windows Security” and open it.
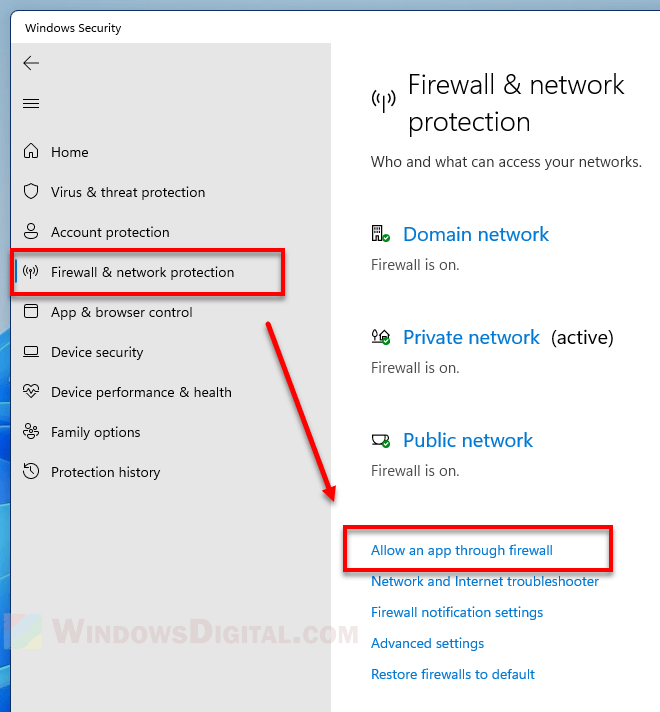
- Select Firewall & network protection from the left pane.
- Click on the “Allow an app through firewall” link at the bottom of the settings pane.
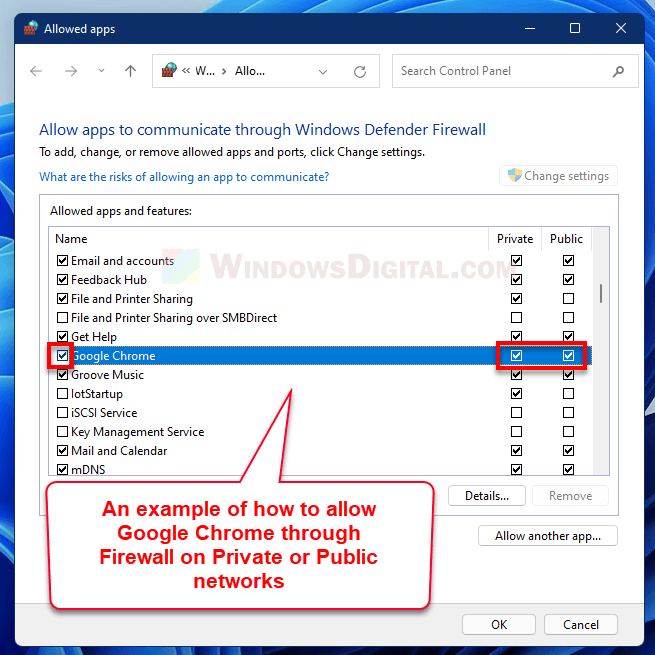
- In the list of Allowed apps and features, look for the app you want to allow through firewall. Then, click on the checkbox next to the app and the checkbox of the network profiles (Private or Public) you want to allow the app through firewall when you’re connected to.
- Click OK to save the changes.
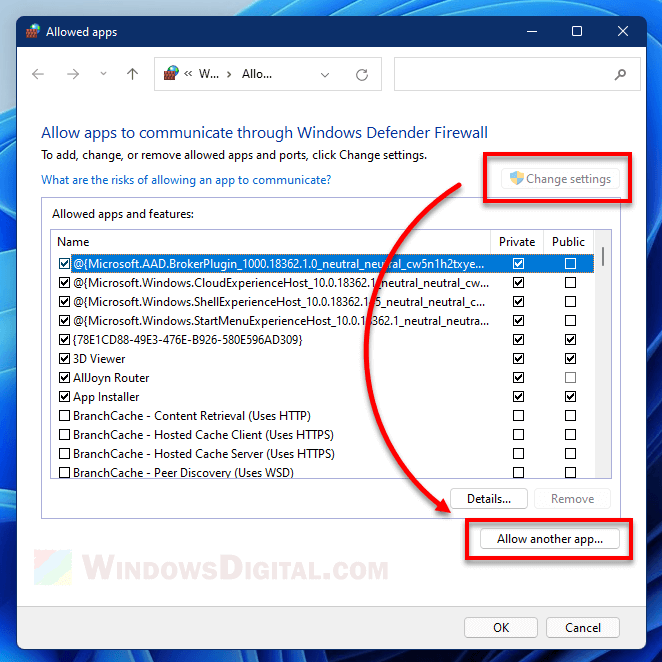
If the app you want to allow through firewall is not listed in the list of allowed apps and features, you can manually add the app to the allow list by first clicking the Change settings button (You need to have administrative privilege to do this). Then, click on Allow another app.
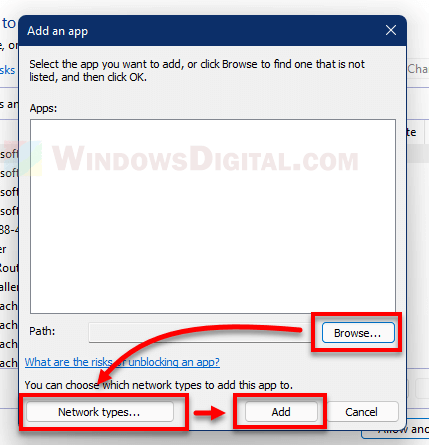
Next, browse the app’s executable file (.exe) you want to allow. Click on Network types and select the network profiles you want to add this app to. Then, click on Add to add the app to the list of allowed apps.
To disallow or block an app you’ve previously allowed through firewall, simply uncheck the checkbox next to the app you want to block in the list of allowed apps and features (step 4). Optionally, you can remove the app from the list of allowed apps by selecting the app and then click on Remove.
