In Windows 11, the date and time are automatically set as “Set time automatically” by default. When this option is turned on, users cannot manually change the date and time. Windows 11 will always try to synchronize the date and time of your PC with the time server (time.windows.com) at a set interval.
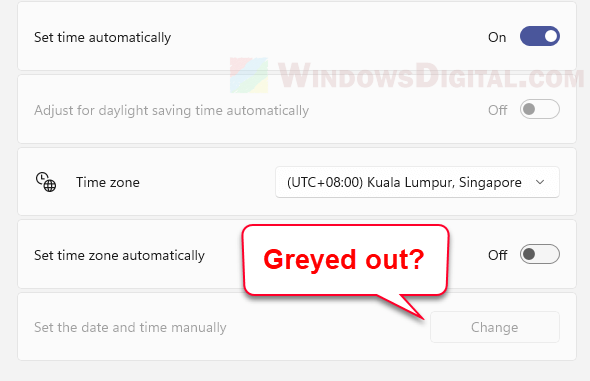
If you want to change the date and time in Windows 11 manually only to find that the “Change” button for the “Set the date and time manually” option greyed out in the time settings, here’s why and how you can manually set the date and time in Windows 11.
If your PC’s date and time is wrong and not syncing automatically, this guide will also show you how to manually sync your computer’s date and time with the time server, and how to make sure the date and time settings are set correctly so that it will sync automatically with the time server in the future.
Page Contents
Set Windows 11 date and time manually
If you want to manually set the date and time in Windows 11, you need to first disable the Windows automatic date and time syncing in order for the “set date and time manually” option to be available to you. Follow the steps to mnually change the date and time in Windows 11.
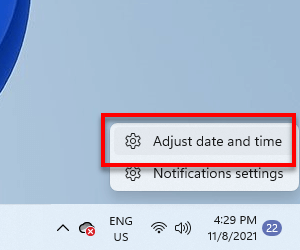
- On Windows 11 desktop screen, right-click on the date and time on the taskbar.
- Then, select Adjust date and time.
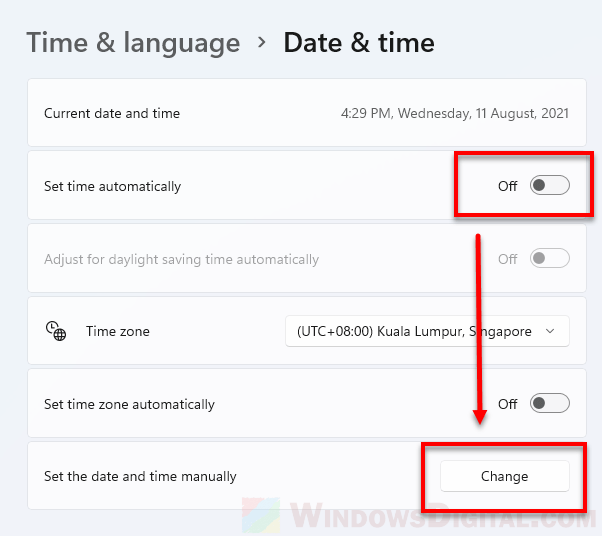
- Under Date & Time settings, turn off the “Set time automatically” option.
- The “Change” button for the “Set the date and time manually” option will now be clickable. Click on the “Change” button.
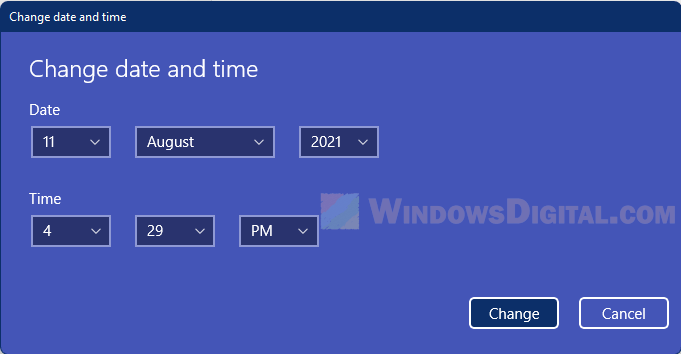
- Adjust the date and time to your preference. Once done, click “Change” to confirm the changes.
The “set the date and time manually” option will be greyed out if the “set time automatically” option is turned on. Thus, in order to change date and time manually, you need to disable the “set time automatically” option first.
Another method to manually change the date and time is to change it via the old Control Panel date and time settings (requires administrative privileges).
- In Windows 11, click on Start menu.
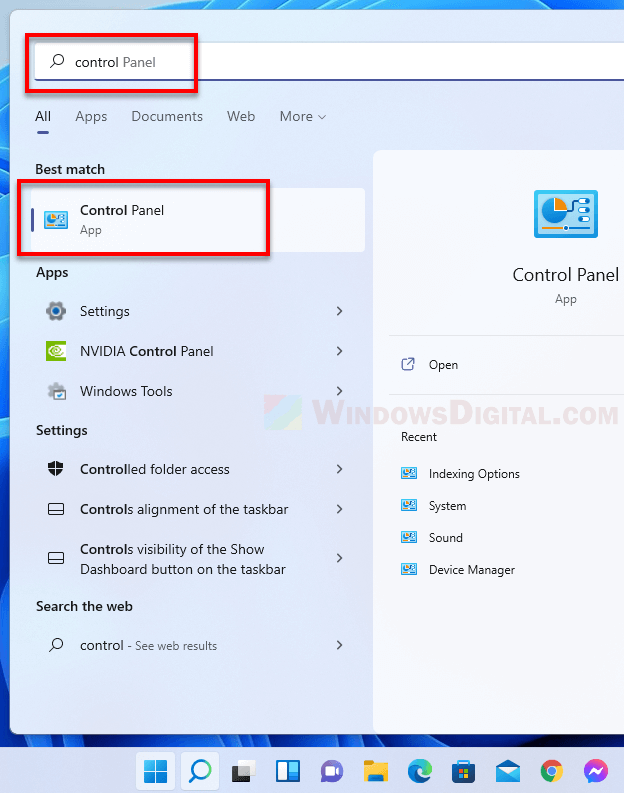
- Search for and open Control Panel.
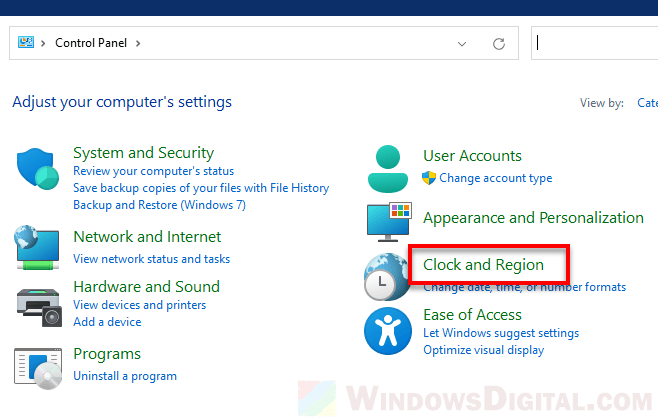
- Next, select Clock and Region.
- Click on Date and Time or Set the time and date.
- Then, click on Change date and time.
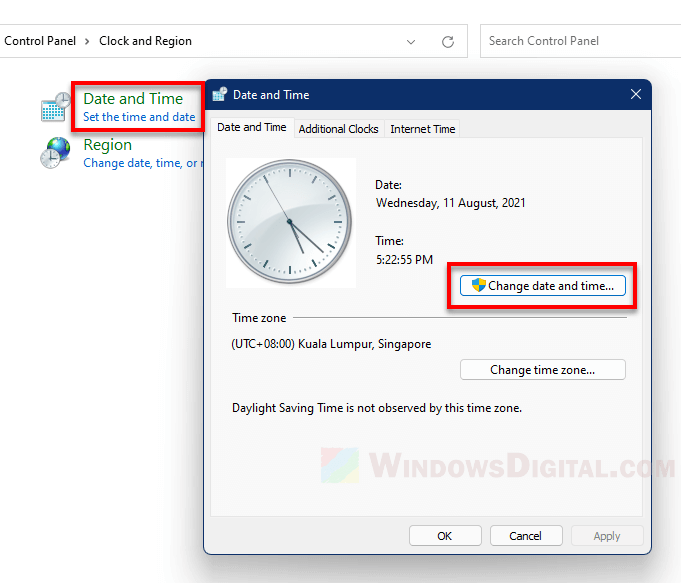
If UAC prompt for administrative access confirmation, click OK to proceed. This is where you can change the date and time manually. Once done, click OK to save the changes. You can also change the time zone from the same settings window under “Time zone”.
Sync date and time automatically in Windows 11
If the date and time in Windows 11 happens to be incorrect, here’s how to manually re-sync it with the Windows time server.
- Right-click on the date and time on your taskbar in Windows 11, then select Adjust date and time.
- Under “Additional settings”, click on the Sync now button.
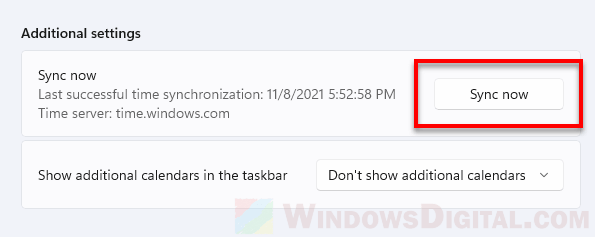
Doing so will force sync the date and time with the Windows time server (time.windows.com) immediately.
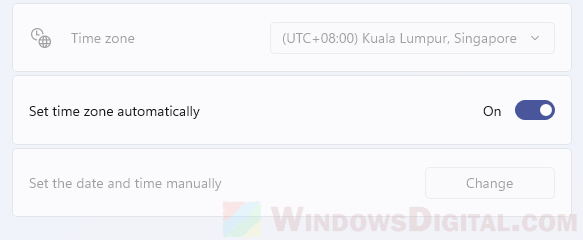
Also, make sure the time zone is set correctly to your actual time zone so that
Windows can show the correct date and time according to your time zone. Alternatively, you can turn on the “Set time zone automatically” option to allow Windows to automatically set your PC’s time zone according to your current location.
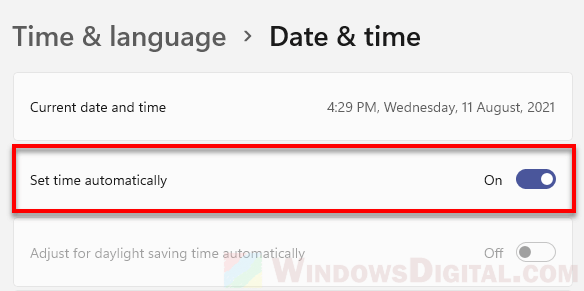
If you want Windows to automatically sync the date and time every now and then, make sure the “Set time automatically” option is enabled.
