Time is always wrong, keep changing or not syncing correctly on Windows 10? Here’s how to troubleshoot date and time synchronization failed issue, how to manually force sync the date and time, and how to sync with a different internet time server in Windows 10.
Page Contents
Check the date and time settings
Incorrect settings may cause the date and time to not sync or update correctly in Windows 10. For example, if the time zone is not set correctly according to where you live, the system clock would always show a different time as it syncs according to the set time zone.
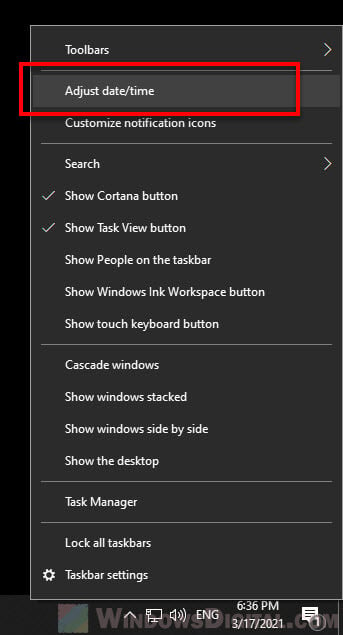
To check the date and time settings in Windows 10, right-click on the “clock and date” from the taskbar, then select Adjust date/time.
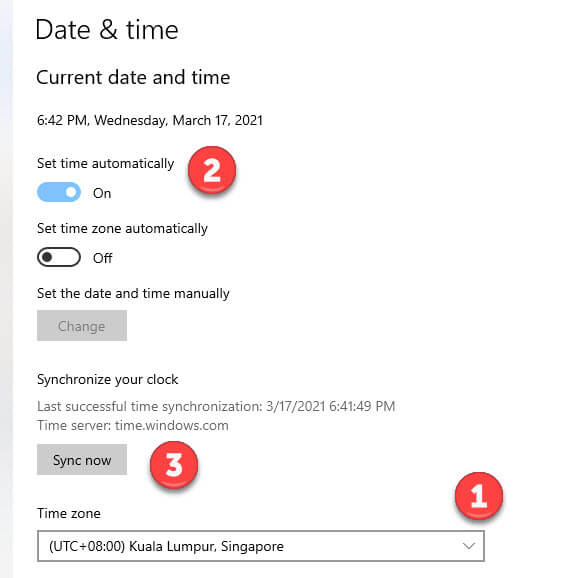
In the “Date & time” settings:
- Make sure the time zone is correctly set to your location.
- Make sure the “Set time automatically” option is enabled so that Windows is allowed to automatically sync the date and time for your PC.
- After making the changes, to manually sync the time now, click on the Sync now button.
Check the Internet time synchronization settings
Windows 10 sync the date and time of your PC with an internet time server. Incorrect sync settings or time server selected may cause the time synchronization to fail in Windows 10.
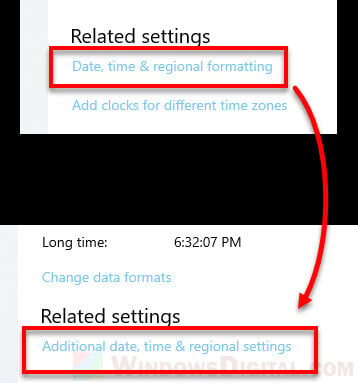
The Internet time settings lie deep within the control panel settings. To access to the settings, on the “Date & time” settings page, click on “Date, time & regional formatting” under Related settings, then “Additional date, time & regional settings” from the Region settings.
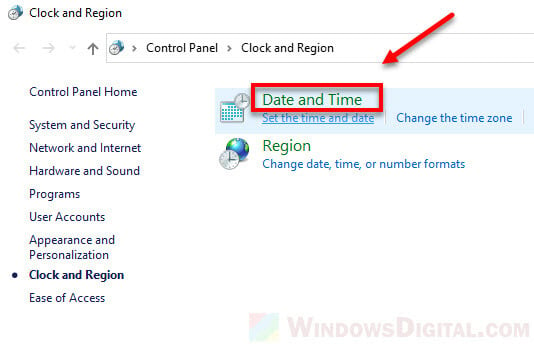
This will open the “Clock and Region” control panel window. Click on “Date and Time” to proceed.
In the “Date and time” window, go to the “Internet Time” tab and click on the “Change settings” button (requires administrative privileges). Make sure the “Synchronize with an Internet time server” option is enabled.
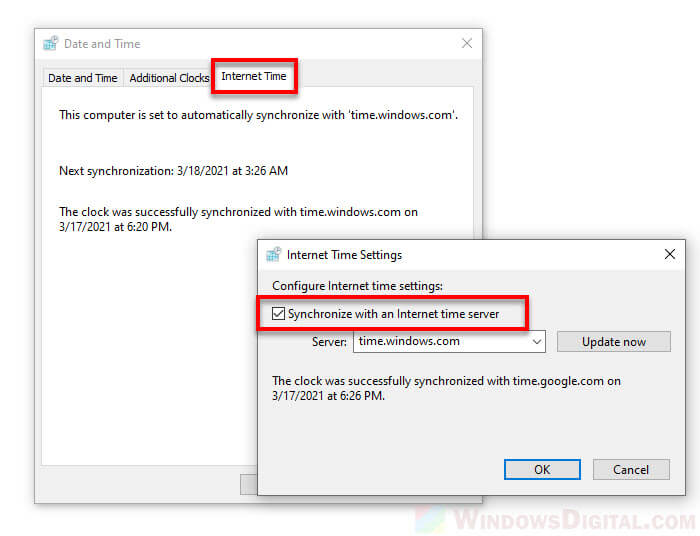
From the Server drop-down menu, “time.windows.com” is selected by default. If you see a different time server, try to change it back to time.windows.com and see if it resolves your time wrong issue.
Sync time with other Internet time servers
Some users have reported that they are unable to update time using the time.windows.com internet time server. If time.windows.com is selected by default, you can try to change it to other internet time server and see if the sync works correctly.
By default, the drop-down menu only offers two options: time.windows.com or time.nist.gov. You can try the latter option first and see if it resolves your PC time problem. If the problem persists, you can try other time servers by manually typing the server address onto the server field.
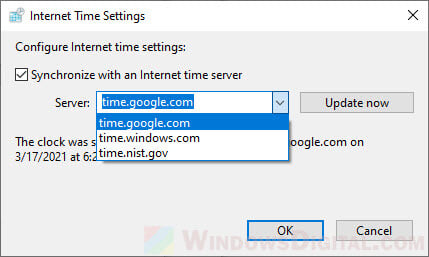
Below is a list of other popular internet time servers:
- time.google.com
- time.facebook.com
- time.cloudflare.com
- time.apple.com
- ntp.gsu.edu
- pool.ntp.org
Create a batch file to quickly force sync date and time
If the date and time keeps changing randomly or upon every restart no matter how many times you try to re-sync it, you can create a batch file or a shortcut to manually force Windows to sync the date and time immediately when you run the batch file.
To create the batch file to sync time in Windows 10, right-click anywhere on your desktop, select New, then Text document.
In the text document, enter the following command line.
powershell.exe -command "Start-Process cmd -ArgumentList '/s,/c,C:\Windows\System32\net.exe start w32time & w32tm /resync"' -Verb runAs"
*Note: Replace C: if your Windows installation is not on C: drive.
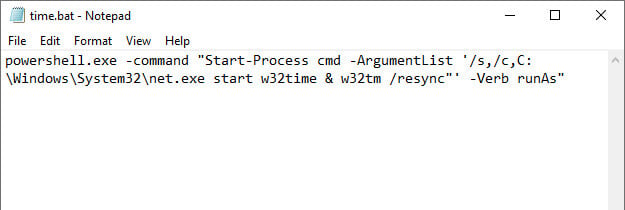
Click on File > Save, or simply press CTRL + S to save the text file.
To make it to work as a batch file, right-click on the text file and select Rename. Give it any name you like but end it with .bat instead of .txt, for example, “time.bat”.

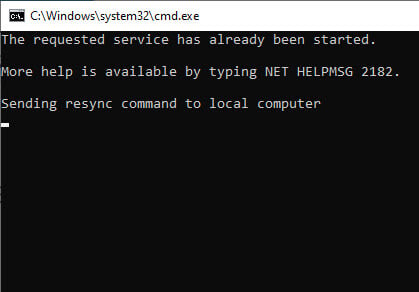
Now, when you run the batch file, Windows will automatically sync the date and time for your PC. If it prompt for UAC confirmation, click Yes to allow operation.
Can’t change .txt to .bat
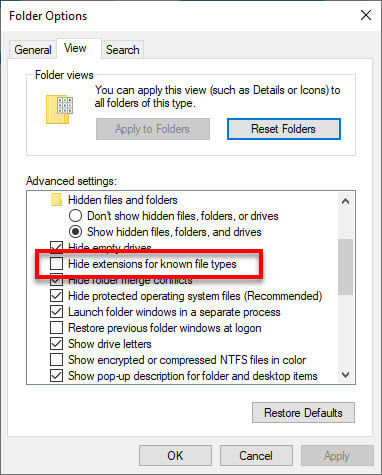
If you can’t see the extensions of files to change the “.txt” to “.bat”, you need to allow Windows to show the extensions for files by going to File Explorer > View > Options > Change folder and search options > View tab > uncheck “Hide extensions for known file types“.
Create a shortcut to sync time in Windows 10
Optionally, you can create a shortcut instead of a batch file using the same command line. To do so, right-click anywhere on your desktop, select New, then Shortcut.
In the “Type the location of the item” field, enter the following line.
powershell.exe -command "Start-Process cmd -ArgumentList '/s,/c,C:\Windows\System32\net.exe start w32time & w32tm /resync"' -Verb runAs"
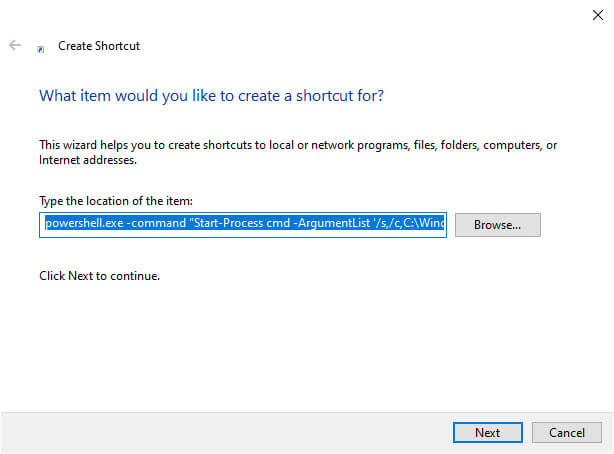
Click Next to proceed. Give the shortcut a name and click Finish to complete creating the shortcut.
When you run this shortcut, Windows will immediately sync date and time of your PC with the time server.
Manually change the date and time
If the date and time syncing issue still persists, you can manually set the date and time, and then disable Windows from automatically syncing the date and time so that the syncing doesn’t mess up the date and time again.
To manually set the date and time in Windows 10, go to the “Date & time” settings (right-click on the clock from taskbar and select Adjust date/time).
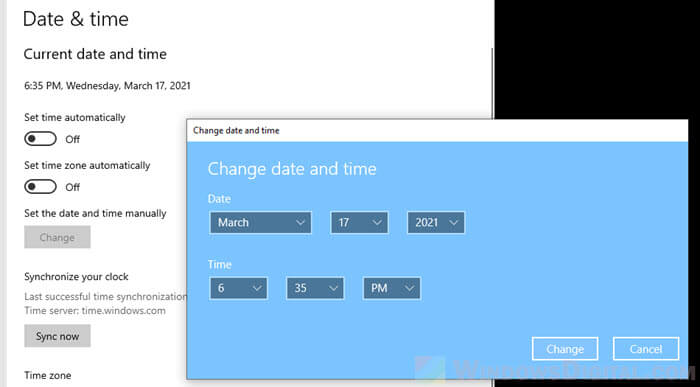
Disable the “Set time automatically” option and then click on the Change button under “Set the date and time manually“. Set the date and time accordingly and click on Change once done.


