If you often find yourself needing to change window sizes and layouts in Windows 11, you can try using a powerful tool called PowerToys, which comes with a feature called FancyZones that does exactly that. FancyZones allows you to create custom layouts for windows, so that your apps can always open in your preferred size and arrangement. This guide will walk you through setting up FancyZones to set default window sizes on your desktop.
Also see: Shortcut Keys to Scale and Resize Window in Windows 11
Page Contents
What is FancyZones and why use it?
FancyZones is just one of many features offered by Microsoft’s PowerToys, a very popular power-user tool that includes a set of utilities that can modify how Windows works. The main reason to use FancyZones is that it can help you create custom window layouts on your screen and quickly snap your windows to these zones.
Instead of manually resizing and positioning each window, you can create predefined zones that automatically adjust windows to fit specific sizes and positions, thus effectively setting a default size for any window.
Pro tip: How to Use Snap Layouts to Snap Apps in Windows 11
Setting default window size using FancyZones
The following is a detailed step-by-step guide on how to use FancyZones to create a custom layout, so that you can set a predefined (default) zone and size for any window you want to snap into it.
- Go to the Microsoft PowerToys GitHub page.
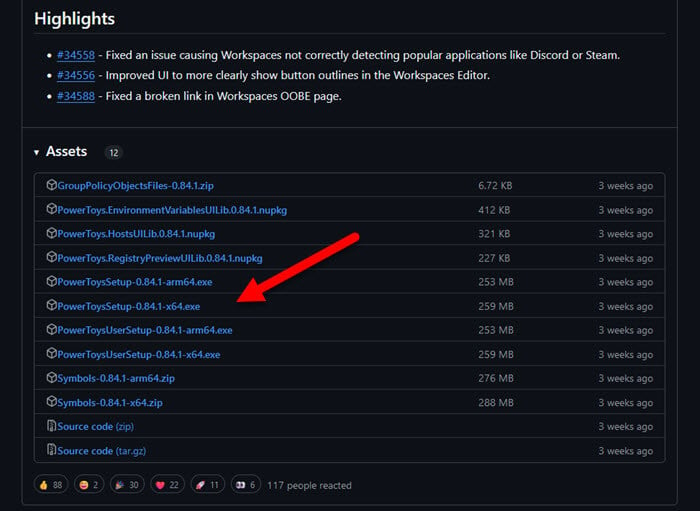
- Download the latest version and follow the installation steps.
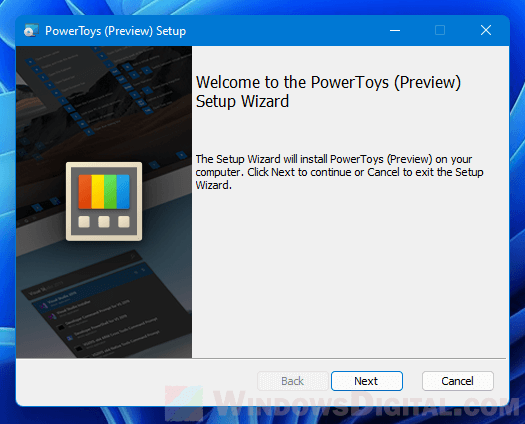
- Once installed, launch PowerToys by searching for it in the Start menu. PowerToys will now run in the background.
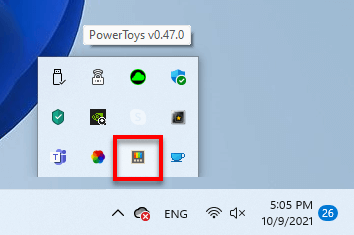
- Open PowerToys by clicking its icon in the system tray.
- In the PowerToys settings window, select FancyZones from the left-hand menu.
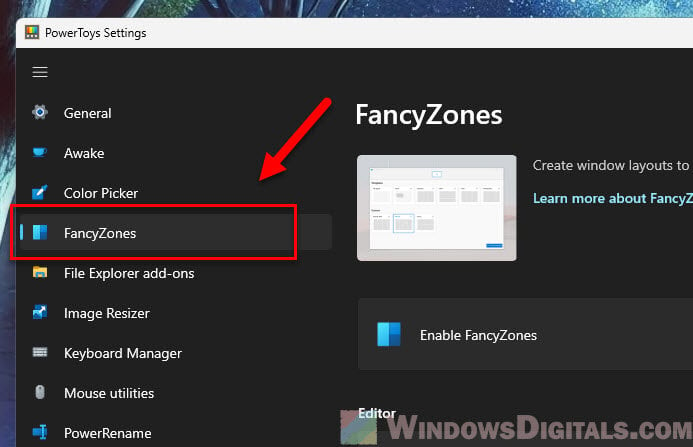
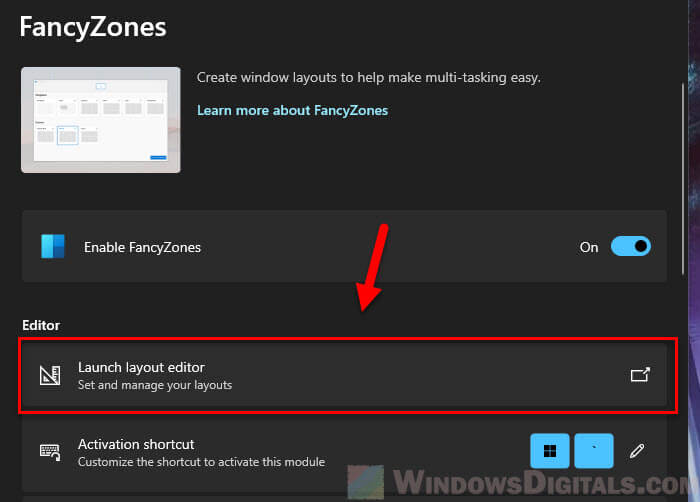
- Click on the Launch layout editor button to open the FancyZones layout editor. In the layout editor, you’ll decide how you want your windows arranged and their default sizes.
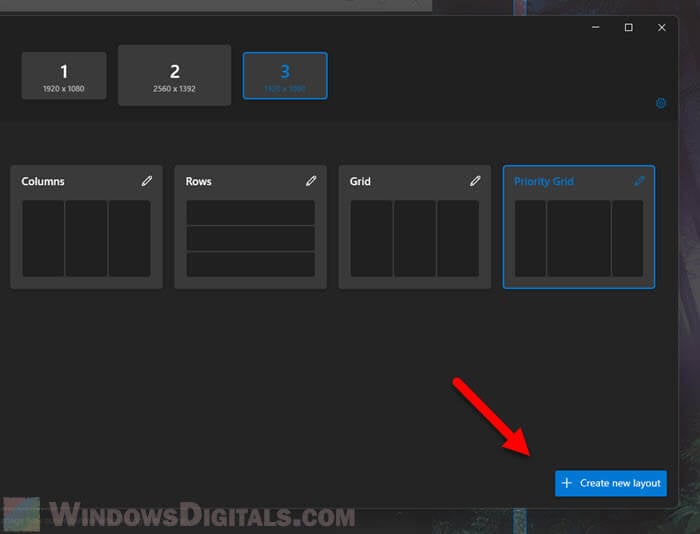
- Inside the layout editor, pick a preset layout or hit Create new layout to make your own.
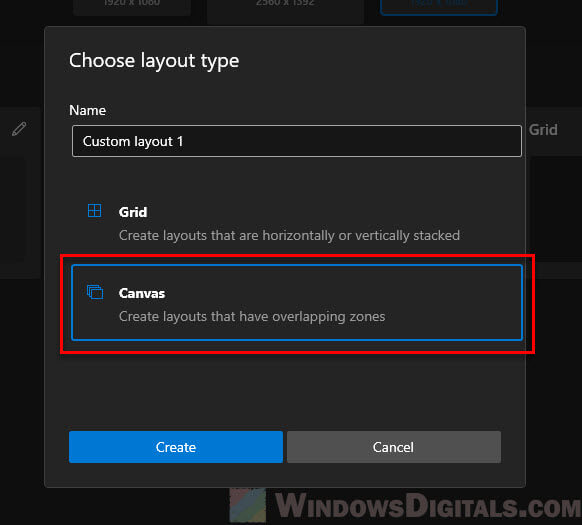
- If you choose to create, decide if you want a Grid or Canvas layout. In most cases, you’ll want to use the Canvas layout in order to set a custom window size and position.
- Grid Layout: Perfect for snapping windows into a tidy grid with each window sized ahead.
- Canvas Layout: Gives you the freedom to place and size zones however you like.
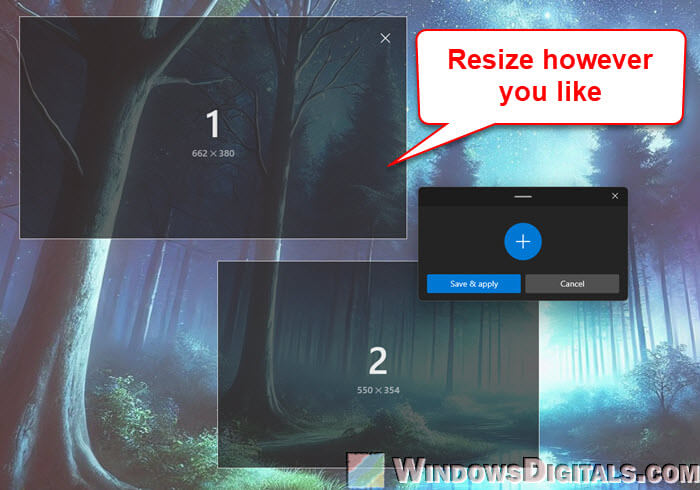
- Move and resize the zones to get the exact size and place you want for each window. This step is important for setting default window sizes because these zones define the dimensions and location where windows will snap. It means that you can control the default size your app’s window will take when dragged into these spaces.
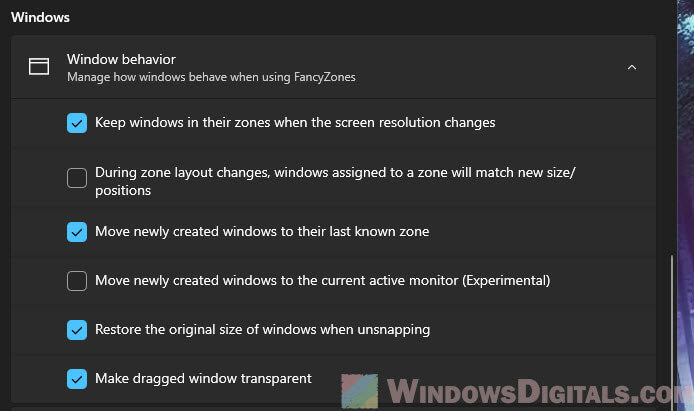
- Next, go to the Window behavior section in the FancyZones settings.
- Turn on Move newly created windows to their last known zone. This option makes sure that your apps will remember their position and size based on the zone they were last placed in.
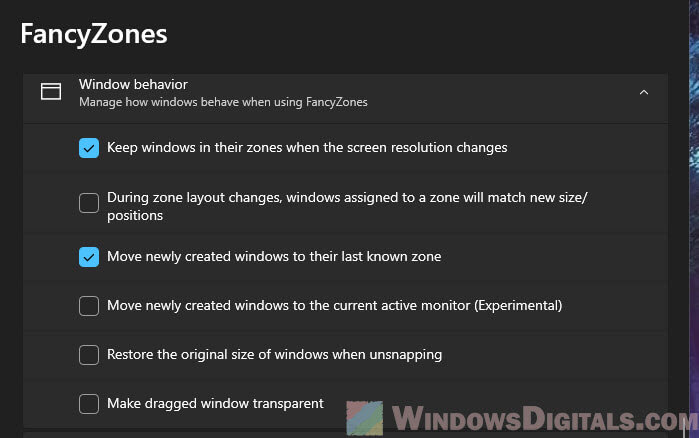
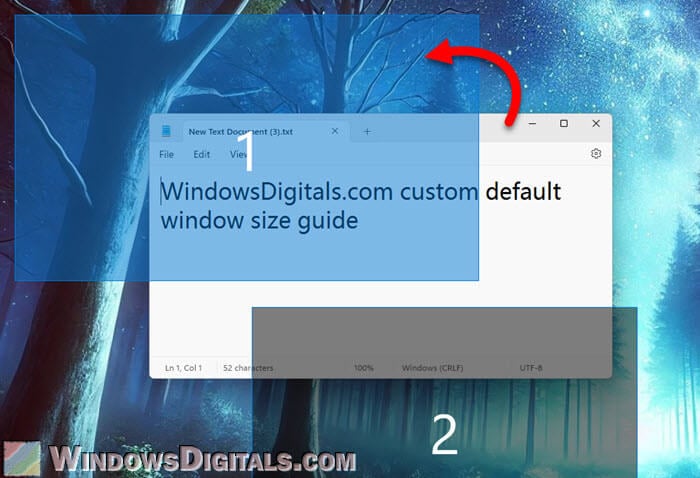
- Now that you’ve configured your custom layout and settings, you can snap any window you like into these predefined sizes. To do this, simply open the window you want to resize.
- Hold down the Shift key and drag the window around your screen.
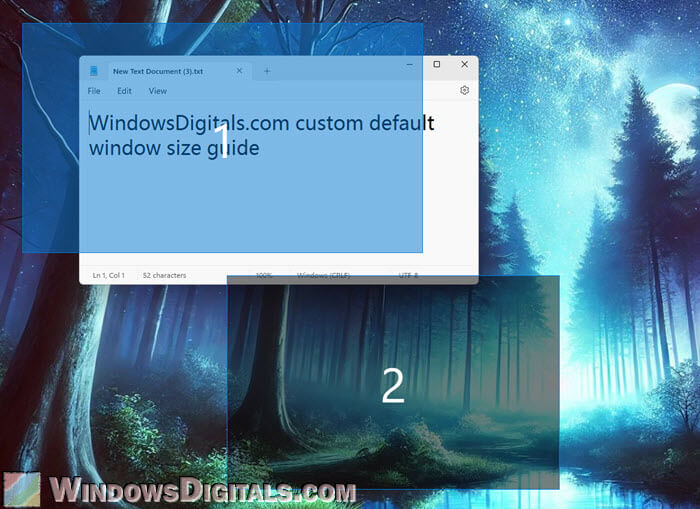
- You’ll see the FancyZones layout show up with your preset zones.
- Drop the window into a zone, and it will resize to fit perfectly.
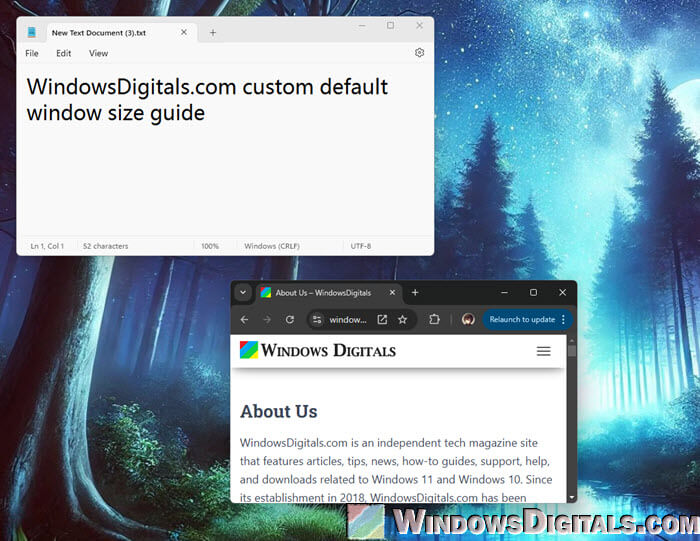
After doing this, your window will open to that exact size in the same zone every time.
Setting different default window sizes for multiple monitors
If you’re using more than one monitor, FancyZones lets you set up different layouts for each one:
- Open the FancyZones layout editor again.
- Choose the monitor you want to adjust from the top of the editor.
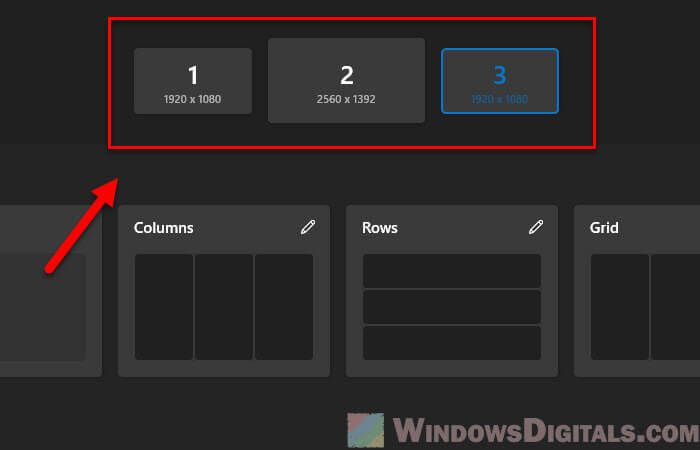
- Set a unique layout for each monitor by changing the zones as needed.
FancyZones will keep these settings for each monitor, so your windows stay consistent no matter how many screens you use.
Other FancyZones features that might be useful
You might want to also make use of the other amazing features in FancyZones when customizing the zones:
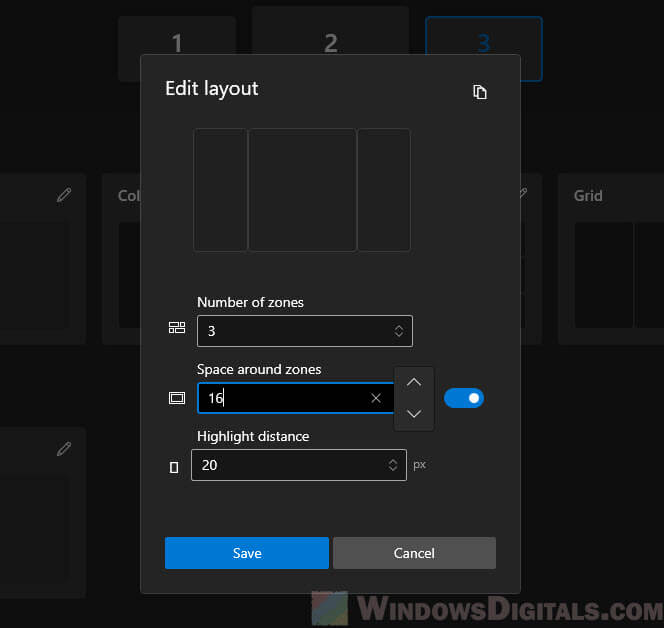
- When creating or editing your custom layout, use the “Space around zones” setting to add some space between zones to keep windows from touching or being too close to each other.
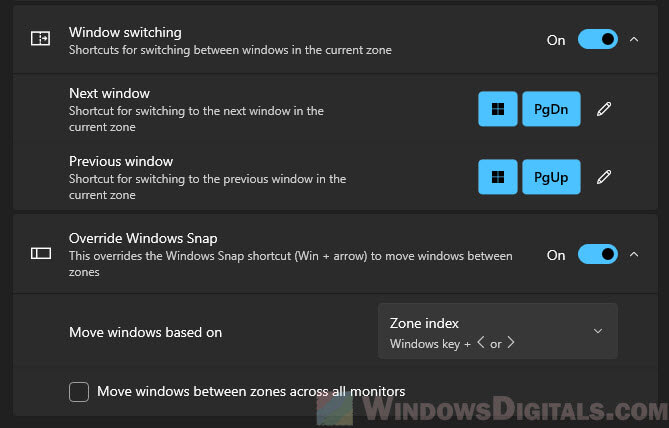
- You can also assign hotkeys for quick snapping of windows to zones, which can save you time if you often move windows around.
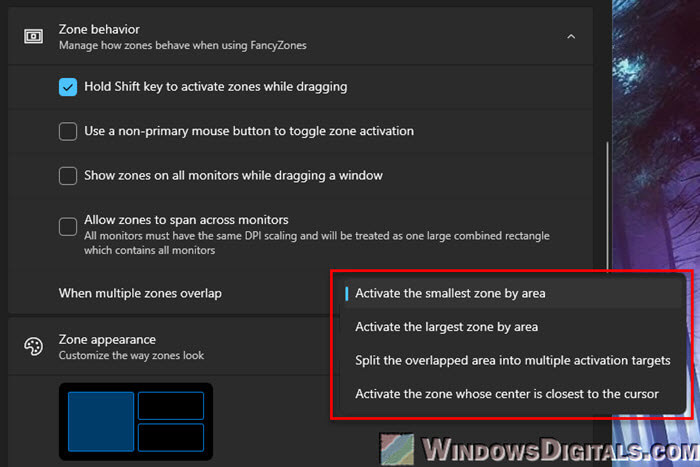
- When you have multiple zones and worried about them overlapping each other, you can change how it behaves via the “When multiple zones overlap” dropdown menu in the “Zone behavior” section.
- Check out other options in the “Window behavior” section as well to see if there is any option that you might need to better achieve what you’re looking for.
