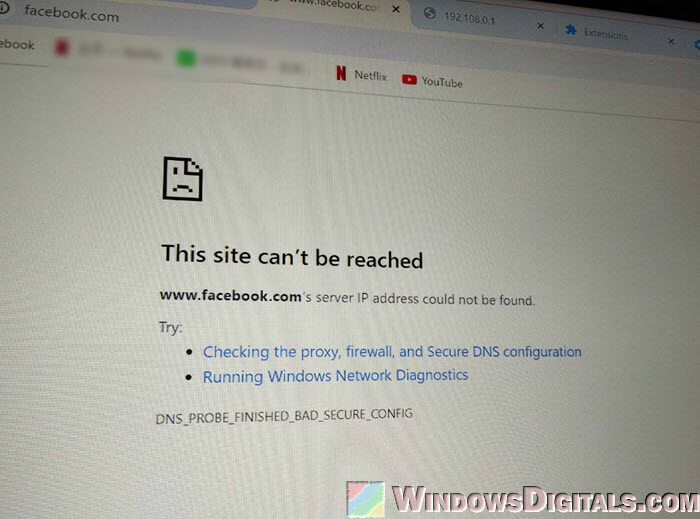
If you’re seeing this weird error that says, “This site can’t be reached – www.example.com’s server IP address could not be found“, with an error code of “DNS_PROBE_FINISHED_BAD_SECURE_CONFIG“, telling you to check the proxy, firewall, and secure DNS configuration, or run the Windows Network Diagnostics (usually to no avail), and it happens ONLY in Chrome but not other browsers (e.g., websites open fine on Edge or Firefox), this guide will show you how to quickly fix this issue.
Also see: “This site can’t be reached” on Google Chrome (Fix)
Page Contents
What does DNS_PROBE_FINISHED_BAD_SECURE_CONFIG in Chrome mean?
When Chrome throws the “DNS_PROBE_FINISHED_BAD_SECURE_CONFIG” error, it’s basically saying that there’s an issue with how your DNS settings are configured. DNS, or Domain Name System, is what translates website names (like www.example.com) into IP addresses that your computer can connect to. If something goes wrong in this process, Chrome won’t be able to find the server IP address, and you will see DNS related errors.
Linked issue: Some Websites Not Loading in Windows 11
What if your DNS has no issues and the error only happens in Chrome?
But why does this happen only in Chrome and not in other browsers? You might find that everything works fine on other browsers like Edge or Firefox, meaning your DNS itself isn’t the problem. The issue might just be specific to Chrome, which is both good news and bad news. Good because your overall network isn’t really down; bad because now you need to dig into Chrome’s specific settings to fix it.
Chrome, by default, uses a feature called Secure DNS, which encrypts DNS queries for better user’s privacy and security. If something goes wrong with these settings, or if your network doesn’t fully support Secure DNS, Chrome might not be able to correctly resolve the DNS queries when you open any websites.
Pro tip: DNS Servers to Unblock Websites and Possibly Everything
Check Chrome’s Secure DNS settings
Secure DNS in Chrome uses something called DNS-over-HTTPS (DoH) to encrypt DNS queries when you visit a website. Its purpose is to make it much harder for other people with access to your internet traffic to see which sites you visit. But when there’s a conflict with your network or if the DNS provider itself is having problems, it can cause DNS related errors such as the “DNS_PROBE_FINISHED_BAD_SECURE_CONFIG”.
- Click the three dots in the upper right corner of Chrome to get to the settings menu. Then, select “Settings.”
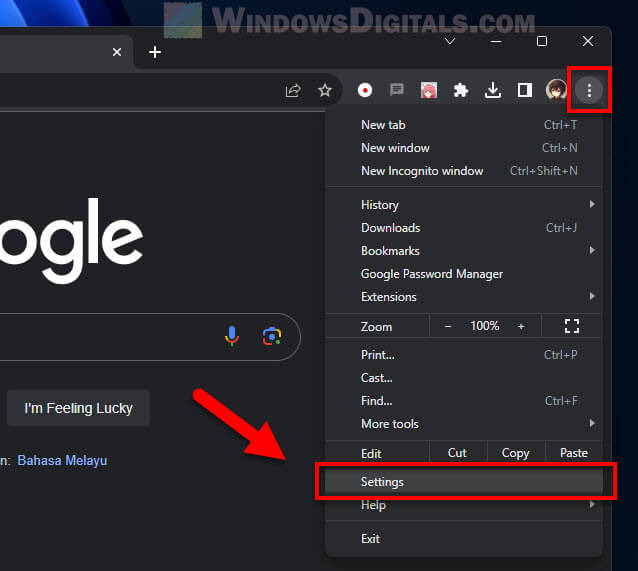
- Select “Privacy and security” from the left pane, then go to “Security“.
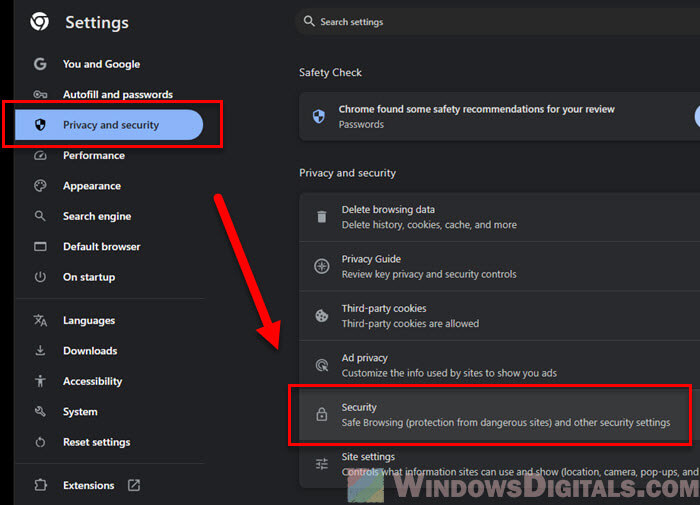
- Look for “Use Secure DNS“. This might be on or off based on what you’ve set before.
- If it’s on, try turning it off to see if that fixes things. If it’s off, consider turning it on and picking a different DNS provider from the options in Chrome, like Google Public DNS, Cloudflare, or the default one.
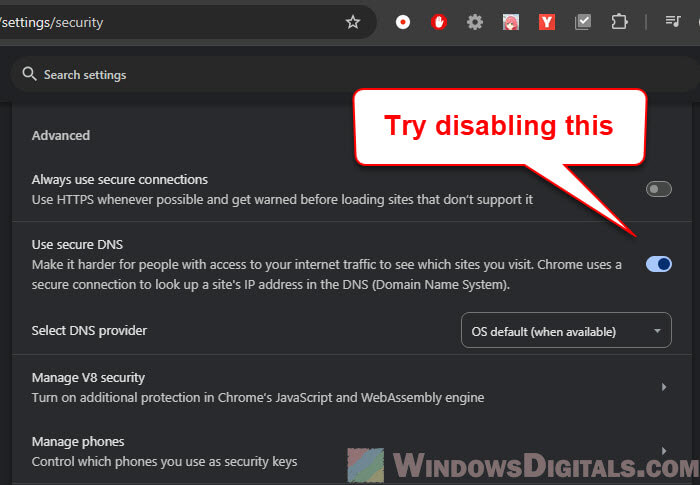
- Once you’ve made changes, restart Chrome and check if you can get to the site without any issues.
Might be useful: How to Stop Your ISP From Blocking Websites
Manually set up your DNS instead
If disabling the “Use Secure DNS” option in Chrome actually fixes the DNS problem but you’re concerned about privacy or just want to use a custom DNS instead of the one your ISP provides, you might want to manually change your DNS settings on your network adapter or router.
To configure the DNS through your network adapter in Windows 11 or 10, follow the steps below:
- Search for “Control Panel” via the Start menu and open it.
- Select “Network and Sharing Center” in the “All Control Panel Items” window.
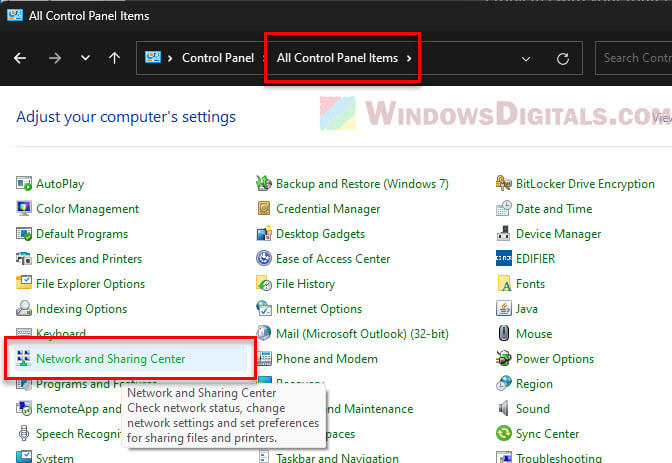
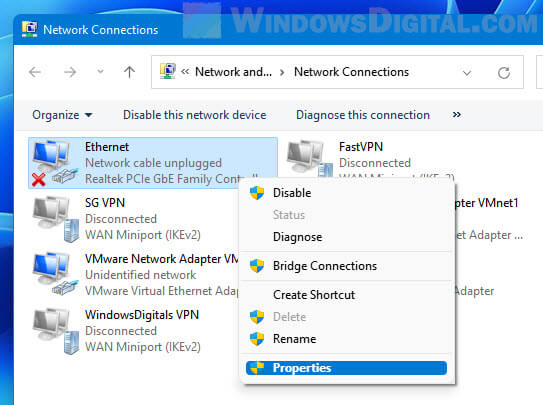
- Click on “Change adapter options” from the left pane to open the Network Connections window.
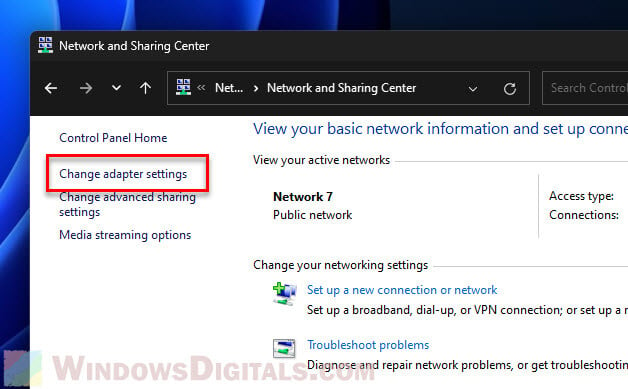
- Right-click on your active network connection (either Ethernet or Wi-Fi) and select “Properties.”
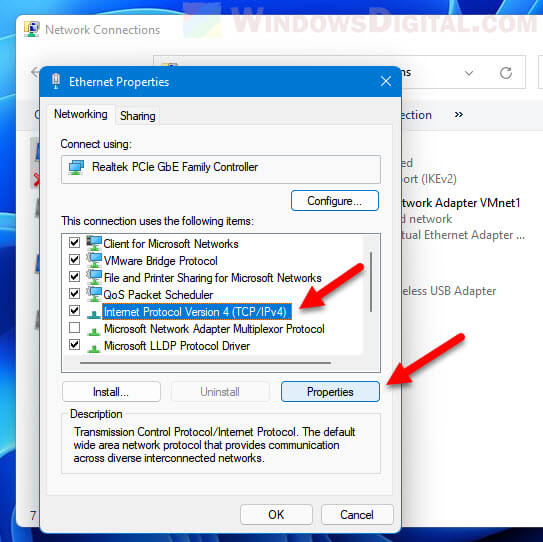
- Highlight the “Internet Protocol Version 4 (TCP/IPv4)” option and click “Properties.”
- Select “Use the following DNS server addresses” and enter your preferred DNS servers. For example, you can use Google’s DNS (8.8.8.8 and 8.8.4.4) or Cloudflare’s DNS (1.1.1.1 and 1.0.0.1).
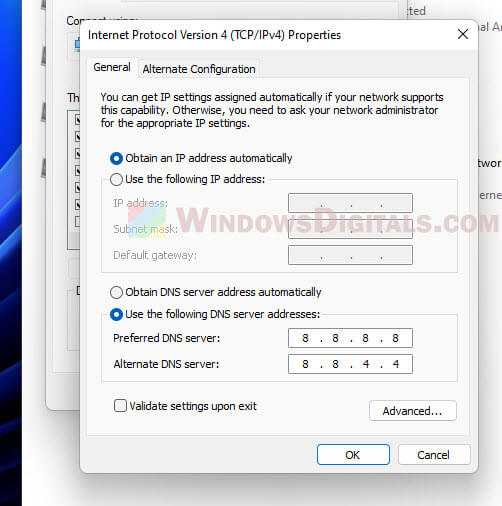
- Click “OK” to save the settings and restart your browser.
To set up DNS on your router instead, follow these steps:
- Open a browser and enter your router’s IP address (usually something like 192.168.1.1) to access the admin page.
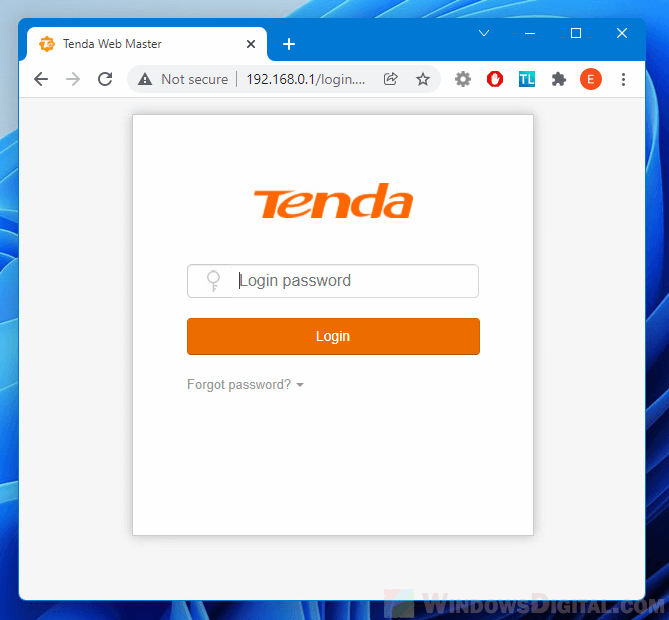
- Enter your username and password (often printed on the router or provided by your ISP).
- Go to the DNS settings section, usually found under “Internet” or “WAN” settings.
- Replace the automatic DNS settings with your preferred DNS addresses (e.g., Google or Cloudflare).
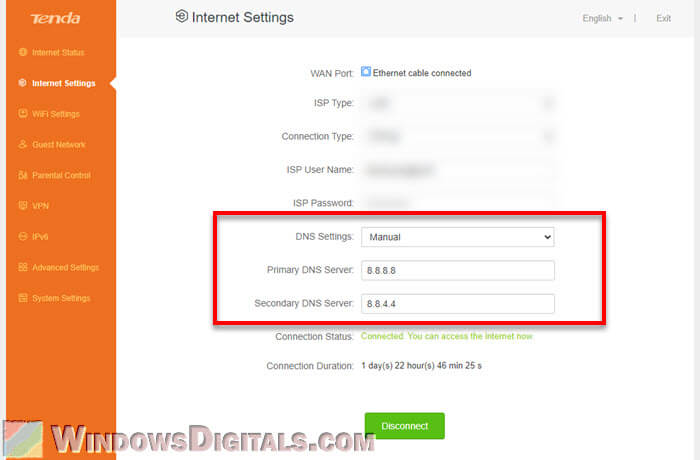
- Save your settings and restart the router for the changes to take effect.
Commands to flush and renew DNS
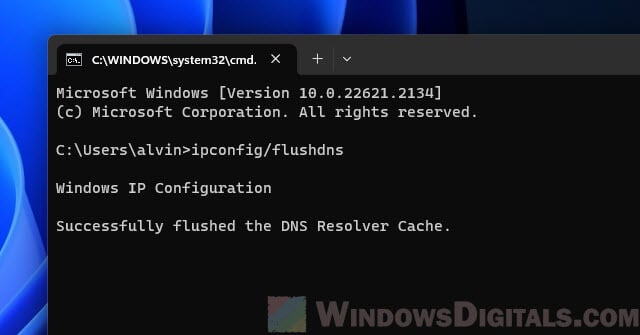
If turning off the “Use Secure DNS” option in Chrome doesn’t really help or if the issues also happen on other browsers as well, try running the following commands in to flush and renew the DNS configuration. Flushing the DNS cache can get rid of any old or corrupted that could be causing the problem, and renewing it gets your connection to the DNS server up to date.
- Type “cmd” in the Windows search bar, right-click on “Command Prompt,” and select “Run as administrator.”
- In the Command Prompt, enter these commands one by one:
ipconfig /flushdns
ipconfig /release
ipconfig /renew
Check your DNS in Windows and on the router
If you keep getting the error, make sure your DNS settings are set correctly on both your Windows network settings and your router. Problems with your router’s DNS can affect every device using your network.
To check your Windows DNS settings, go to your network adapter settings as mentioned before. Make sure the DNS server addresses are correct and there aren’t any conflicts. If you’re not sure what DNS to use, just use Google’s Public DNS (8.8.8.8 and 8.8.4.4).
To check your router’s DNS, you’ll need to log into your router’s admin page. Go to the DNS settings, and confirm everything’s set up right. If it’s set to obtain DNS automatically, you might want to manually set it to a trusted DNS provider like Google or Cloudflare and see if it helps fix the issue.
Check the hosts file
Another common cause of DNS issues in Windows is the hosts file. The hosts file is a plain text file that maps hostnames to IP addresses. If it contains incorrect or outdated entries, it can lead to DNS errors in Chrome when you visit those mapped hostnames.
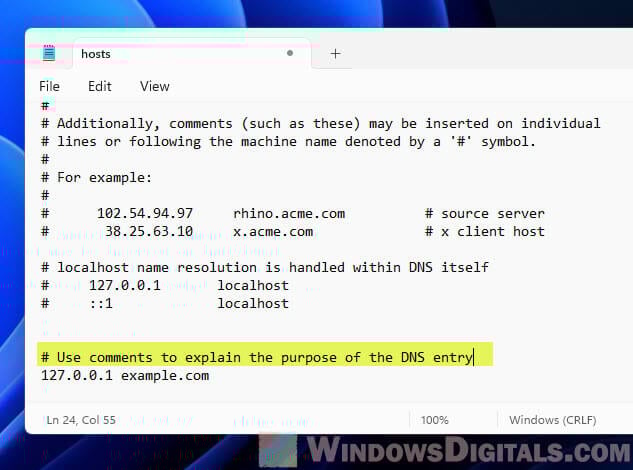
The hosts file is located at C:\Windows\System32\drivers\etc. You can view it by directly opening it with Notepad. But to edit it, you will need to open a text editor like Notepad as an administrator and then open the hosts file from within the elevated Notepad.
Once you’ve opened the hosts file, scroll through the file and look for any entries that map the domain you’re trying to access to an incorrect IP address. If you see any, you can delete the line or comment it out by adding a # at the beginning of the line. Save the file if any changes are made.
Note that you should not just delete any line you see, as some lines might be needed for certain apps on your computer to work. If you’re not sure what you’re doing, don’t edit the hosts file. Instead, get someone who knows to take a look for you.
