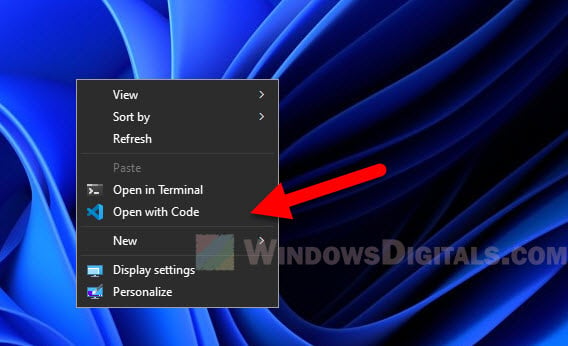
If you just switched to Windows 11, you will see a new layout when you right-click a file or folder. Back in Windows 10, the “Open with Code” button was pretty easy to find because it’s just directly in the context menu (it lets you open files in Visual Studio Code). But in Windows 11, you have to click “Show more options” first before you can actually see the option. In this guide, we’ll show you a few ways to get the “Open with Code” button back on the main right-click menu in Windows 11.
Also see: How to Customize Right-Click Menu in Windows 11
Page Contents
Update Visual Studio Code to the latest version
The first and simplest way is to just update your Visual Studio Code. The developers have fixed this issue in recent updates, and now the “Open with Code” option should show up right in your main context menu in Windows 11.
-
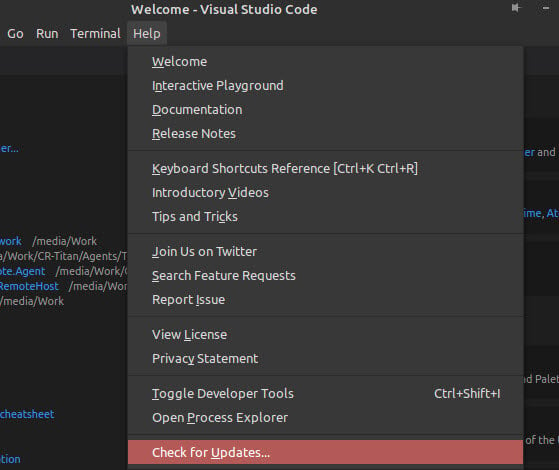
- Open Visual Studio Code, go to the “Help” menu, and select “Check for Updates.” If there’s an update, just follow the steps to install it.
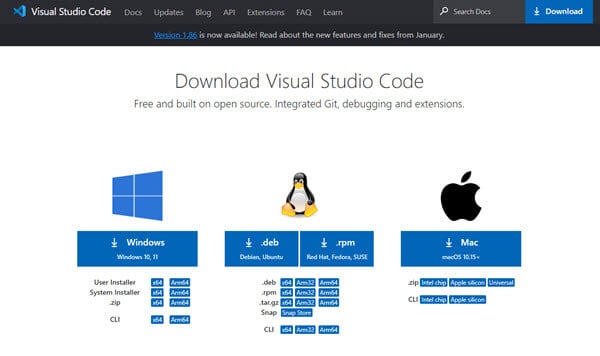
- If updating doesn’t do the trick, try uninstalling and reinstalling Visual Studio Code. Grab the latest version from the official website.
- Make sure your Windows 11 is also up to date. Go to “Settings” > “Windows Update” and check for updates. Install any that you find.
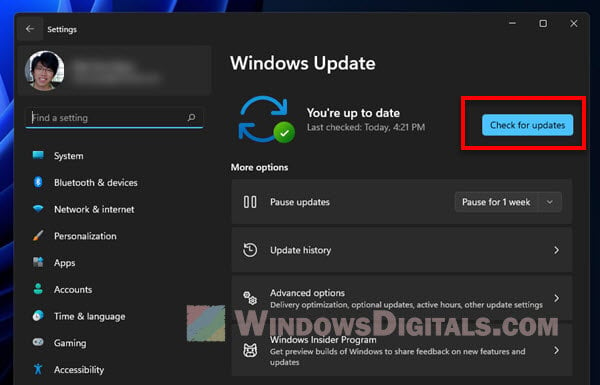
- Open Visual Studio Code, go to the “Help” menu, and select “Check for Updates.” If there’s an update, just follow the steps to install it.
Update: You might need to install the Insider version for this to work. It seems the updates are still being tested and aren’t out for everyone yet. Otherwise, try updating both your Windows 11 and Visual Studio Code to the latest versions to see if the option to add “Open with Code” to the main context menu is there.
Related resource: How to Uninstall VS Code and All Extensions Completely
Use Shift + Right-click instead
If updating Visual Studio Code doesn’t fix the issue, there’s a simple workaround you can use to get the full context menu. By holding the Shift key while right-clicking on a file or folder, you skip the new Windows 11 menu and get the old full context menu, including the “Open with Code” option.
- Open File Explorer and go to the file or folder you want to open in Visual Studio Code.
- Press and hold the Shift key, then right-click on the item. You’ll see the full context menu right away.
- Find the “Open with Code” option in the menu and click it to open your file or folder in Visual Studio Code.
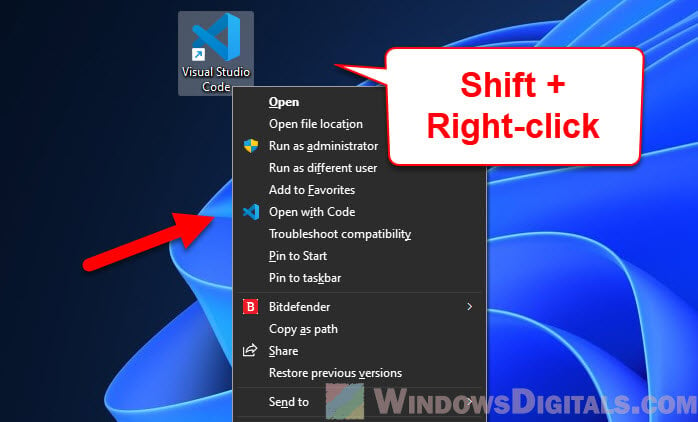
This method is pretty straightforward and simple. It should be useful if you just need a quick fix or prefer not to change your Windows settings too much.
Pro tip: How to Remove Items from Right-Click Menu in Windows 11
Use a third-party context menu editor
If you want a more lasting solution and don’t want to mess with your computer’s registry, try a third-party context menu editor. A good one is the “Custom Context Menu” editor from the Microsoft Store. This tool lets you add what you need to your context menu easily.
Just search for “Custom Context Menu” in the Microsoft Store and install it. Open the app and follow the steps to add the “Open with Code” command to your context menu. This app is easy to use and comes with clear instructions.
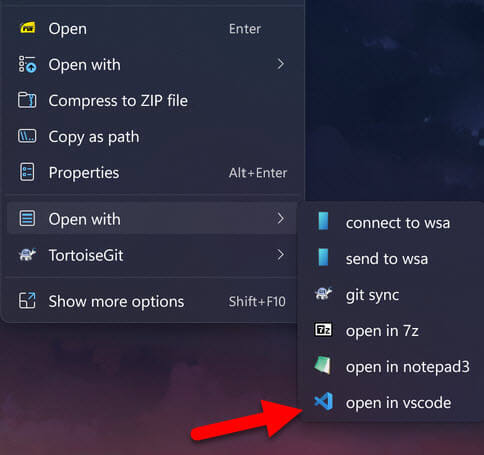
You can also visit its GitHub page at https://github.com/ikas-mc/ContextMenuForWindows11 for more details. You can download the app from there too.
Some things to know
The “Open with Code” option isn’t in the main context menu of Windows 11 anymore, and this has been a big problem for a lot of developers and coders. This change means they have to take an extra step, which actually slows them down when they have to use that option a lot. But there’s good news coming up. The insider version of Windows 11 shows that an update might soon add this option back to the main context menu.
Even though it’s just being tested right now and isn’t out for everyone yet, it’s a good sign that Microsoft is actually paying attention to what users say and is trying to make things better. For the time being, there are some other ways to get around this problem, but it’s definitely worth looking out for this update later.
