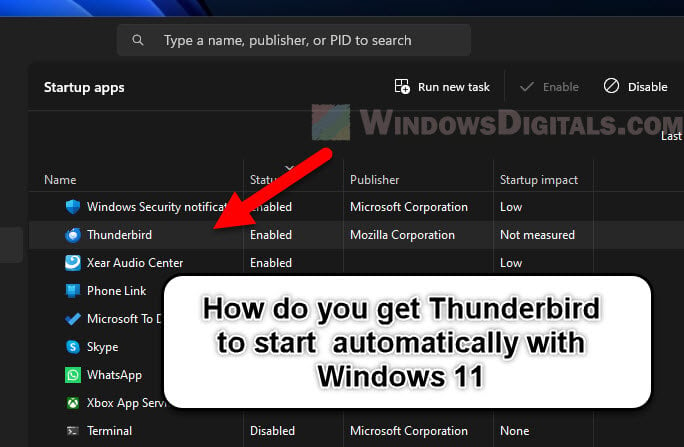
Thunderbird doesn’t start on its own when you turn on your computer with Windows 11 or Windows 10. This can be a bit of a hassle if you rely on Thunderbird for your emails and want it to be ready right when you start your PC. But, there are actually ways to make Thunderbird open automatically as soon as you log into Windows. This guide will show you how.
Also see: Where is the Startup Folder in Windows 11/10 for All Users
Page Contents
Copy Thunderbird’s shortcut to Windows 11 Startup folder
The easiest way to make Thunderbird start with Windows 11 is by putting a shortcut of the app in the Windows Startup folder.
- Look for the Thunderbird executable file, which is usually found in
C:\Program Files\Mozilla ThunderbirdorC:\Program Files (x86)\Mozilla Thunderbird. - Right-click on
thunderbird.exeand chooseCreate shortcut. This will make a shortcut in the same folder, or on your desktop if you can’t create shortcuts in the program files folder.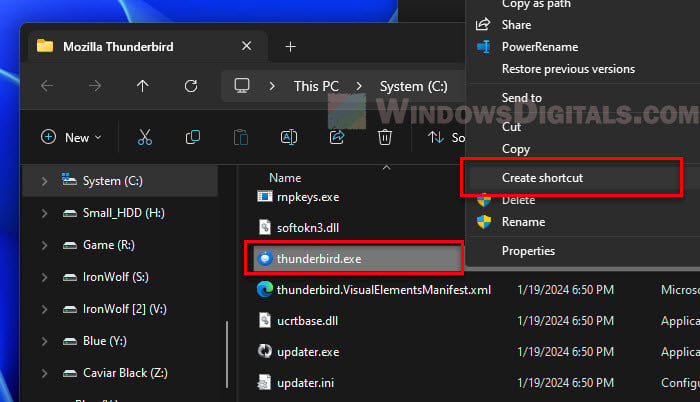
- Press Win + R to open the Run dialog. Type
shell:startupand press Enter. This will open the Startup folder, where you can add shortcuts for programs you want to open with Windows.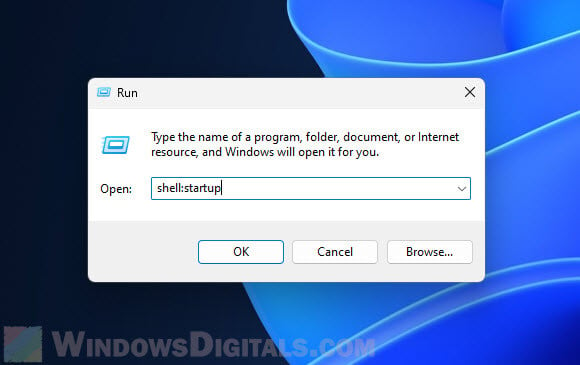
- Move the shortcut you made for Thunderbird into the Startup folder.
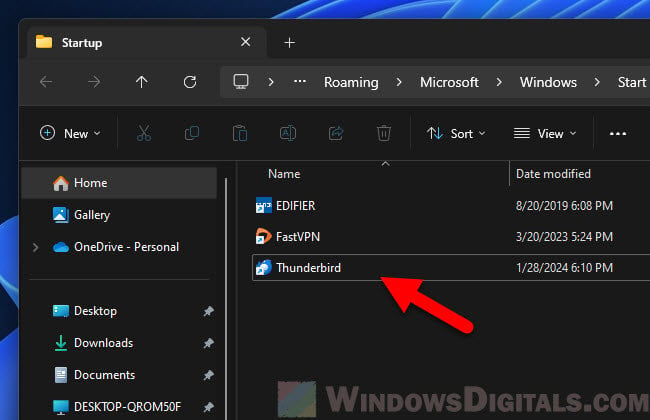
By doing these steps, Thunderbird will start up automatically every time you log into Windows 11. This is a straightforward and quick solution if you don’t want to mess with complicated settings.
Interesting read: Windows 95, 98, XP, 7, 10 and 11 All Startup Sounds
Use Task Scheduler to schedule Thunderbird to open automatically on startup
Using Task Scheduler is a great way to make Thunderbird open by itself when you start Windows 11. This method is a bit more complex but it allows you to adjust more details.
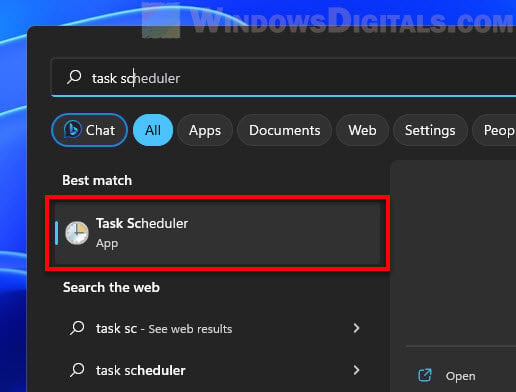
- Search for ‘Task Scheduler’ in the Start menu and open it.
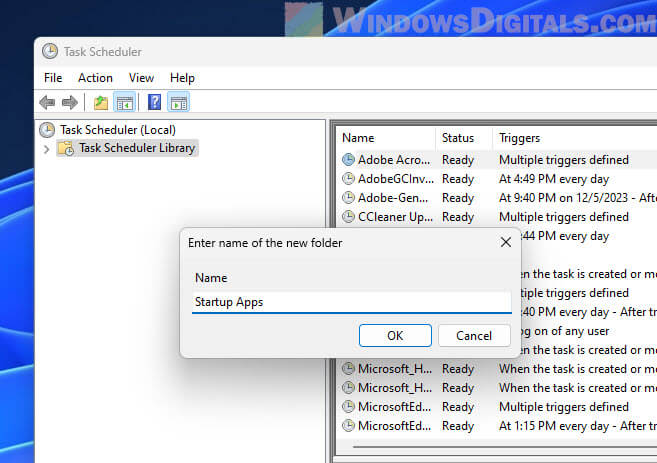
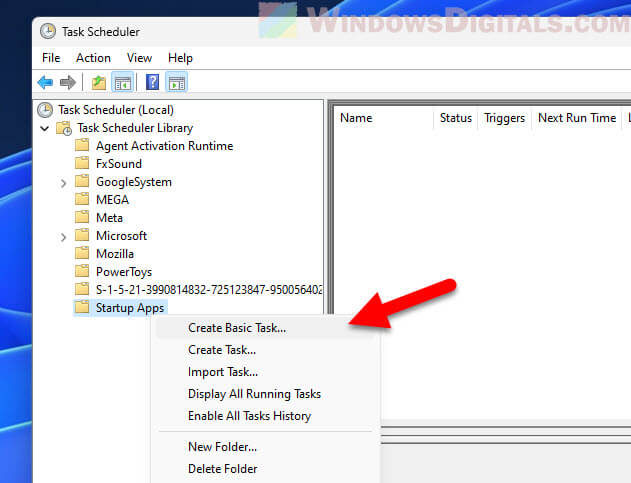
- Right-click on the Task Scheduler Library and choose ‘New Folder’. Name it something like ‘Startup Apps’.
- Go to the new folder and pick ‘Create Basic Task’ from the Actions menu.
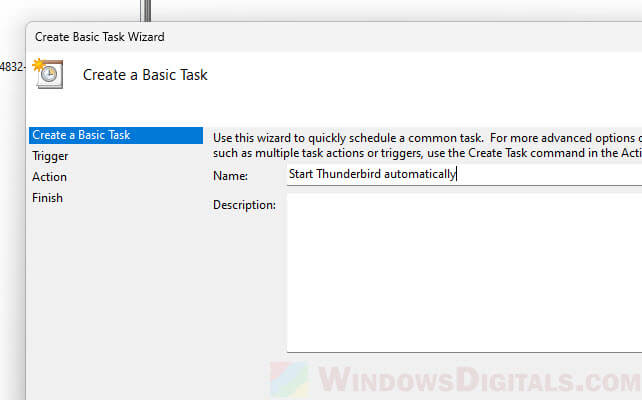
- Name the task and describe what it does.
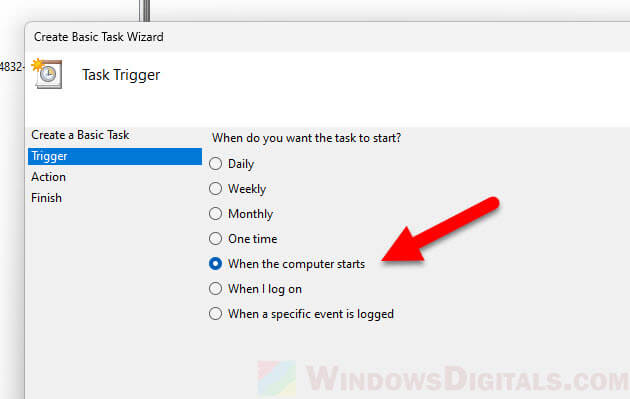
- Set ‘When the computer starts’ as the time for your task to run.
- Pick ‘Start a program’ and then find Thunderbird’s executable file (
thunderbird.exe) using the Browse button.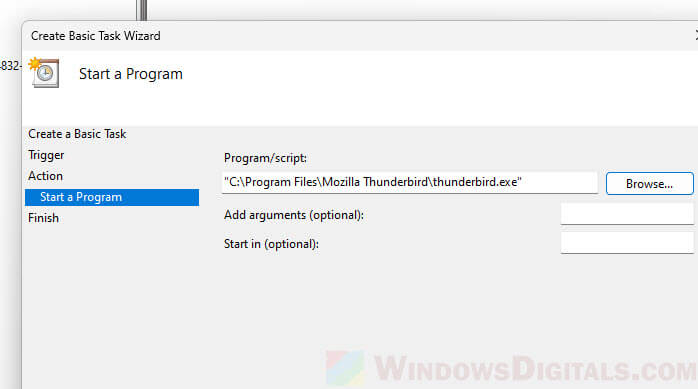
- Check the details and click ‘Finish’.
Once you finish these steps, Thunderbird will start by itself when you log into Windows 11.
Linked issue: Windows Task Scheduler Service Started then Stopped
Use Windows Registry
Adding Thunderbird to your Windows 11 startup through the Windows Registry involves creating a new entry that tells your system to launch Thunderbird each time you log in. This method is more technical and you should be careful with it.
Before proceeding, you should know that messing up in the Registry Editor can cause big problems. It’s a tool that manages important parts of your computer system and apps. Wrong changes can cause errors or even make your computer unable to start. It’s very important to create a system restore point before you make any changes. This way, if something goes wrong, you can go back to how things were. If you’re not sure about this, maybe stick to the Startup folder or Task Scheduler methods which are safer and easier.
- Press Win + R, type
regedit, and press Enter. This will open the Registry Editor.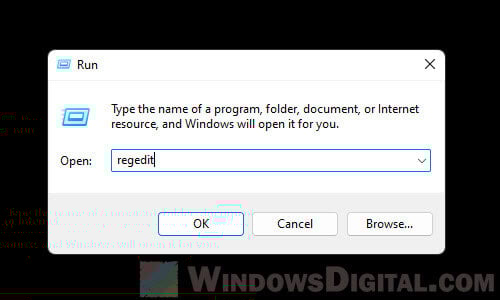
- Navigate to
HKEY_CURRENT_USER\Software\Microsoft\Windows\CurrentVersion\Run. - Right-click in an empty area in the right pane. Choose ‘New’ > ‘String Value’.
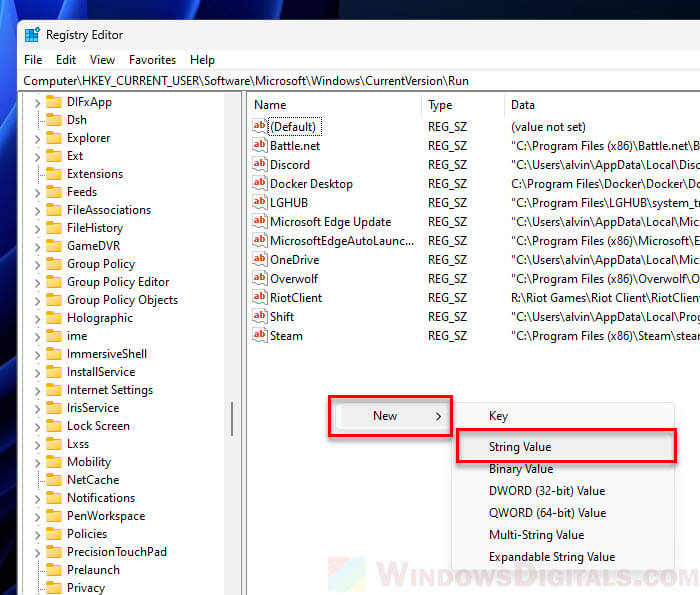
- Name this new value something like ‘Thunderbird’.
- Double-click on the new value.
- In the ‘Value data’ field, type the full path to Thunderbird’s executable, like
"C:\Program Files\Mozilla Thunderbird\thunderbird.exe".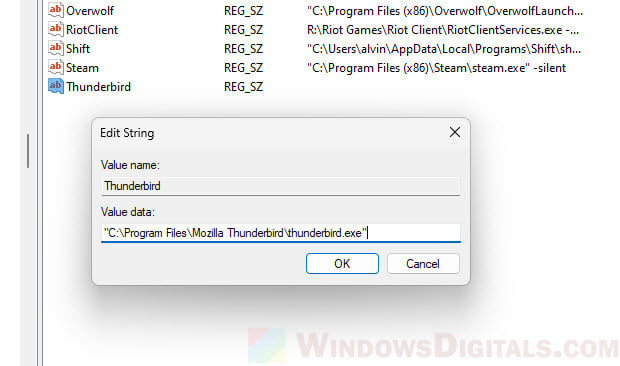
- Make sure the path is correct and includes the ‘.exe’ part.
- Hit ‘OK’ to save your new setting.
- Close the Registry Editor.
- Restart your computer to see the changes.
After doing this, Thunderbird should open by itself when you start your PC.
