In Windows 11, .reg files are very useful for tweaking system settings or fixing certain problems. But to make these changes take effect, you often need to run these files as an admin. This guide will show you how to do just that, along with some tips and warnings that you should be aware of.
Also see: How to Run Regedit as SYSTEM in Windows 11

Page Contents
Understanding administrator privileges and .reg files in Windows 11
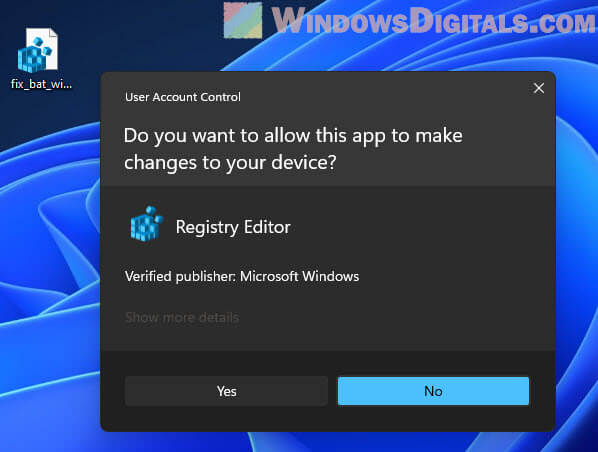
If you’re using an admin account, .reg files usually run with admin rights straight away. You’ll see a pop-up asking for permission to make changes. This is all thanks to User Account Control (UAC), a security feature in Windows that checks with you before allowing apps to make big changes with extra permissions.
But if running a .reg file with admin rights is giving you trouble, there are ways to fix that.
Useful tip: Create local admin account without password in Windows 11/10
Method 1: Run Registry Editor as administrator and import the .reg file
Running the Registry Editor as an admin allows you to open and apply the .reg file right away. Follow the steps below:
- Hit Win + S to pop open the search box.
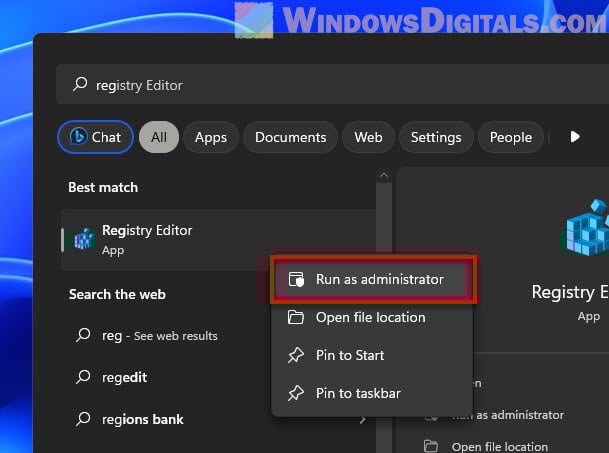
- Search for regedit, right-click Registry Editor in the results, and choose Run as administrator. This opens Registry Editor with all the privileges.
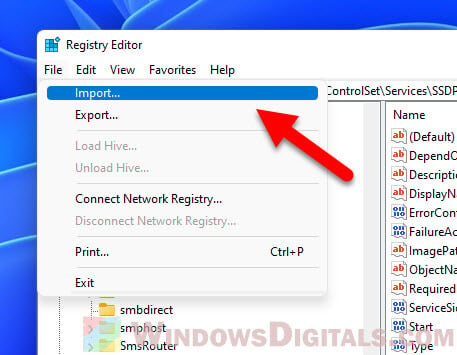
- Click File at the top left.
- Hit Import in the menu.
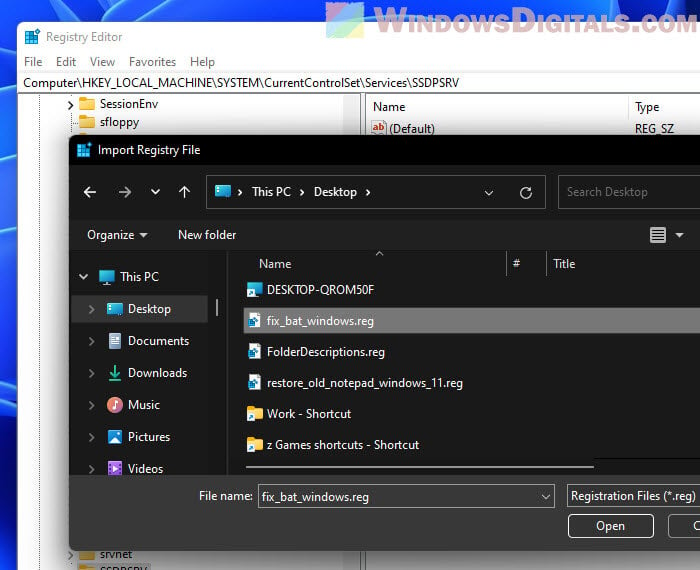
- Find your .reg file, select it, and click Open.
- Wait for a confirmation message that the .reg file is all set. Click OK to finish up.
Linked issue: Windows Registry Key “Access is Denied” Error
Method 2: Use third-party software to run registry file as administrator or with higher authority
Software like Advanced Run lets you run programs with even higher rights, like as SYSTEM or TrustedInstaller. These accounts can touch files and settings that are usually off-limits. The following steps will show you how to use Advanced Run:
- Get Advanced Run from its website.
https://www.nirsoft.net/utils/advanced_run.html
- Open it up after installing.
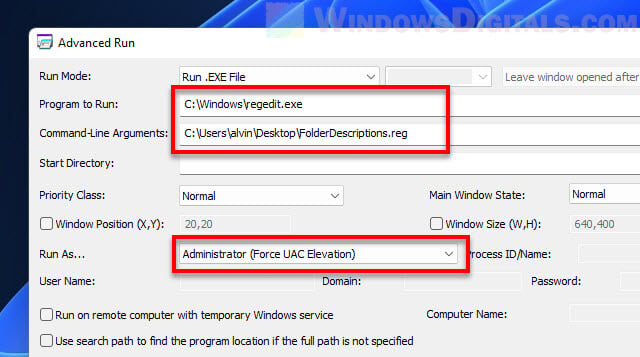
- In the Advanced Run window, hit the Browse button next to Program to Run and find regedit.exe (normally in
C:\Windows\regedit.exe). - Pick how high up you want to run it in the “Run As…” part.
- Type the path to your registry file in Command Line Arguments, like
C:\registryfile.reg(use your file’s real path). - Press Run to go ahead with those privileges.
Method 3: Run .reg Files as Administrator Using Task Manager
You can also use Task Manager to run .reg files with admin rights. No extra software needed. Here’s the step-by-step:
- Press Ctrl + Shift + Esc to open Task Manager.
- Click on More details if it’s showing the simple view.
- From the File menu, choose Run new task.
- Hit Browse in the dialog box to look for your .reg file.
- Find your file, select it, and hit Open. The file path will show up.
- Make sure Create this task with administrative privileges is checked.
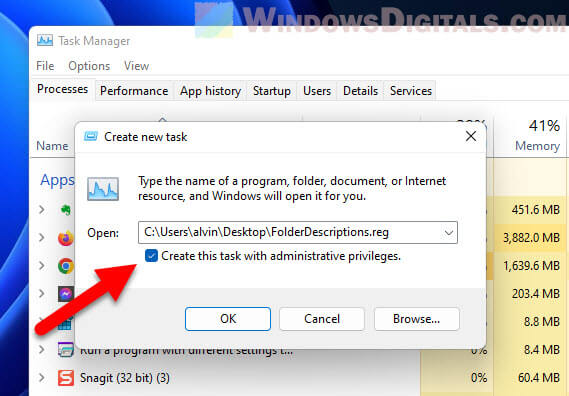
- Hit OK and you’ll see a pop-up asking for permission. Say Yes to run the file.
Related resource: How to Change Administrator Email on Windows 11
Things to note when working with registry files in Windows
The Windows Registry is a very important yet super sensitive part of your system. One tiny mistake can cause problems as serious as bricking your OS entirely (meaning your computer won’t be able to even start). So, you have to be very careful when you need to edit the registry, and the following are some tips that you should know.
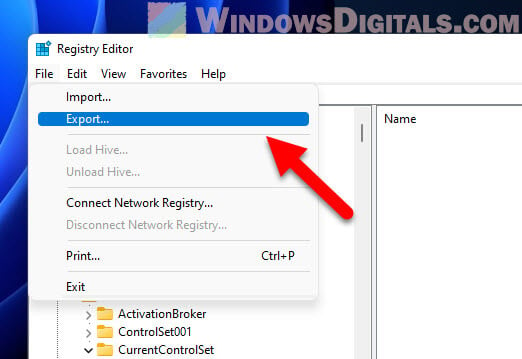
- Always back up the registry first. Open Registry Editor, click File, and pick Export. Save it somewhere safe. If something goes wrong, you can bring back your old settings by choosing Import from the File menu.
- Make a system restore point before touching the registry. This lets you undo changes if needed. Just search for Create a restore point, click on it, and then hit Create in the System Properties window.
- Only use .reg files from places you trust. Bad files can bring malware or other unwanted stuff. Check the file’s source and peek inside if you can before running it.
- Know what the .reg file will change. If you’re not sure, look up the keys and values it’s messing with before you run it. It helps to know what you’re doing to avoid surprises.
- If messing with the registry feels scary or you’re not sure what you’re doing, ask someone who knows their stuff for help. Better safe than sorry.
And know that, some .reg files might be made for specific Windows versions. Make sure the file you want to run is compatible with your current Windows build so that you don’t run into unexpected issues.


