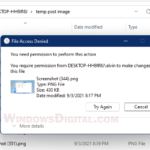
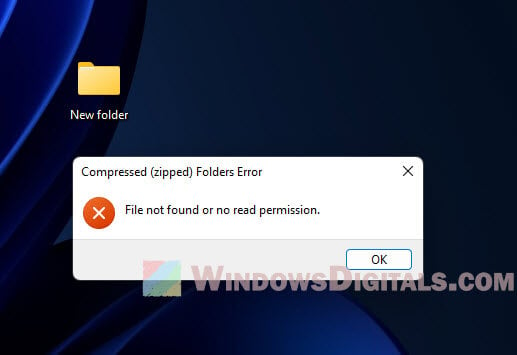
Zipping files is a very common way to make them much smaller (depending on level of compression) and save disk space. Windows 11 can, by default, zip and unzip files without any third party software. But sometimes, when you try to zip files by right-clicking and choosing to send them to a compressed (zipped) folder, you might encounter the “Compressed (zipped) Folders Error – File not found or no read permission” error message.
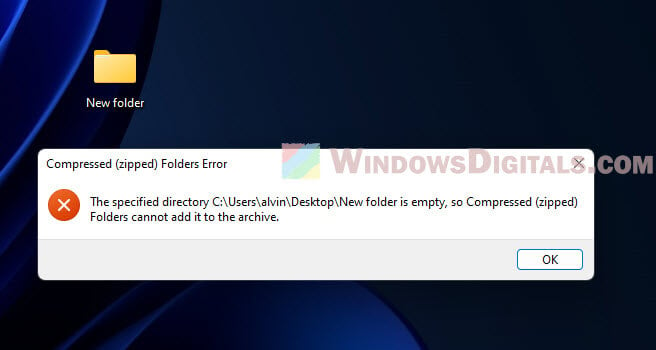
There can be also another error that might pop up saying “The specified directory is empty, so Compressed (zipped) Folders cannot add it to the archive” when you’re trying to zip a folder in Windows 11. We’ll talk about why these errors happen and how you can fix them.
Page Contents
What are the causes of these errors?
Below are a few reasons that can be the what’s causing you face the error when you zip a file or folder:
- If you don’t have the required read and write permissions for the files or folders you’re trying to zip, Windows won’t let you zip them.
- If a file or folder is being used by another program, Windows will lock the file to prevent interruption of its ongoing use. You will then see the error when you try to touch it, like zipping it.
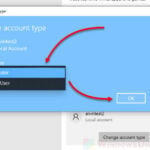
- You are not logged in as administrator, which is often required to have enough rights to zip the files.
- You don’t own the files you’re trying to zip.
- The folder(s) you want to zip have hidden files in them that are either being used or you don’t have permission for.
How to fix “File not found or no read permission” error
To fix the file not found or no read permission error when zipping files or folders in Windows 11, there are 5 solutions you can try.
Solution 1: Check permissions of files and folders
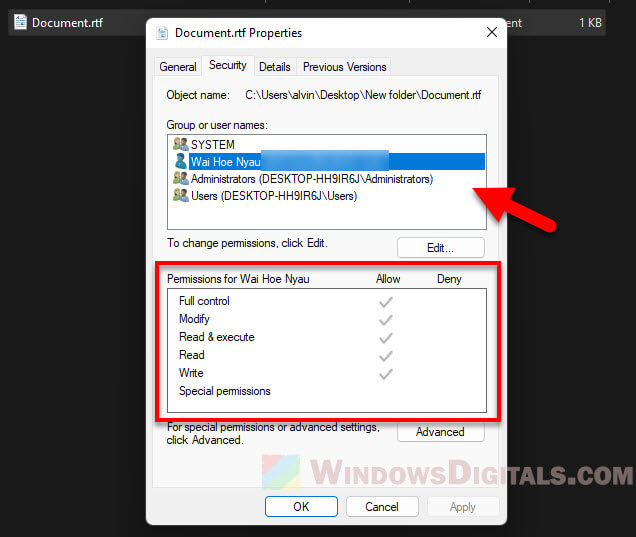
The very first step is to check if you have the required permissions and rights to read or modify the files and folders you want to zip. You’ll need either “Full control” or at least “Read” and “Write” permissions for the files.
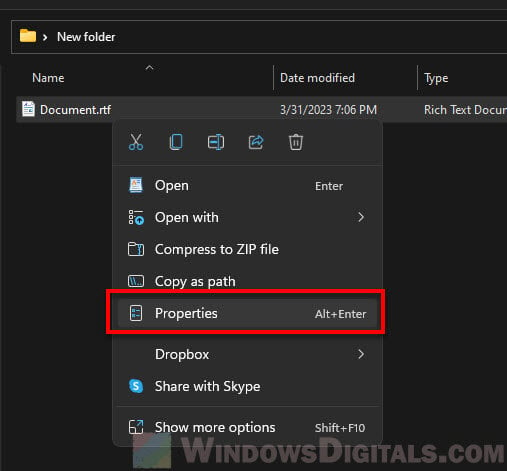
- Right-click the file or folder and choose “Properties“.
- Go to the “Security” tab. You’ll see different users and their permissions.
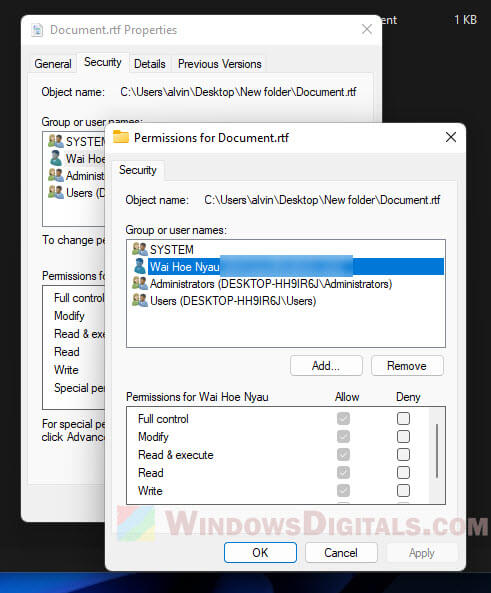
- Click “Edit” to change permissions.
- Pick the user or group you want to change permissions for.
- Tick the “Allow” box for “Read” and “Write” permissions. Make sure no boxes are ticked under “Deny”.
- Hit “Apply” then “OK” to save your changes.
- Close the properties window.
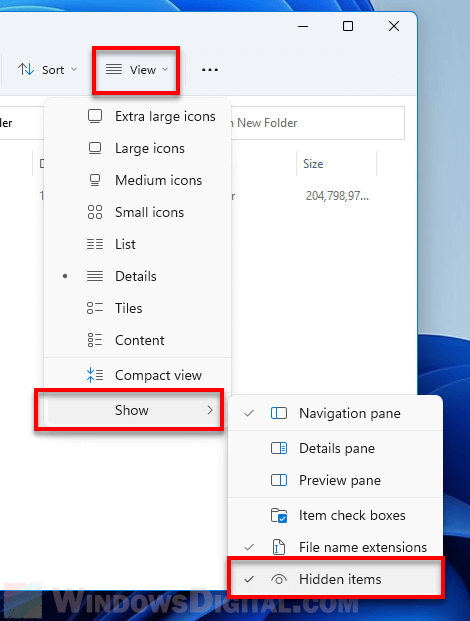
If you’re zipping a whole folder, make sure there aren’t any hidden files you don’t have permission for. To see hidden files, do this:
- Open File Explorer and click the “View” tab.
- Look for the “Show” menu and tick “Hidden items“.
After making sure you have the right permissions for the files and folders (and hidden files) you want to zip, try zipping them again.
Solution 2: Check if any program is using the file
Another reason that you might bump into the “File not found or no read permission” error while zipping a file is that some program is already using the files you want to zip.
Why does this matter? Well, if a file is being used, Windows might lock it to prevent any other action, like zipping, because doing so could mess things up or corrupt your data.
Find out more: How to Know Which Process is Using a File in Windows 11
To figure out if a program is using your file, here’s what you can do:
- Hit Ctrl + Shift + Esc to bring up the Task Manager.
- Go to the “Details” tab.
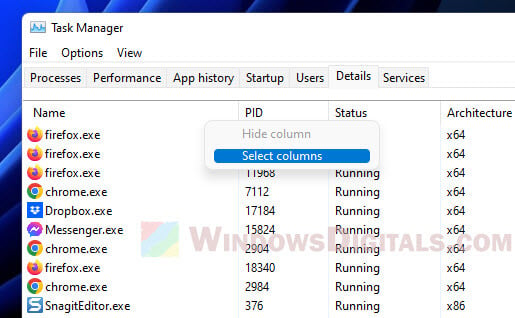
- Right-click on any column header and choose “Select columns.”
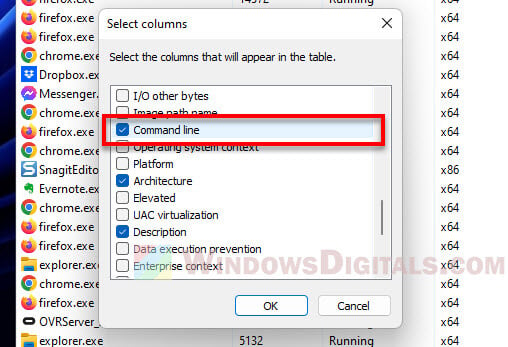
- In the “Select columns” window, tick the “Command line” box and click “OK.”
- Now, you can see the command line for each process, which helps identify who’s using your file. If you spot the culprit, right-click it and choose “End task” to stop it.
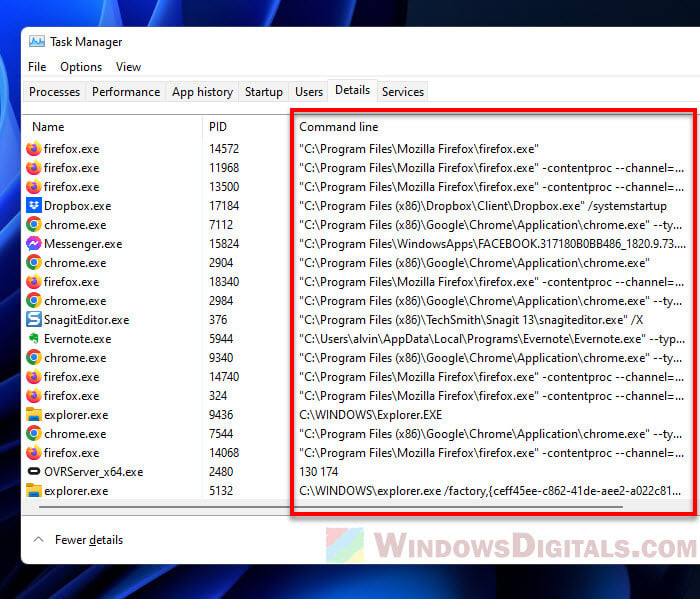
Note that even hidden files in the folder you’re trying to zip can also be in use. Try to show these hidden files and check them as well. After making sure no programs are using your files at the moment, give zipping another try.
Solution 3: Take control of the files or folders
Taking control, or “ownership,” of the files or folders you want to zip might be able to resolve error as well. Ownership means you have the highest control level over the files, including changing permissions or deleting them.
Learn more: How to Take Ownership of a File, Folder or Drive in Windows 11
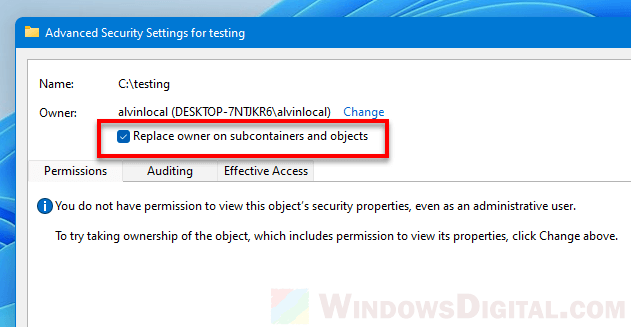
If you’re not the owner of the files or folders, you might not have the permissions needed to zip them, thus, causing the error. Becoming the owner allows you to get full control of the files and you should be able to zip them without issues.
Solution 4: Log in with an admin account
Some tasks in Windows 11 need admin rights. If you’re using a standard account, you might not have the permissions needed to zip some files or folders. To fix the zipping error, try logging in with an admin account.
See also: How to Give Administrator Permission or Rights to User in Windows 11/10
- Click the “Start” button and select the user icon at the bottom left.
- Pick an account with admin rights from the user accounts list. If you’re not sure which one has these rights, look in the “User Accounts” settings under “Settings > Accounts”.
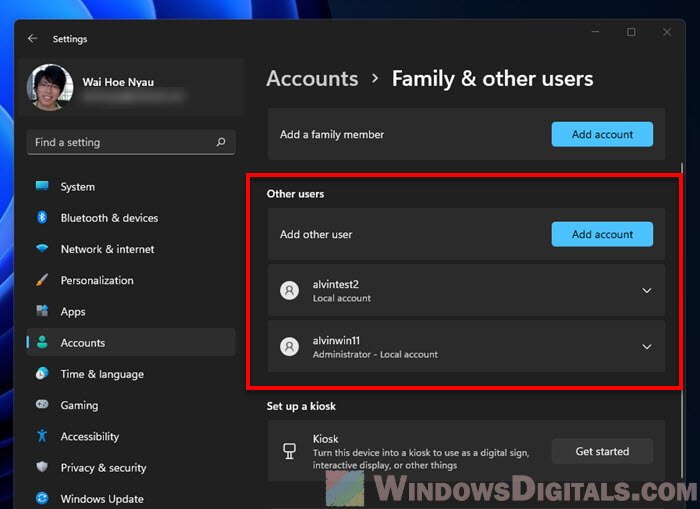
- If asked, enter the password for the admin account.
- With admin access, try zipping the files or folders again.
If you don’t have an admin account, you might need to ask the computer owner or the system admin for help.
Solution 5: Try another file compression tool
If you keep getting the “File not found or no read permission” error with Windows 11’s built-in file compression, consider using another tool like 7-Zip or WinRAR. These tools often have more features and better compression, which could help you zip your files without errors.
One more thing to note
Sometimes, your antivirus or security software might mistakenly think a zipping action is suspicious and block it. If you’ve tried everything else and still can’t zip the files, check your antivirus settings. You might need to temporarily disable it or set an exception for the files in question. Just don’t forget to turn it back on or remove the exception once you’re done.
