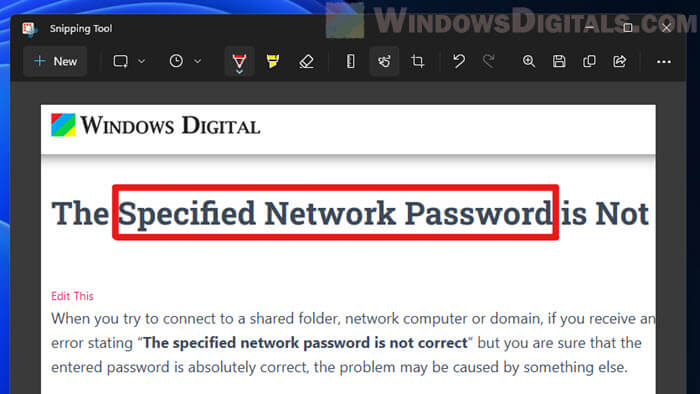
There are many times when we need to highlight something on a screenshot, such as text, usually by drawing a red box around it. In Snipping tool, a built-in screenshot tool in Windows 11 and Windows 10, we only have limited tools at our disposal to add things and edit captured screenshots. However, it is still possible to draw a box or circle around text or any object in Snipping Tool.
This guide will show you how to use the pen tool to draw boxes, circles or any shape around text or any object in Snipping Tool.
Page Contents
Draw a box around text in Snipping Tool
While you can’t directly create a square or rectangle box around text in Snipping Tool, you can use the Pen tool to draw the box manually. However, the Pen tool itself is just a manual drawing tool that follows your mouse pointer as you draw. You will need to be able to draw straight lines in order to draw boxes.
Fortunately, drawing straight lines in Snipping Tool is possible if you use the pen tool with another tool called Ruler. With these tools combined, we can draw a box or border around text or any object on the captured screenshot.
For example, to draw a red box around text or any object in Snipping Tool, follow these steps.
- First, take a screenshot with Snipping Tool.
- After capturing the screenshot, in Snipping Tool, select the Ruler tool from the menu bar and place the ruler over the text you want to draw a box around.
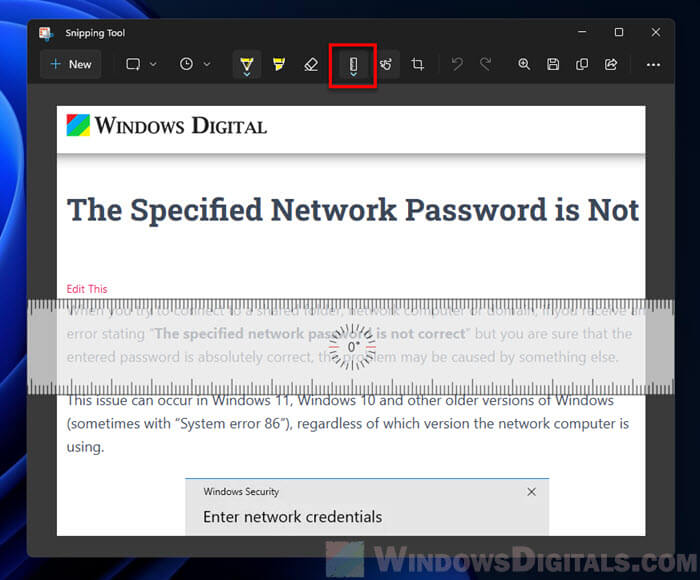
- Next, select the Pen tool and choose the pen color and size (if you want to draw a red box, choose red).
- Then, draw a straight line along the ruler above the text.
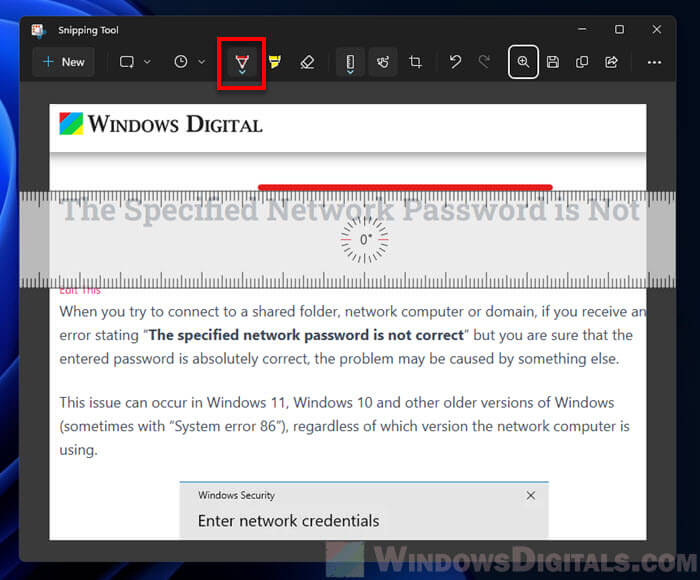
- After that, rotate the ruler and draw vertical lines along the ruler around the text.
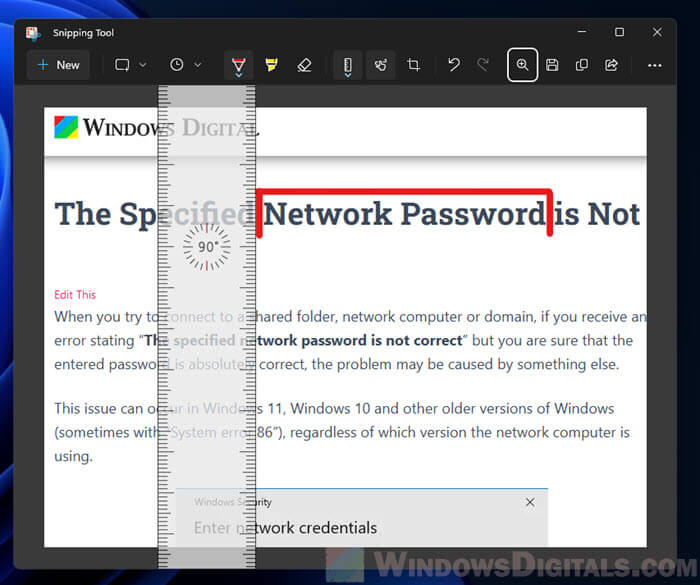
- Finally, draw a straight line below the text. That’s it, you just drew a box in Snipping Tool.
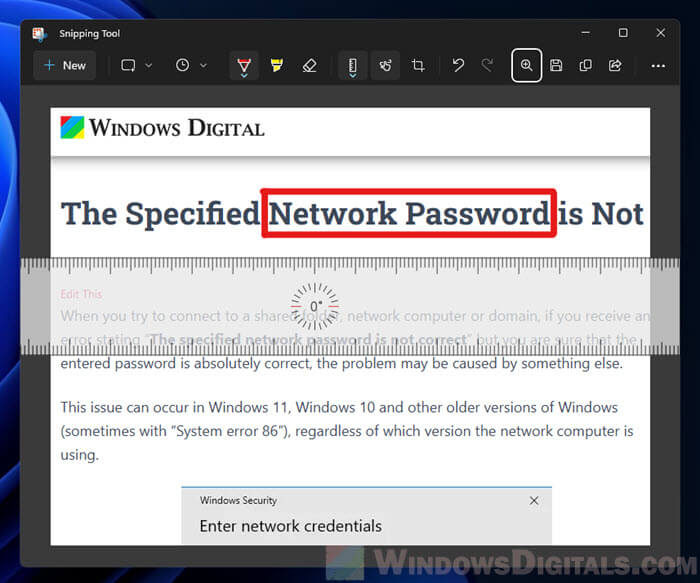
You can use the same concept to draw any shape in Snipping Tool, such as an arrow, a triangle, etc.
Also see: How to Find Snipping Tool History in Windows 11 or 10
How to draw a perfect circle in Snipping Tool
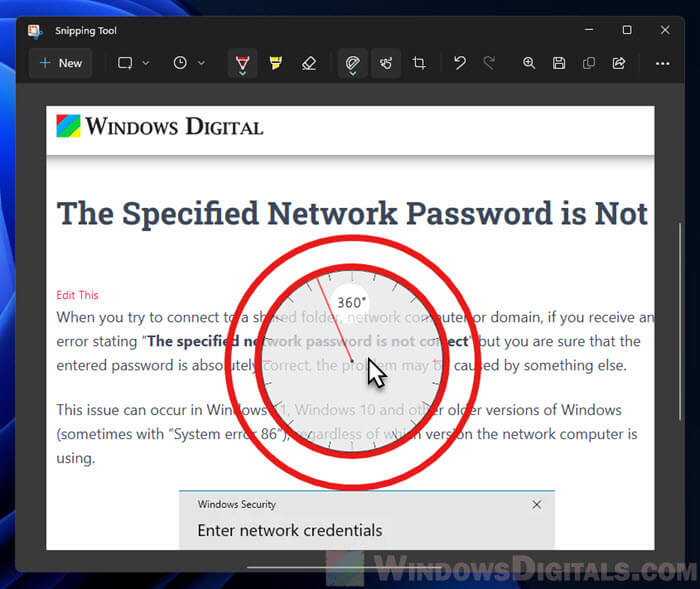
If you prefer to draw a circle around the text or any object, you can use the Protractor tool to draw a perfect circle in Snipping Tool. Here’s how to do it.
- In Snipping Tool, click the Ruler from the menu bar and then select Protractor.
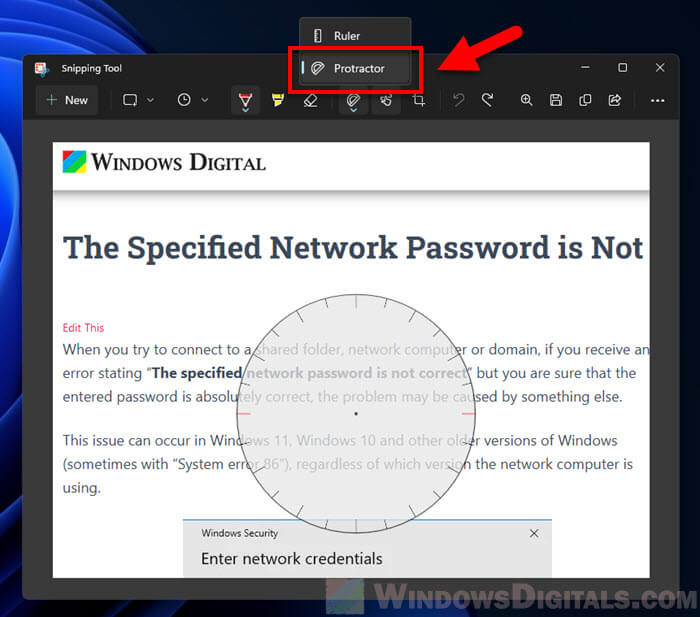
- Next, place the protractor over the object you want to draw the circle on.
- Then, draw along the protractor to create a perfect circle.
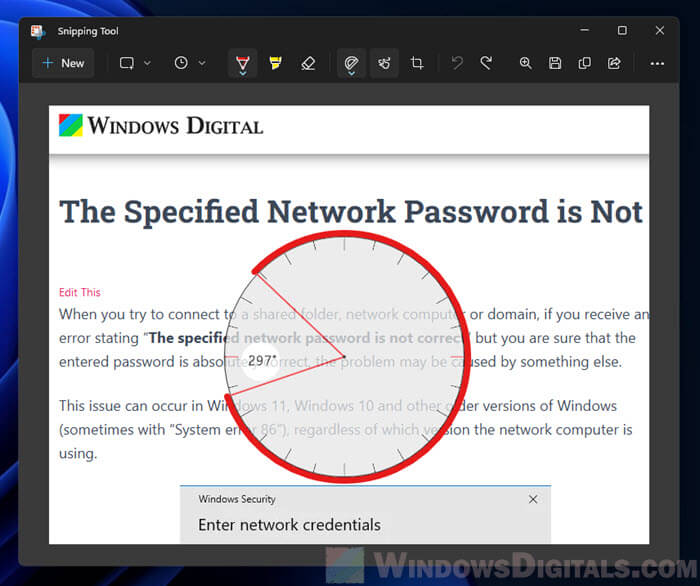
How to change the size of the Protractor
To change the size of the protractor in Snipping Tool in order to draw a bigger or smaller circle, place your mouse cursor over the protractor and scroll your mouse wheel up or down to change its size.
Open the captured screenshot in Paint
If you don’t want all this hassle of just trying to draw a box or any shape on a captured screenshot, you should use a better editor that has more editing tools available, such as Paint in Windows.
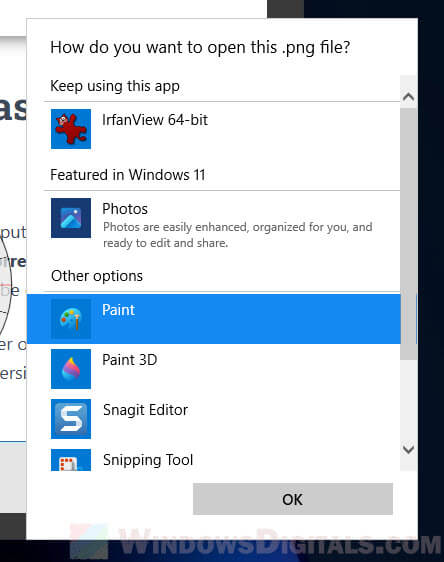
In Snipping Tool, you can directly open the captured screenshot in Paint from Snipping Tool without saving the image first. To do so, after taking a screenshot with Snipping Tool, click the three-dots menu icon at the upper right corner of the window, and select Open with.
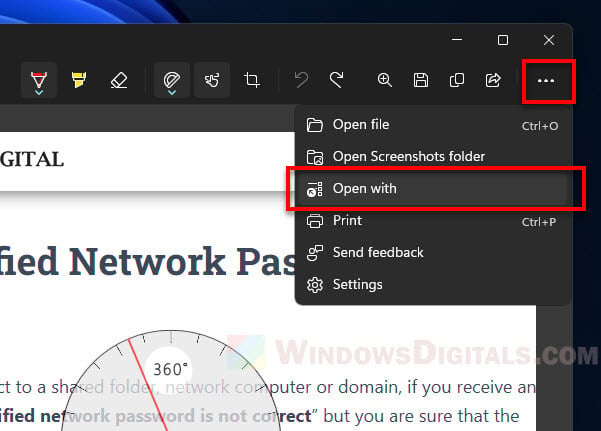
Then, when prompted to select an application to open the picture, select whatever application you prefer to use, for example, Paint. In Paint, you can easily draw any shape you want on the screenshot, and more.
