This guide explains why Disk Management can’t delete some of the protected partitions such as the EFI System Partition on some disks, and how to delete these protected partitions in Windows 11 using an alternative method (without any third-party software).
Also see: How to Merge Two Drives in Windows 11
Page Contents
Disk Management can’t delete protected partition
When we need to initialize a disk and create volumes on it, we would normally use the Disk Management tool in Windows to achieve that. It’s common that some disks consist of a small partition called EFI System Partition usually with a size not more than a gigabyte.
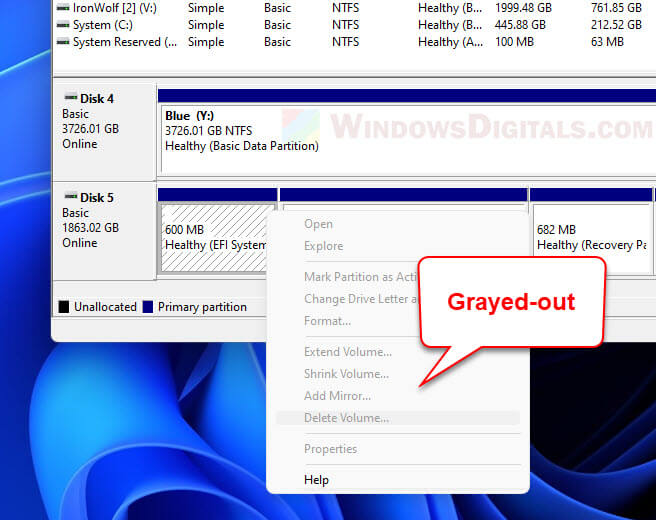
When you right-click this partition in Disk Management, the Delete Volume will be grayed-out and cannot be selected. This is because the partition was created in such a way that it restricts any tool from being able to make changes to it, including deleting it. Not even the Disk Management tool is able to delete the partition or apply any changes to it.
Suggested Read: How to Extend C: Drive in Windows 11
Delete Protected EFI System Partition in Windows 11 using DISKPART
Although some third-party disk management software may be able to delete the protected EFI system partition, you can use the Windows built-in DISKPART tool instead to delete the protected partition in Windows 11 without relying on any third-party tool.
However, the DISKPART tool is a command-line tool that can only be executed by typing the relevant commands in a command prompt. It does not have a graphical user interface. It may seem complicated and confusing at first, but believe me, it’s not as difficult as you may think.
Important: Please note that the procedure of deleting the protected EFI system partition will involve cleaning and wiping the entire disk. All data and files from any other partition on the same disk will be erased. This is because the DISKPART “clean” command that we will be using will clean the entire disk, including all partitions on it. There is no way to delete only the protected partition without wiping the disk first. Please back up your important files to some other location before proceeding. If you do not know what you’re doing, please do not proceed as you may risk destroying your existing partitions and lose your files if done incorrectly.
To delete a protected partition in Windows 11 using DISKPART command-line tool, follow the steps below.
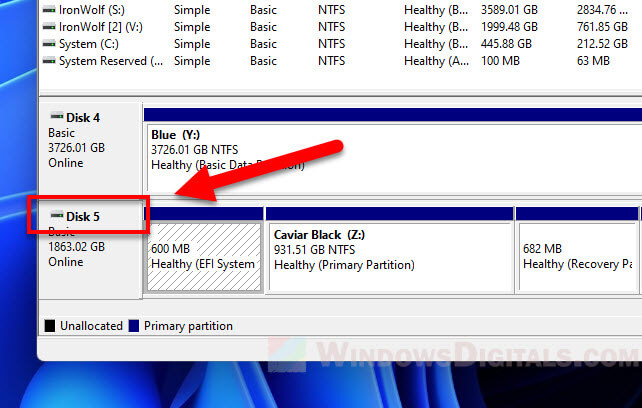
- First, write down the Disk number of the disk that you want to manage. You can view the disk number in the Disk Management tool. In my case, the disk that has the EFI System Partition that I want to delete is called Disk 5.
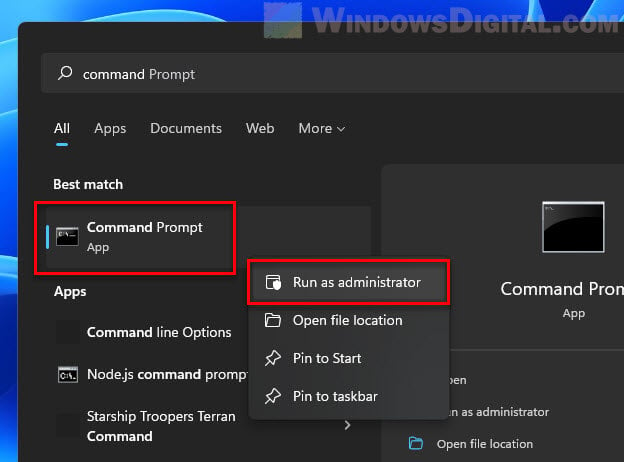
- Search for and run “Command Prompt” (or CMD) as administrator. Administrative right is required to run the following commands.
- In the Command Prompt window, first type
diskpartand press Enter to begin using the tool. The new line should now begin with “DISKPART>“.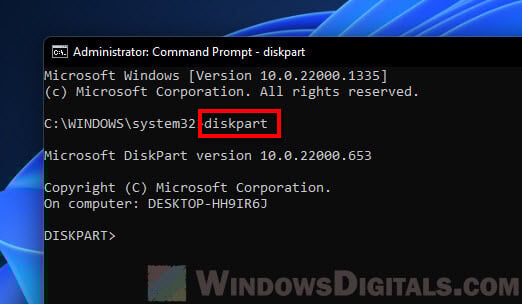
- Next, type
list diskto display all the detected disk drives.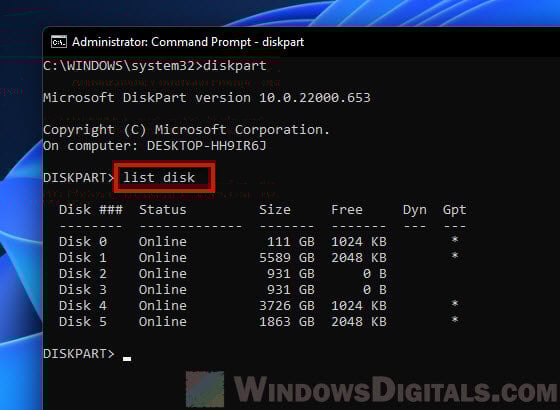
- Double check the size of the disk number you wrote down earlier matches the one displayed in the command prompt. This is to make sure it is the same drive that you want to manage, so you don’t accidentally wipe the wrong drive. For example, in my case, the Disk 5 shown in Disk Management tool has the same size as the “Disk 5” displayed in DISKPART. Thus, I’m sure it is Disk 5 that I want to manage.
- Then, type
select disk #to select the disk. In my case, I had to typeselect disk 5. - To make sure the disk is selected, type
list diskagain and make sure there is an asterisk (*) symbol next to the disk you select.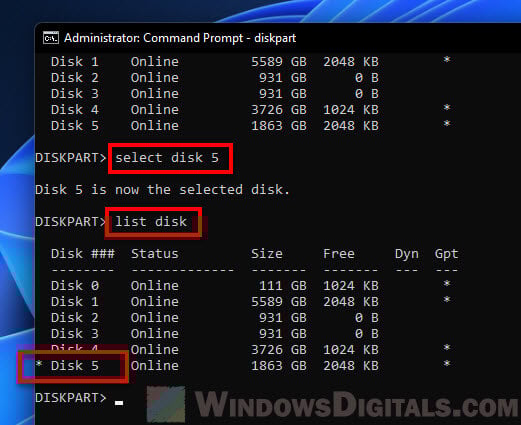
- Now, type
cleanto wipe the disk and delete all partitions on it, including any protected partition such as the EFI system partition.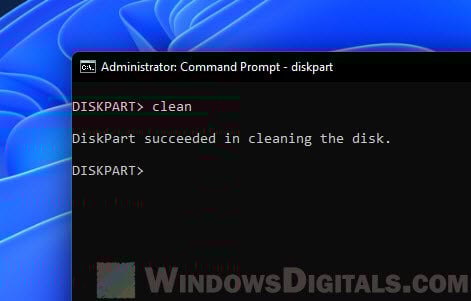
- The process may take a while to complete depending on the size of the disk that it needs to clean.
Read next: How to Split Drive in Windows 11 without Formatting
Re-initialize the disk and create volume on it
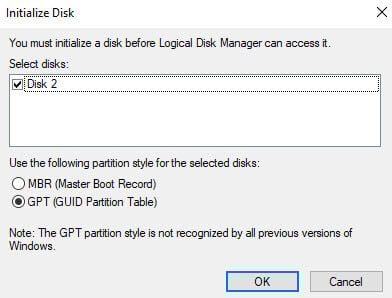
After cleaning the disk, since all partitions on it are deleted, it will be as if it is brand new. To re-initialize it, open Disk Management tool. It should automatically prompt you to initialize the disk as it detects the presence of the disk. You will need to initialize the disk before you can create partition (volume) on it. Select the disk and select a partition style (MBR or GPT) and click OK to initialize it.
After initializing the disk, you should see that all the available disk space is now marked as “Unallocated“. Since all partitions, including the protected EFI partitions are deleted when you run the DISKPART clean command, all disk space will now be unallocated.
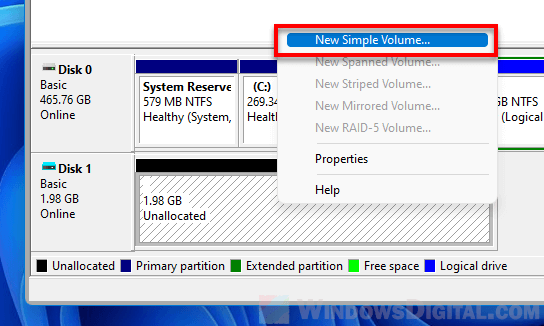
To create a new partition on the disk, right-click the unallocated space and select “New Simple Volume”. Follow the on-screen instructions to complete the process. You can create as many partition as you want on the disk.
Related: How to Format and Partition SSD Drive in Windows 11
Can’t delete EFI System Partition on C: drive
You can’t delete the EFI System Partition if it is on your C: drive (system drive) where your Windows resides. Since the process involves wiping the drive, you can’t just erase your system drive from which your Windows is running. Every tool will prohibit you from doing so. And there is no way to delete only the protected partition without wiping the drive.
To delete protected partitions on such a system drive, assuming you no longer need the operating system on it, you can unplug the drive, plug it into another computer, and run the DISKPART clean command to erase the drive from that computer.
