Most computer mice today have more than just left click, right-click, scroll wheel and middle click. They have mouse 4, mouse 5, DPI button, multimedia buttons and more. If you have an advanced or gaming mouse, you will have a lot more buttons you can use.
If you want a button on your mouse to do an action that is different from its default, you can assign the desired action to that button. We call this button remapping. In this guide, we will show you several methods on how to remap mouse buttons, including mouse wheel up and down, in Windows 11.
Also see: How to Remap Keyboard Keys in Windows 11
Page Contents
Remap mouse buttons using configuration software
Most advanced and gaming mice will have a corresponding hardware configuration software that lets you configure various settings, including remapping the mouse buttons for your mouse.
For example, if you have a Razer mouse, you will need Razer Synapse. If you have a Logitech mouse, you will need Logitech G hub. Use SteelSeries Engine Software for SteelSeries mouse, and Corsair iCUE for Corsair mouse.
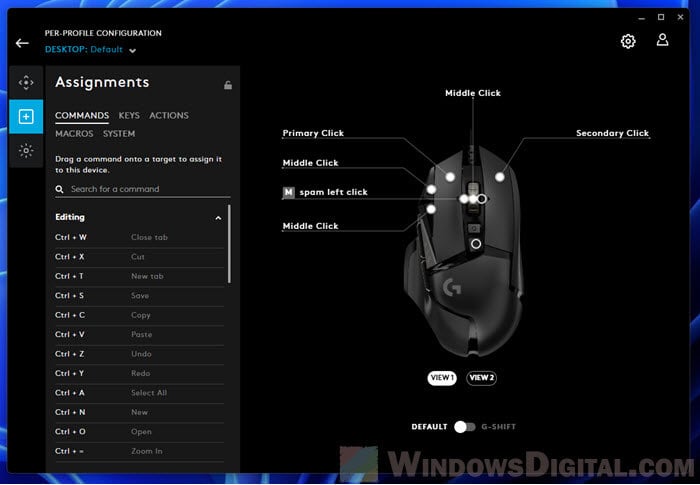
Logitech G Hub
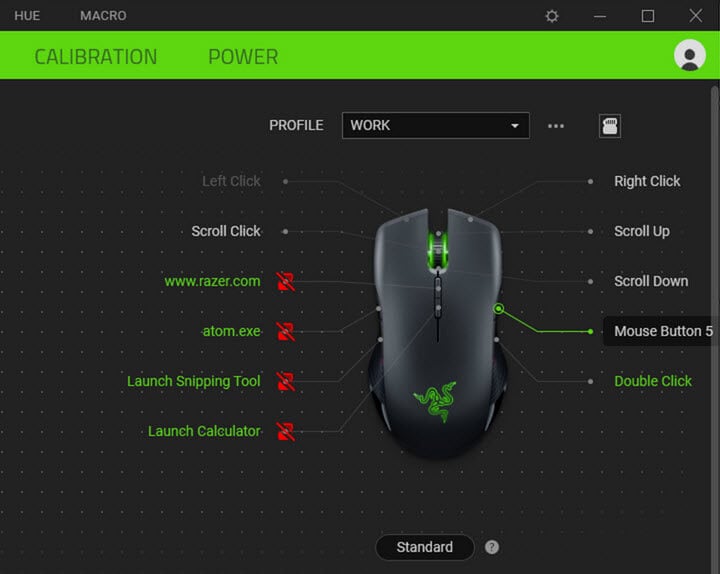
Razer Synapse
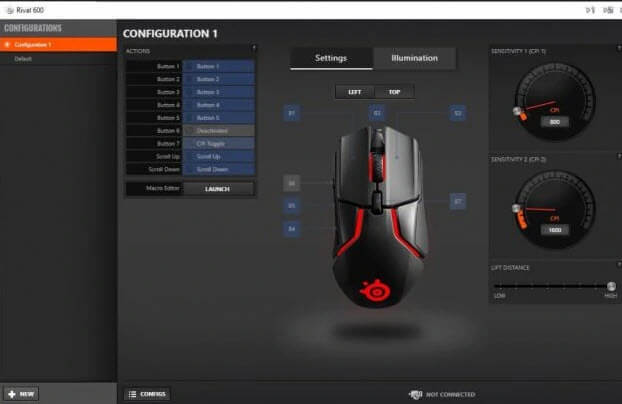
Steelseries Engine Software
In these peripheral configuration tool, you will find a setting that allows you assign different actions onto available buttons on your mouse. In some tools from certain companies, you will even be able to record and assign macro to the mouse buttons.
To remap mouse buttons for a gaming mouse, install the corresponding hardware configuration software and assign any desired action to any button you like via the configuration software.
Note that the configuration software will only work for peripherals (usually keyboard, mouse and headset) manufactured by the corresponding company. For instance, you cannot configure your Logitech mouse using Razer Synapse.
Read next: How to Check Mouse DPI (Windows 11)
X-Mouse Button Control to remap any mouse button
If your mouse does not come with a dedicated configuration app, you can use a third-party mouse remap software such as X-Mouse Button Control to remap any mouse button for your mouse.
You can download the software from the following page.
https://www.highrez.co.uk/downloads/xmousebuttoncontrol.htm
Once you’ve installed it, open the app and you will see a list of all mouse buttons that you can remap, including the mouse’s scroll wheel up and down actions.
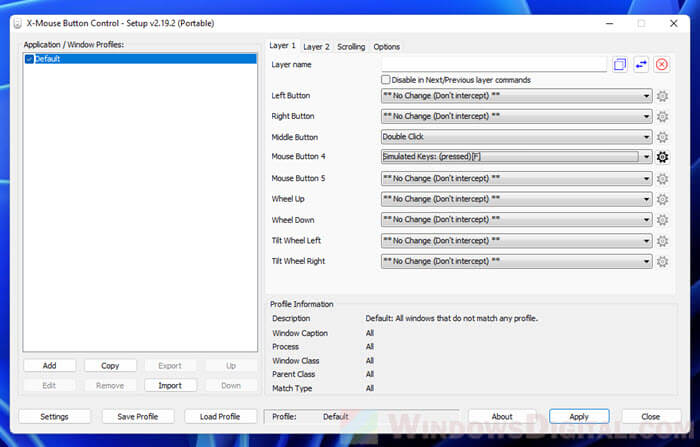
By default, the mouse button will be assigned as “No Change (Don’t intercept)” which basically means no changes to the mouse button. If you want to remap a mouse button, click the drop-down menu next to it and select an action you wish to assign to it.
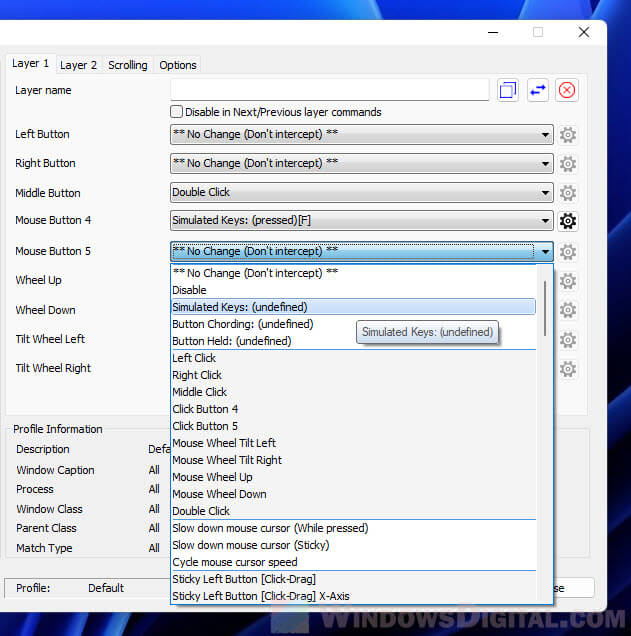
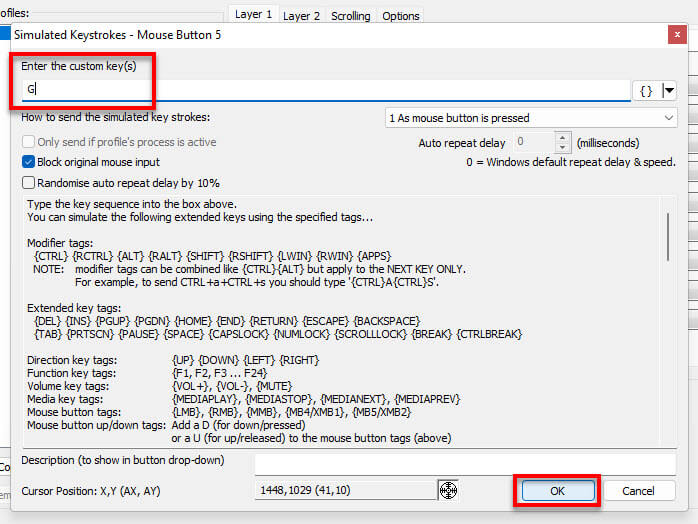
If you would like to assign a keyboard key to a mouse button, select the “Simulated Keys” option. You will then be prompted to enter the keystroke you wish to assign to the mouse button. Enter the custom key and click OK to proceed.
To disable a mouse button, simply select “Disable” from the drop-down menu for the mouse button you wish to disable.
Once you are satisfied with the configurations you have made, click Apply to apply the changes immediately.
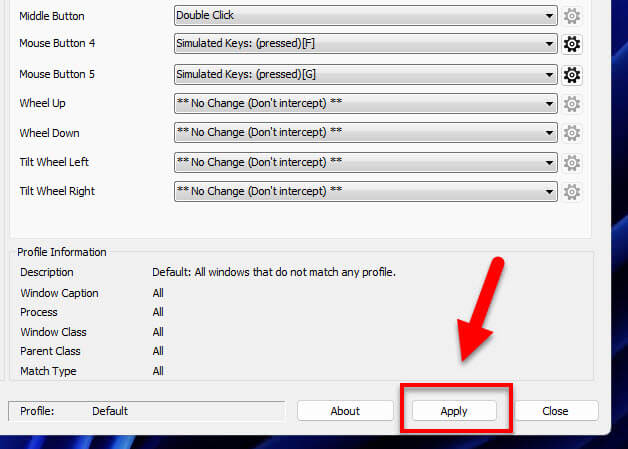
Note that the app must be running in the background for any remap to have any effect in Windows 11. When you install the software, by default, it will be set to run automatically on Windows startup. You can disable (or enable) this via the task manager. Read more: How to Disable Startup Programs in Windows 11.
Remap mouse buttons without any software
If you do not want to install any software to remap mouse buttons, you can do so via the mouse settings in Windows 11. But, it is only limited to the primary and secondary mouse button.
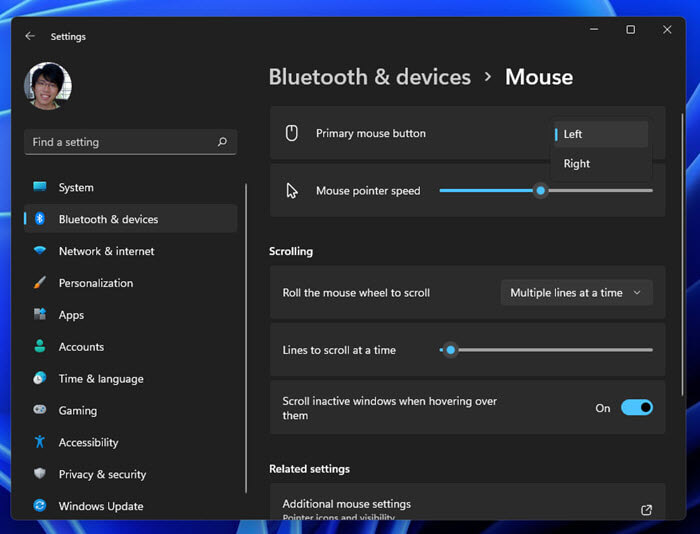
To change the primary mouse button in Windows 11, first press Win + i to open Settings. On the left pane, select Bluetooth & devices, and select Mouse on the right. In the mouse settings, click the drop-down menu next to “Primary mouse button” and then select “Left” or “Right“. For instance, if you select Right, the right-click will be the primary mouse button.
