A driver is a program that tells the operating system how to work with a piece of hardware. Like all other hardware and devices, printer needs a driver to tell Windows 11 how to operate it and to make it usable for you. This guide outlines several methods to reinstall printer driver in Windows 11.
If you have recently upgraded from a previous version of Windows, there is a chance that your printer’s driver might stop working. Besides, if your computer is infected with malware or viruses, or if you encounter any event that could corrupt your system files such as power outage, the printer driver can also be damaged or corrupted.
If your printer suddenly stops working or not showing up on the list of available printers when you do a print preview in Windows 11, reinstalling the printer driver may often fix the issue.
Also see: How to install or update driver on Windows 11
Page Contents
Run Windows Update
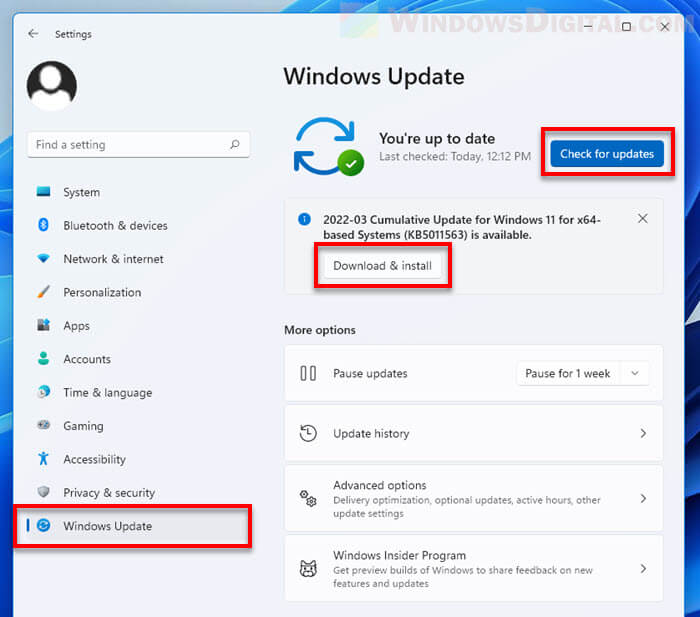
The first thing you should try is to run Windows Update. Windows Update can automatically detect all connected hardware and devices on your computer, after which it will download the latest drivers from Microsoft’s driver repository and install them for you.
You can quickly run Windows Update in Windows 11 by pressing Win + i keys to open Settings, select Windows Update from the left pane, and then click Check for updates.
Use the driver CD that came with your printer
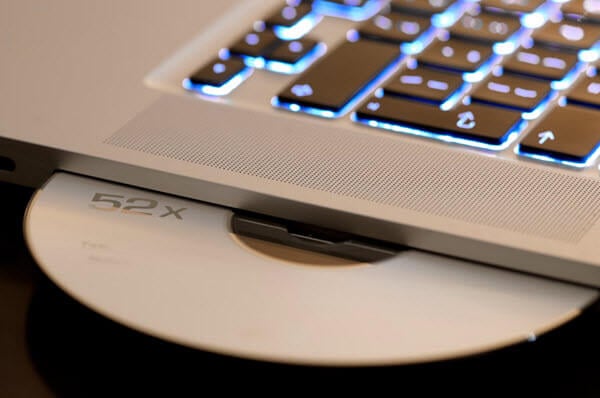
When you purchase any hardware, it will come with a driver installation media, usually in the form of a CD (compact disc), if the hardware requires a driver to run. If you can still find the driver CD for your printer, use the CD to install the printer driver.
Manually download the driver from printer manufacturer’s website
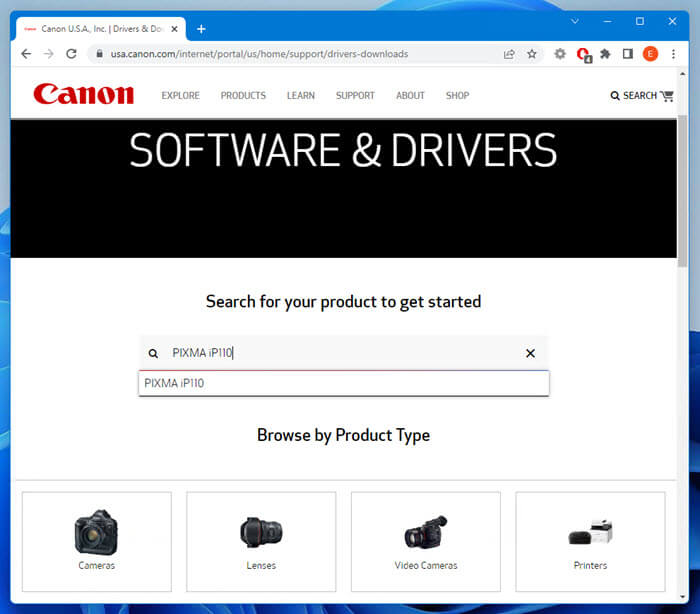
Most major printer manufacturers such as Canon, HP, Epson, Brother, Kyocera, etc. have their own websites which usually include a dedicated drivers section where users can search for and download their printers’ drivers online. You can download the driver for your printer from the respective printer manufacturer’s website and install it on your computer.
The driver section on these manufacturers’ websites are often called “Drivers” or “Support”. When you access the driver section, you can usually select the model of the printer, after which it will show you the latest driver that matches your printer’s model.
Related Guide: How to Download Bluetooth Driver for Windows 11
Uninstall printer driver to allow Windows 11 to reinstall it automatically
Every time you start up or restart your computer, Windows 11 has the ability to automatically detect all connected hardware and devices on your computer and install the best suited driver should any of the devices needs it. However, this is only possible if you enable Windows Update.
Thus, uninstalling the printer driver will allow Windows 11 to automatically detect it again and reinstall the printer driver on next startup. There are generally two ways to uninstall a printer driver in Windows 11.
Related: How to Uninstall Drivers in Windows 11
Remove printer driver via “Printers & scanners”
The easiest way to uninstall printer driver is through the Printers & scanners settings. Here’s how to do so.
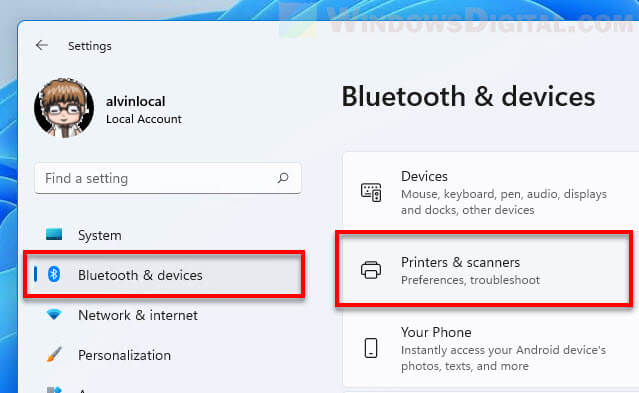
- Press Win + i keys to open Settings. From the left pane, select Bluetooth & devices. Then, on the right, select Printers & scanners.
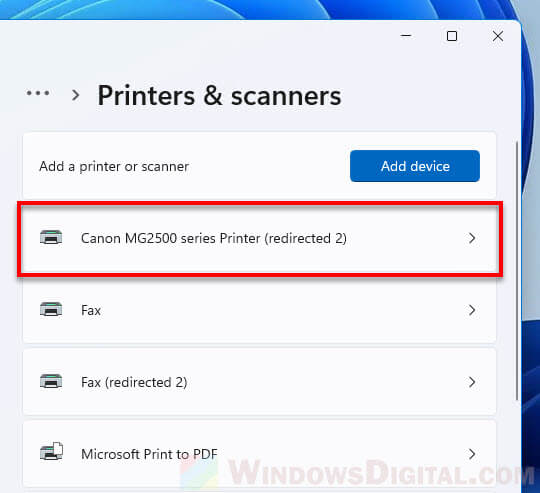
- Next, select the printer driver you want to uninstall.
- Click on the Remove button to remove the driver for the selected printer.
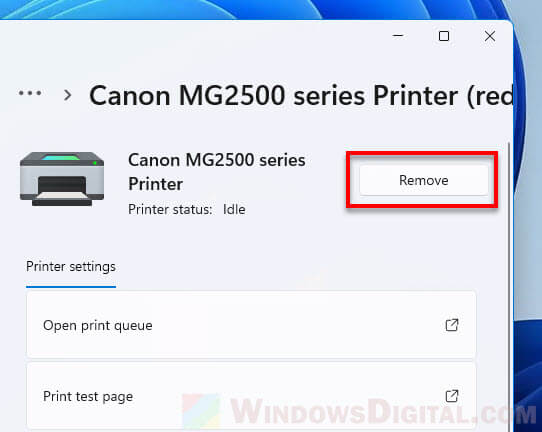
- Restart your computer to allow Windows to re-detect the printer and reinstall the printer driver again.
Uninstall printer driver through Print Management
Another method to uninstall a printer driver in Windows 11 is via the Control Panel’s Print Management settings. Here’s a step-by-step instruction on how to do so.
- First, search for and open “Control Panel” via Start menu.
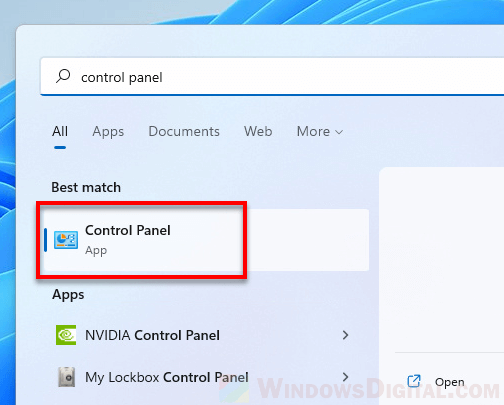
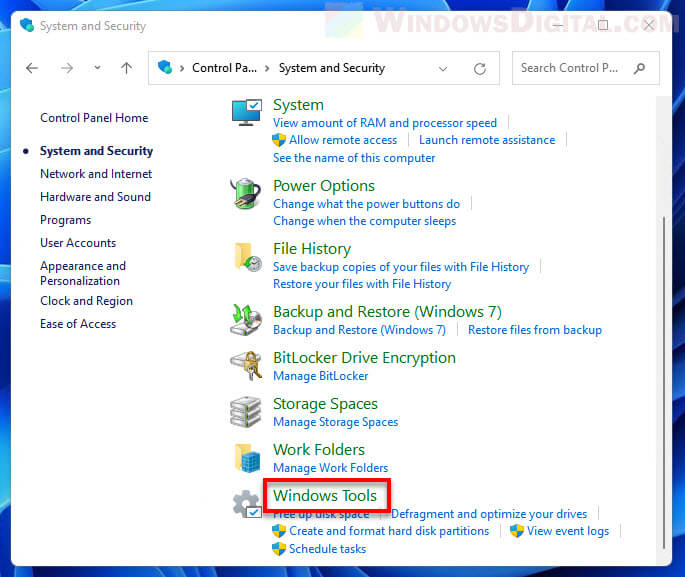
- In the Control Panel window, select System and Security and then select Windows Tools at the bottom of the window.
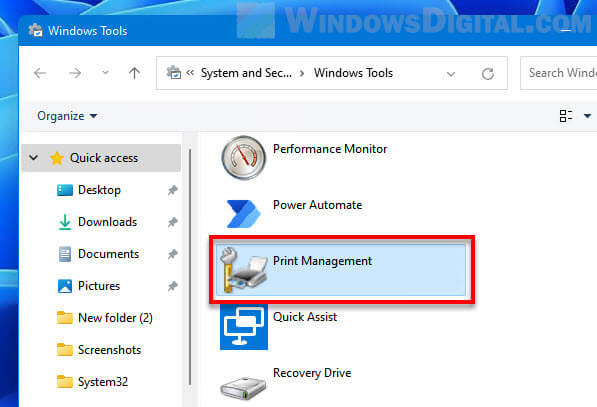
- Next, double-click Print Management to open it.
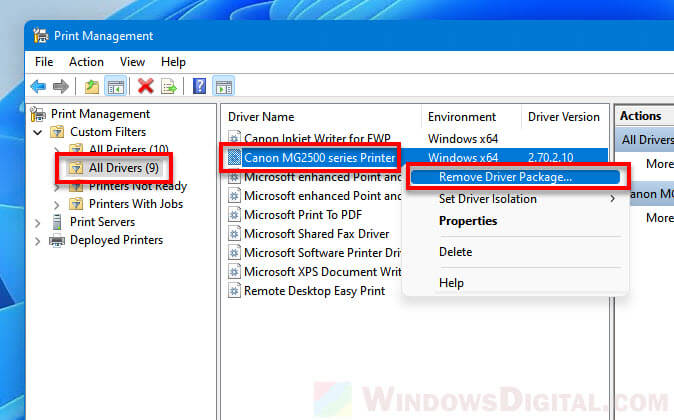
- In the Print Management window, select All drivers on the left pane. Then, on the right, right-click the printer driver you want to uninstall, and select “Remove Driver Package“.
- Reboot your PC to allow Windows to detect your printer and reinstall the printer driver.
In some cases, you may need to restart twice. Alternatively, you can run Windows Update to have Windows detect and install the printer driver immediately.
Read: How to Update Realtek Drivers in Windows 11
Manually install the printer driver via Add Printer Driver Wizard
If none of the above works to reinstall your printer driver, you can try to manually add the driver via the Add printer driver wizard in Windows 11. The instructions below will show you how to do it.
- Open Settings and navigate to Bluetooth & devices > Printers & scanners.
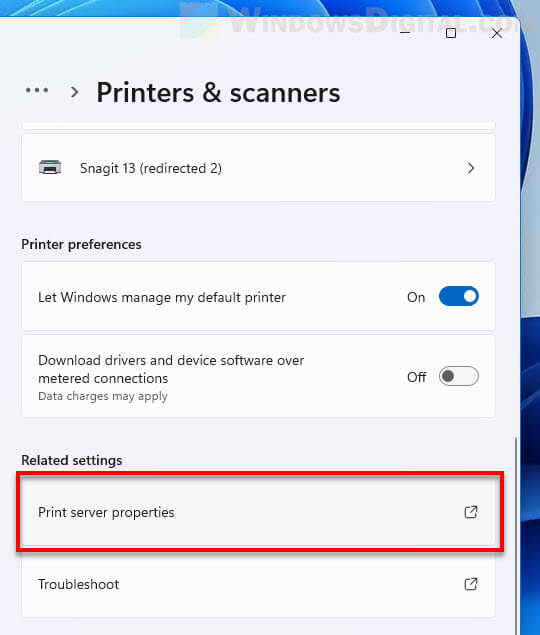
- Next, scroll down to the bottom of the settings page and select Print server properties.
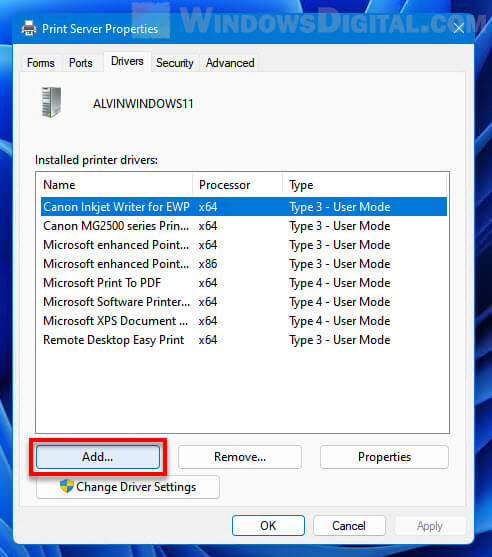
- In the Print Server Properties window, select the Drivers tab and then click Add.
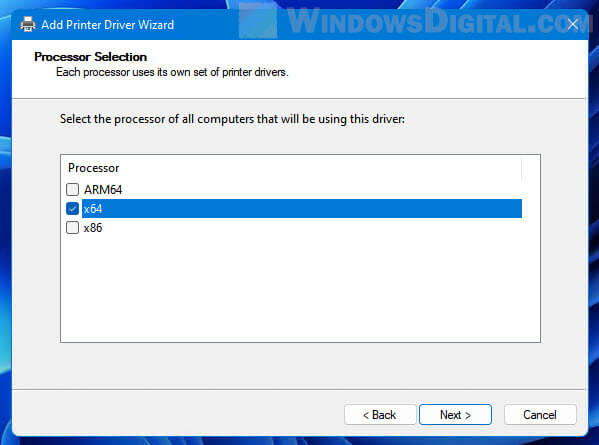
- Click Next on the welcome screen. Then, select your processor architecture (ARM64, x64 or x86) and click Next.
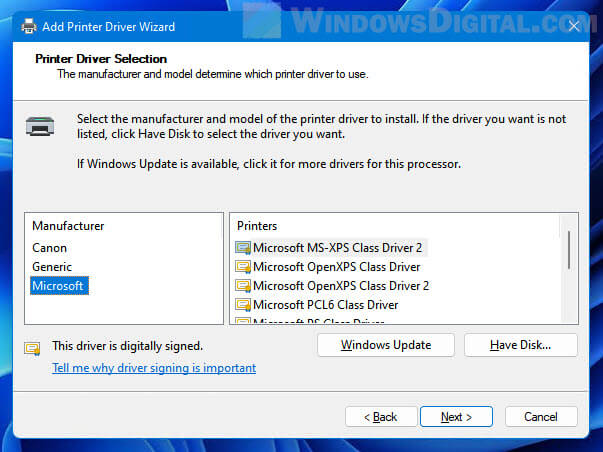
- In the Printer Driver Selection section, on the left, select your printer’s manufacturer. Then, on the right, select your printer’s model. Click Next to add the printer driver. Alternatively, you can click the Windows Update button to have Windows Update automatically search for the printer driver for you.
