Windows 11 Remote Desktop Connection feature allows you to connect from one computer to another and remote control it as if you were sitting in front of it. While the remote desktop connection is easy to setup, it can throw errors if the any of the settings or authentication is incorrect.
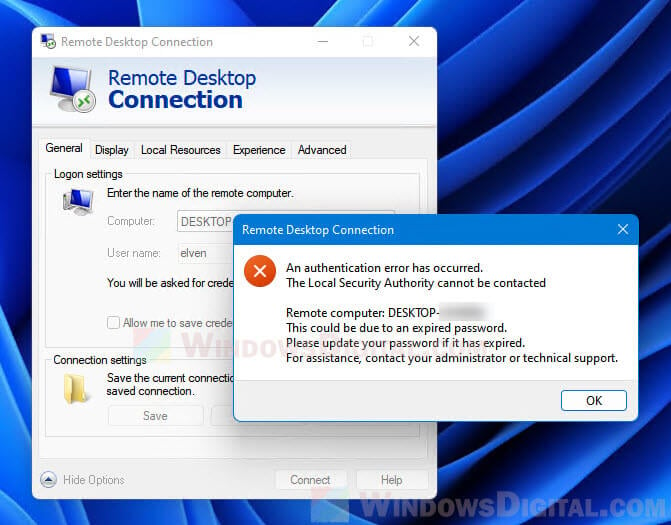
If you receive the error “An authentication error has occurred – The Local Security Authority cannot be contacted” or “The function requested is not supported” when you try to establish a remote desktop connection, it could be caused by wrong username or password, or incorrect remote desktop settings.
Also see: Remote Desktop “A user account restriction is preventing you from logging on”
How to fix Remote Desktop “An authentication error has occurred” on Windows 11
This guide will show you several solutions and workarounds to fix the Remote Desktop Connection “An authentication error has occurred” error on Windows 11 (or on Windows 10 if you are remote connecting to Windows 11 from Windows 10). Depending on which specific error you receive, the applicable solution may differ.
Page Contents
Turn off Network Level Authentication
If Remote Desktop prompts you an error message that associates with the “An authentication error has occurred” error, try to change the following Remote Desktop settings – remove the Network Level Authentication (NLA) requirement from the Remote Desktop Connection.
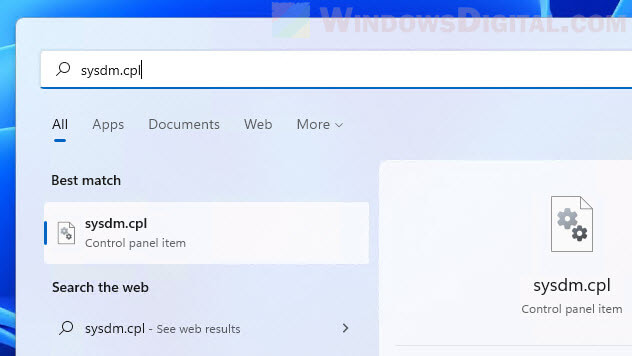
1. On the computer you want to remote connect to, go to Start, type “sysdm.cpl” onto the search bar and press Enter to open System Properties.
2. In the System Properties window, click the Remote tab.
3. Next, in the Remote Desktop section and under “Choose an option and then specify who can connect” option, first make sure “Allow remote connections to this computer” is selected. Then, uncheck the “Allow connections only from comptuers running Remote Desktop with Network Level Authentication (recommended)” setting.
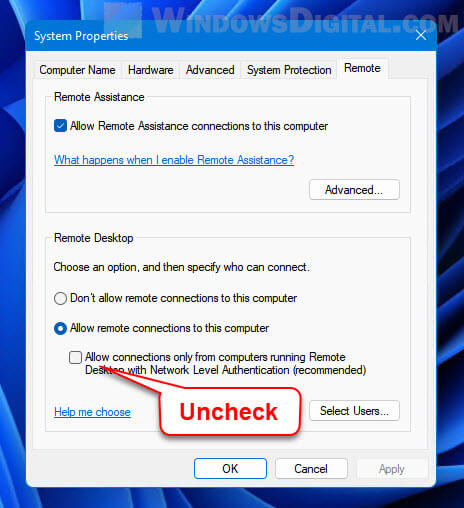
4. Click Apply, then OK to save the changes. Restart the computer and retry the remote desktop connection.
Enable Encryption Oracle Remediation
If you encounter the “An authentication error has occurred – The function requested is not supported” error, particularly after a major system update, try to enable a policy called “Encryption Oracle Remediation” in Windows 11. Here’s how to do so.
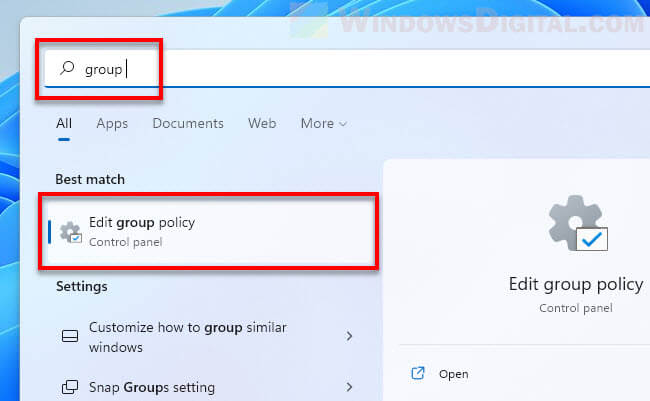
1. Go to Start menu, type “gpedit.msc” and press Enter. Alternatively, you can simply search for and open “Edit group policy” instead. Both would open the Local Group Policy Editor in Windows 11.
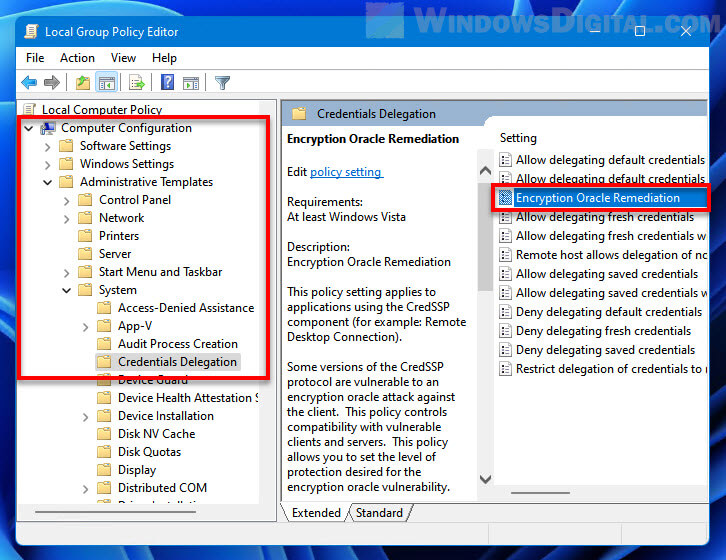
2. In the policy editor window, on the left pane, navigate to Computer Configuration > Administrative Templates > System > Credentials Delegation. Then, on the right pane, locate and open the Encryption Oracle Remediation policy (double-click it).
3. Next, in the policy window, select Enabled. Under Options, click the drop-down menu next to “Protection Level”, and then select Vulnerable.
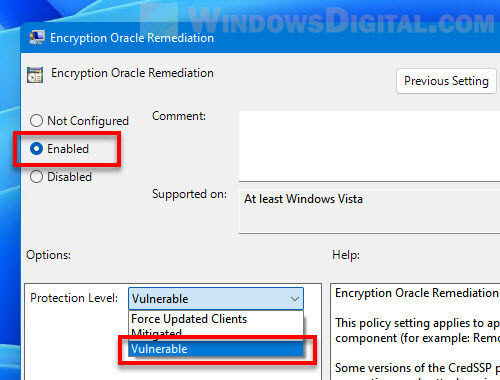
4. Click Apply and OK to save the changes. Reboot your PC, then retry the remote desktop connection again and see if the problem persists.
Incorrect username or password
If you receive “The Local Security Authority cannot be contacted – This could be due to an expired password” error instead, there is a good chance that you may have entered incorrect user account credentials.
Double check and make sure the user name and password of the user account you are connecting as are correct. If it’s a Microsoft account, enter the Microsoft account’s email, for example, [email protected], and its password.
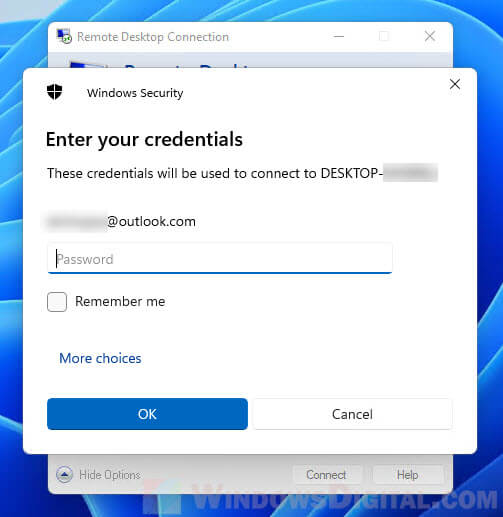
If you have a local user account instead, since Windows 11 remote desktop connection always ask for a password even if a local account doesn’t have one, try to give the user account a password if it doesn’t already have one and see if it fixes the issue.
In addition, check if you have allowed the user account to connect to the computer you want to remote to. You can check this via System Properties > Remote (follow the first solution above to learn how to open the system properties window). Then, click the Select Users button to open the Remote Desktop Users settings.
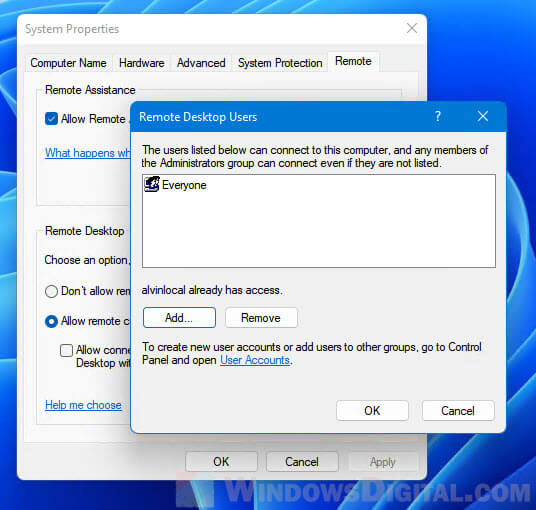
A list of users who can connect to this computer will be shown. Any members of the administrators group (any user account set as an administrator) can connect even if they are not listed. From there, you can add any user account to the list to allow it to connect to this computer.
Check if Remote Desktop is enabled on the computers
Since Remote Desktop is disabled by default on Windows 11, you may want to check if Remote Desktop is enabled on both the computer you want to remote to and the computer you want to remote from. Turning on the Remote Desktop should be the first priority before everything else if you want to use the remote desktop connection feature.
You can switch on Remote Desktop by following the steps in the first solution above and make sure the “Allow remote connections to this computer” option is selected in the Remote Desktop settings.
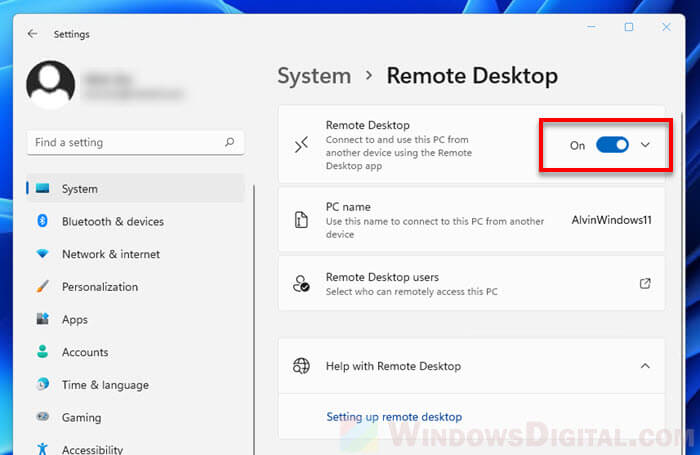
If you are using Windows 11, you can also enable Remote Desktop by going to Settings (Win + i) and navigate to System > Remote Desktop. Next, click the radio button next to Remote Desktop to turn it on.
