The Ethernet “Unidentified Network – No Internet” or “Identifying…” issue is usually caused by incorrect IP settings which results in the router failing to assign a proper local IP address for your computer, and ultimately fail to establish a successful internet/network connection.
Also see: Ethernet Not Working in Windows 11 (Fix)
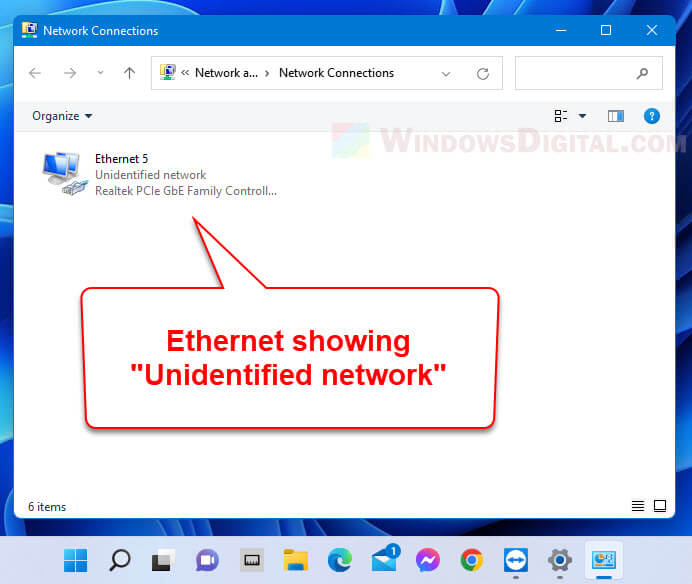
Ethernet “Unidentified Network” in Windows 11
This guide will show you several suggestions and workarounds to fix the Ethernet unidentified network issue in Windows 11.
Page Contents
Run Network Adapter Troubleshooter
To save you the hassle from troubleshooting the problem yourself, you should try to run the Windows 11 network adapter troubleshooter first. If the Ethernet unidentified network issue is due to a couple of simple misconfigured settings, Windows would usually be able to automatically find it and fix it through the troubleshooter.
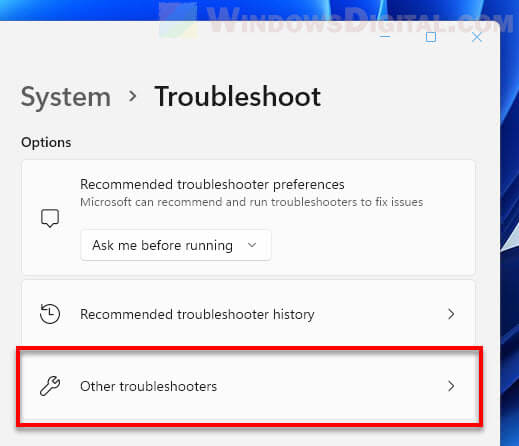
1. In Windows 11, press Win + i to open Settings and navigate to System > Troubleshoot > Other troubleshooters.
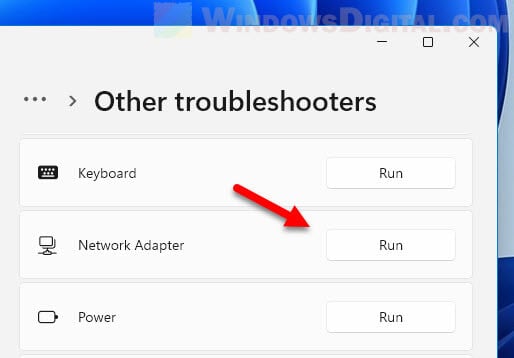
2. From the list of available troubleshooters, click Run next to Network Adapter.
3. During the troubleshooting process, the troubleshooter will prompt you to select the network adapter to diagnose. Select the Ethernet adapter you are having (unidentified network) issue with.
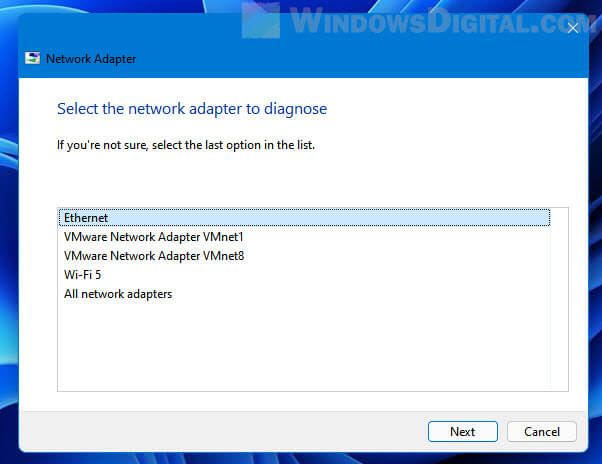
4. Click Next to continue and follow the rest of the on-screen instruction to complete the troubleshooting.
Related: Changing Ethernet Network Speed from 100 Mbps to 1 Gbps (Gigabit)
Run ipconfig and netsh commands
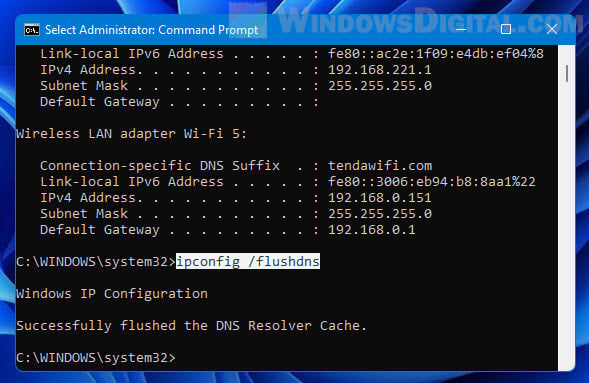
This workaround requires you to run a series of commands in the command prompt on Windows 11. These commands will release and renew the IP address, flush the DNS cache, reset the Winsock, etc.
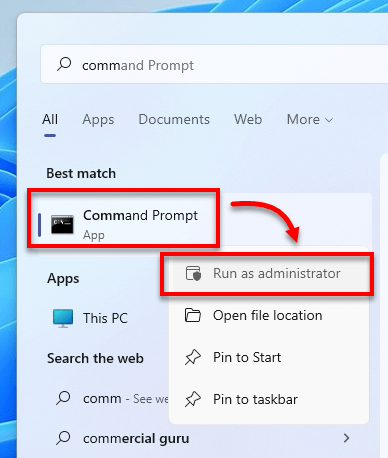
First, search for “CMD” or “Command Prompt” via Start, right-click Command Prompt from the search result and select “Run as administrator“.
In the Command Prompt window, enter each of the following commands one line at a time. After executing all of the following commands, restart your computer and retry your Ethernet connection.
ipconfig /release

ipconfig /renew

ipconfig /flushdns

ipconfig /registerdns

netsh winsock reset

netsh int ip reset

netsh int tcp set heuristics disabled

netsh int tcp set global autotuninglevel=disabled

netsh int tcp set global rss=enabled

netsh int tcp show global
Check LAN cable and connector
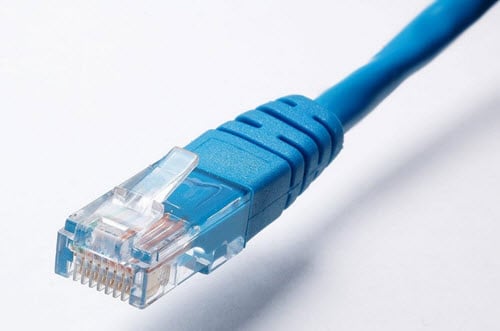
Cable is one of the most common causes for random Ethernet network related issues, and the “Unidentified Network” problem is among the most common results caused by a defected LAN cable.
Check the Ethernet LAN cable and connector to see if there is any damaged or excessively bent in any spot. If you have a spare LAN cable, try to replace the existing one with the spare cable.
Restart router and computer
If you haven’t already tried, do a full reboot of your router and your computer. Most network issues can be resolved by simply turning off and on again both the router and your computer.
Check your Ethernet adapter’s IPv4 settings
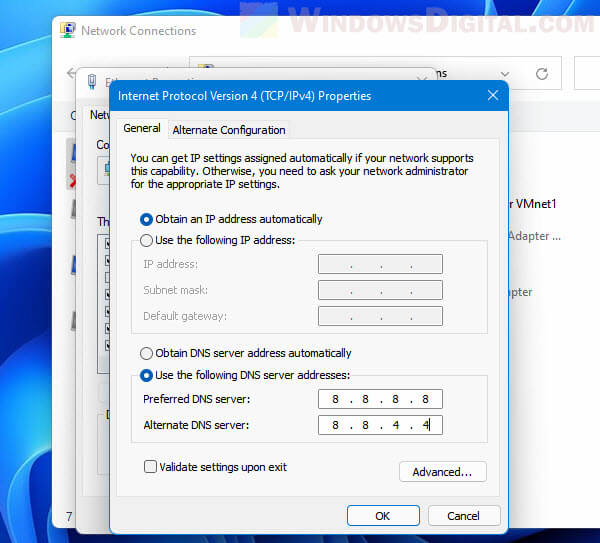
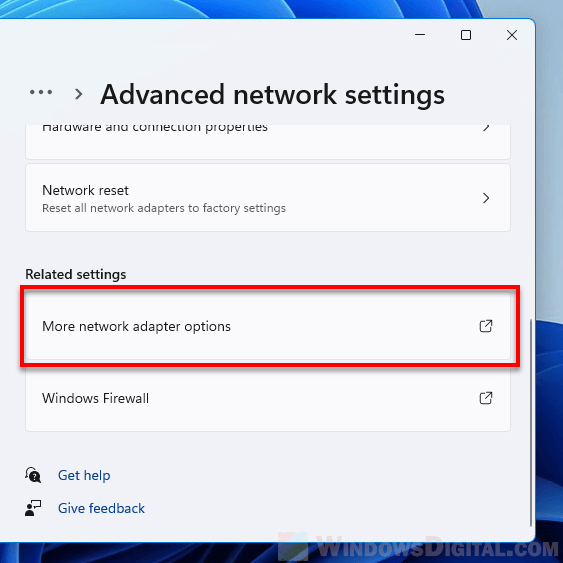
Check your Ethernet adapter’s IPv4 properties to see if the IP address settings are correct. To open the IPv4 properties window, open Settings via Start or by pressing Win + i keys, then navigate to Network & internet > Advanced network settings > More network adapter options.
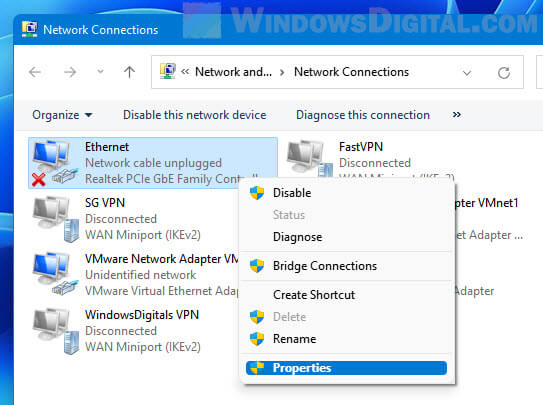
In the Network adapters window, right-click the Ethernet adapter you are having problem with, and select Properties. From the list of items, select “Internet Protocol Version 4 (TCP/IPv4)” and then select Properties.
From there you can see how Windows should obtain IP address from the router. In most cases, “obtain an IP address automatically” should be chosen if your router supports DHCP (most modern routers support DHCP).
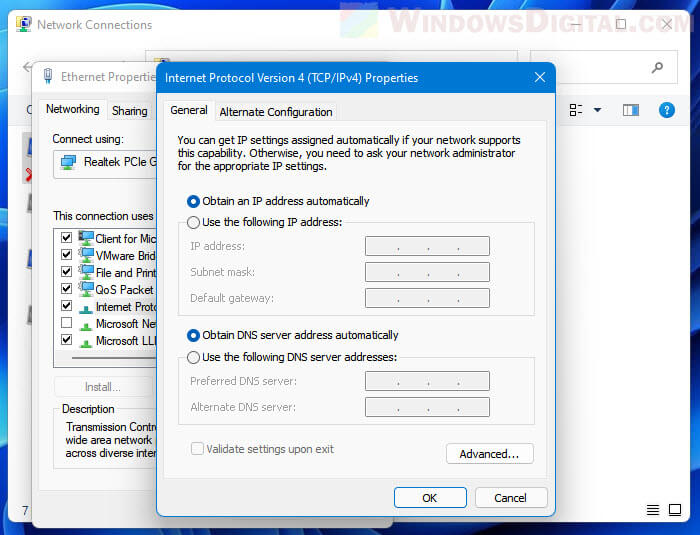
On the contrary, if you are using the “Use the following IP address” option, make sure the IP address entered is correct (within the supported range of IP address by your router) and has the correct Subnet mask.
If you are unsure if the IP settings is correct, you can jot down the current settings first in case you want to undo the changes later, and then try to select “Obtain an IP address automatically” option to see if it fixes the Ethernet unidentified network issue in Windows 11.
Try to manually assign IP address
When checking the IPv4 settings following the Fix 5 above, if you are using “Obtain an IP address automatically”, you can also try to change to “Use the following IP address” and set a static IP address for your computer. This often fixes the issue where router fails to assign an IP address for your computer.
Follow the same steps in Fix 5 to open the IPv4 properties of the Ethernet adapter. Then, select “Use the following IP address” and enter the IP address you want to use for your computer.
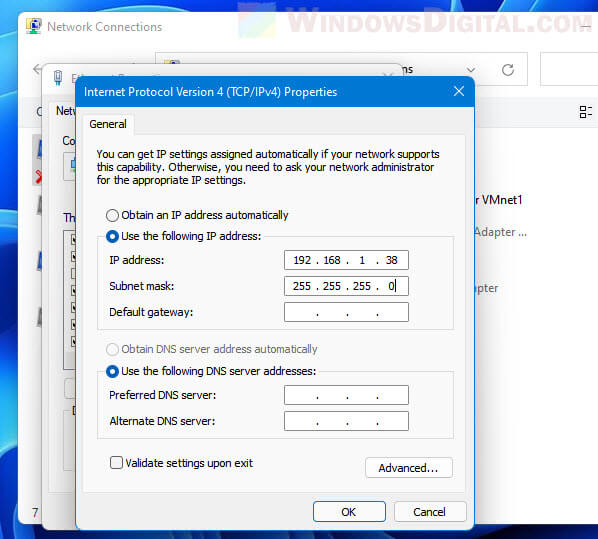
Note: The IP address range must follow the allowable IP range set by your router. You can check this by looking at the IP address of your other devices using the same network. For example, if your phone connecting to the same local network have a local IP address of 192.168.1.6, you can try to use the IP address of 192.168.1.x where x can be any number between 0 to 255, preferably above 10 because 0-10 are usually taken by your router and other devices.
Check DHCP settings in the router settings
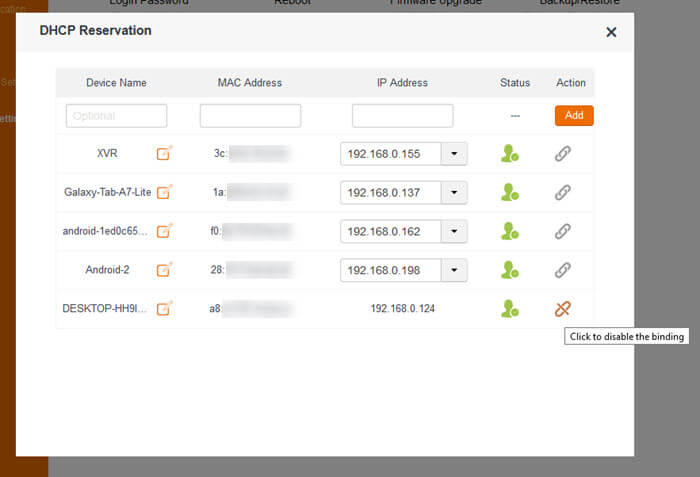
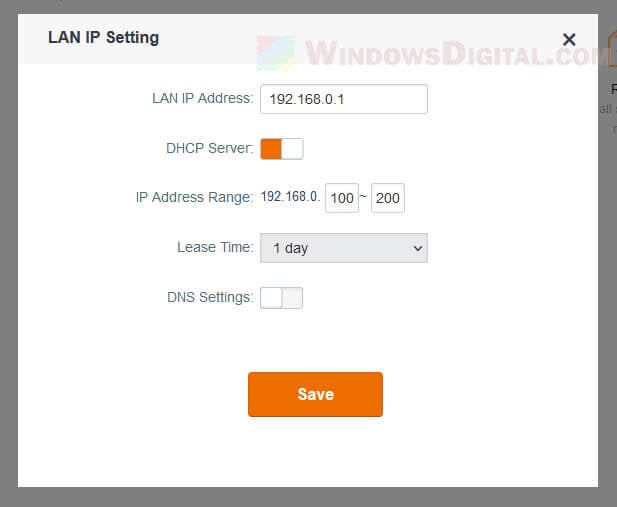
Since the interface of each router differs vastly, it is impossible to make a guide on how to change something in the router. If you have access to your home router, try to check the DHCP settings to see if there is any DHCP reservation setting that bind an IP address to your local computer. Try to remove the binding to allow your router to automatically assign IP address for your computer.
The screenshots below shows an example of how DHCP Reservation and LAN IP setting look like in a Tenda Router.
Disable unused virtual network adapters and VPN
Virtual network adapters can sometimes cause conflicts between different network connections. Try to disable any virtual network adapters you don’t use and see if it resolves the unidentified network issue.
You can view a list of all network adapters via Settings > Network & internet > Advanced network settings > More network adapter options.

In the Network adapters window, you can see a list of all available network adapters in your computer. To disable a network adapter, right-click the adapter and select Disable.
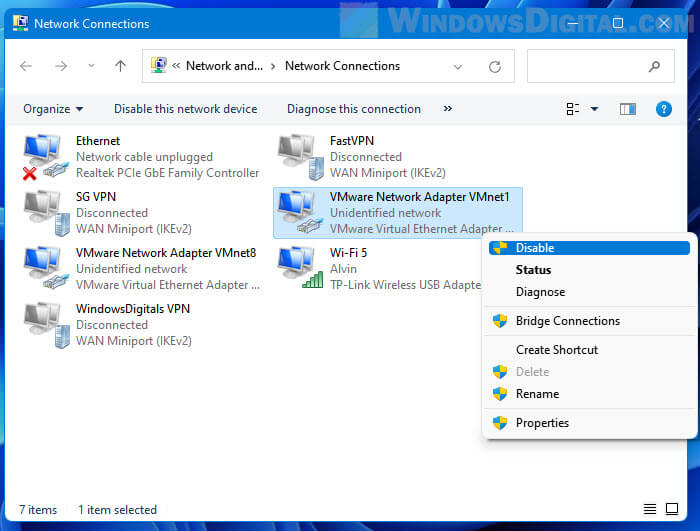
If you have a VPN service, try to disable it and see if it fixes the unidentified network issue.
Turn off Airplane mode in Windows 11
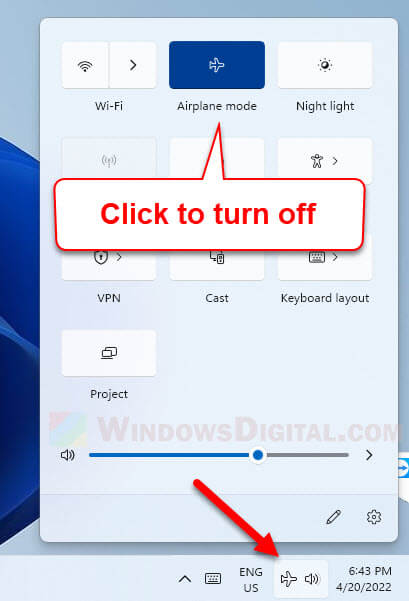
Also, make sure you do not have Airplane mode turned on in Windows 11. To check if you have airplane mode switched on, look at your taskbar to see if there is an airplane icon. If the airplane icon exists, click it and turn off the airplane mode. Airplane mode will restrict connection and cause the Ethernet Unidentified Network issue.
What else can you do to fix the unidentified network issue
If nothing of the above works to resolve your Ethernet unidentified network issue in Windows 11, consider trying the following solutions.
- Update the Ethernet network adapter driver. Read more: How to update driver for network adapter in Windows 11.
- Consider using a new network adapter. PCIe or USB Ethernet adapter is easy to come by and generally not expensive.
- Replace the LAN cable.
- Change the DNS server settings. Read more: How to Change DNS in Windows 11/10 to Google or Cloudflare.
