Windows 11 comes with several new audio features and settings including the new Enhanced Audio setting that is able to automatically improve sound quality when turned on. It also includes several audio enhancements such as Bass Boost, Virtual Surround, Room Correction and Loudness Equalization. However, Sound Equalizer enhancement is not included in Windows 11 by default.
This guide will show you how to add the audio Equalizer Settings in Windows 11 Sound Control Panel. We will also show you 2 other popular third party sound equalizer software for Windows 11 you can use if the former doesn’t work.
Also see: How to Boost Volume Above 100% in Windows 11
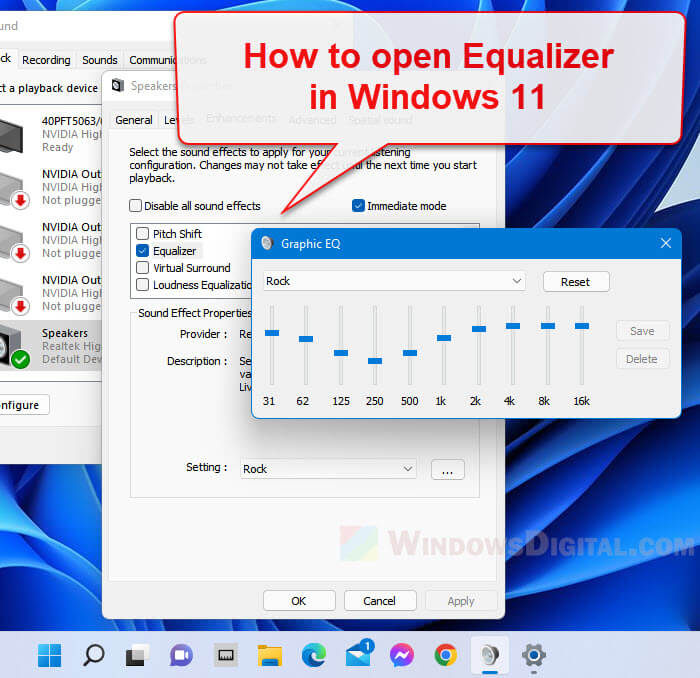
How to open sound equalizer settings in Windows 11
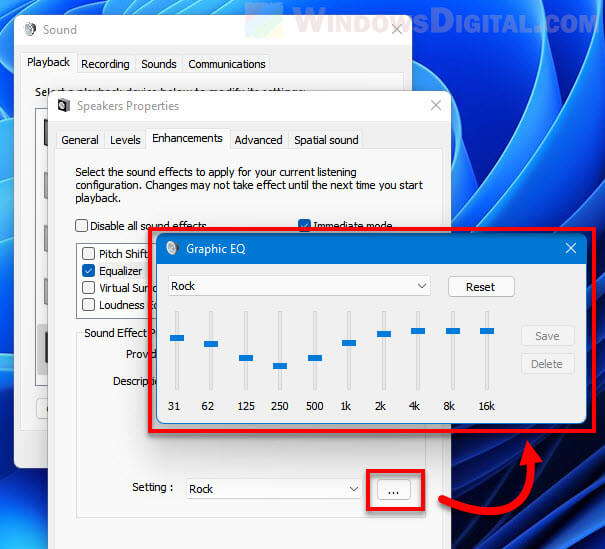
To add the Equalizer enhancement (as shown in the screenshot above) to the Sound Control Panel in Windows 11, follow the steps below.
1. You need to first download and install Realtek HD Audio Codecs Software Driver. On the download page, select the setup with the description that best matches your Windows version (Windows 10 version will work for Windows 11, and Windows 11 are usually 64-bit). If the download is too slow, you can download from an alternative source instead at: https://realtek-download.com/download-hd/.
See also: How to Update Realtek Drivers in Windows 11
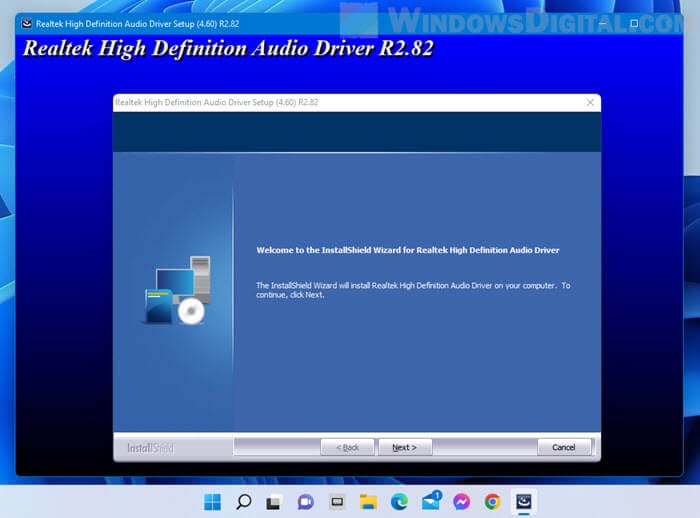
2. Once downloaded, run the installer to install the Realtek High Definition Audio Codecs Software Driver. When the installation has completed, restart your computer.
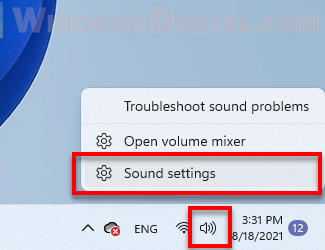
3. Once restarted, to open the sound equalizer settings in Windows 11 via Advanced Sound Settings, right-click the Sound icon from the taskbar and select Sound settings.
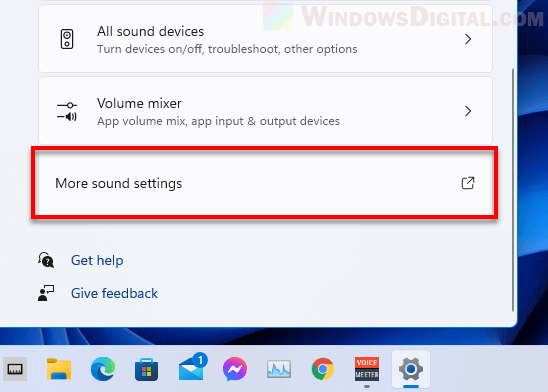
4. In the Sound settings window, scroll down and look for “More sound settings” option and select it.
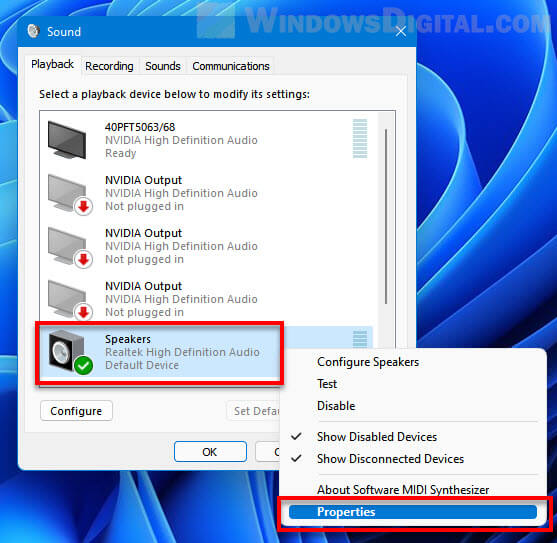
5. In the Sound control panel window, right-click the Speaker or Headphones you are currently using, and then select Properties.
6. Next, select the Enhancements tab. Make sure “Disable all sound effects” option is disabled (otherwise you will not be able to enable any audio enhancement including the equalizer settings). In the list of enhancements, enable Equalizer. While selecting Equalizer, you can change the Windows 11 sound equalizer setting to a preset setting such as Rock, Live, Pop, Classical, Bass, Treble, Powerful, etc.
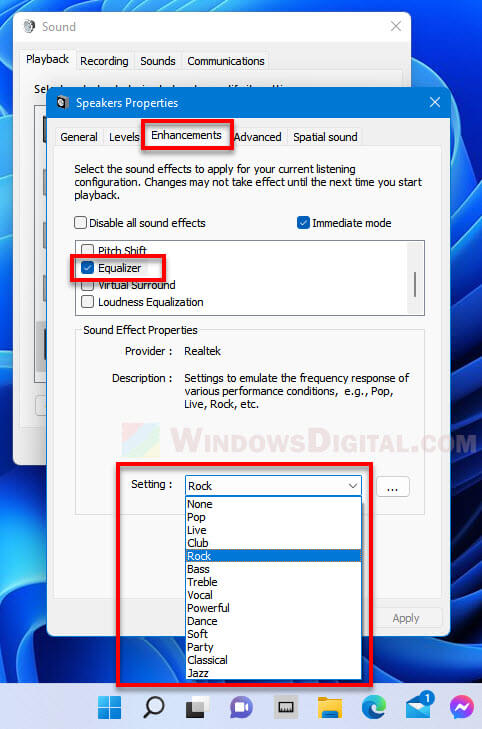
To manually customize your own sound equalizer setting, click the triple dotted option button next to the preset Setting to open the graphical equalizer (Graphic EQ) window. From there you can adjust the audio equalizer settings to your preference in Windows 11.
Also read: How to Change Volume of Different Apps on Windows 11
Other audio equalizer software for Windows 11
Since there is no built-in sound equalizer in Windows 11, we will have to rely on a third party audio equalizer software. The easiest way to get sound equalizer settings in Windows 11 is by installing Realtek HD Audio Driver as shown in the instructions above.
If that doesn’t work or if the audio equalizer by Realtek does not satisfy your need, you can try to use other audio equalizer software instead. Listed below are 2 of the most popular and free sound equalizer software for Windows 11.
Equalizer APO
While there are many audio enhancer software that provides graphical equalizer feature for Windows 11, most of these software are usually not free. However, there is a simple equalizer tool that is actually open-source and free to use, and is one of the most popular sound equalizer tools for Windows. It is called Equalizer APO.
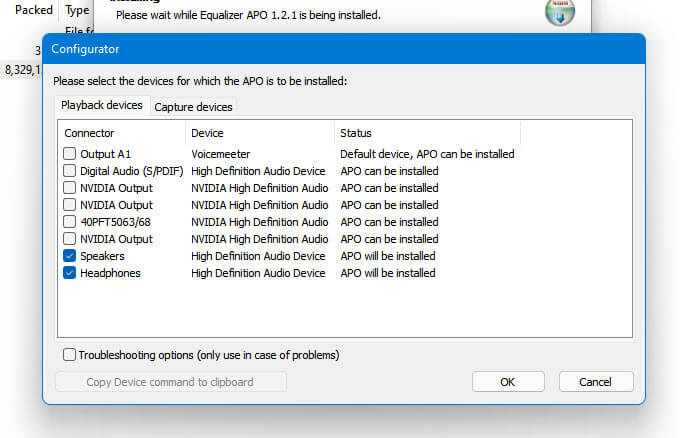
You can get Equalizer APO from https://equalizerapo.com/download.html. When you install the software, the setup will prompt you to select the playback devices you want to use with APO.
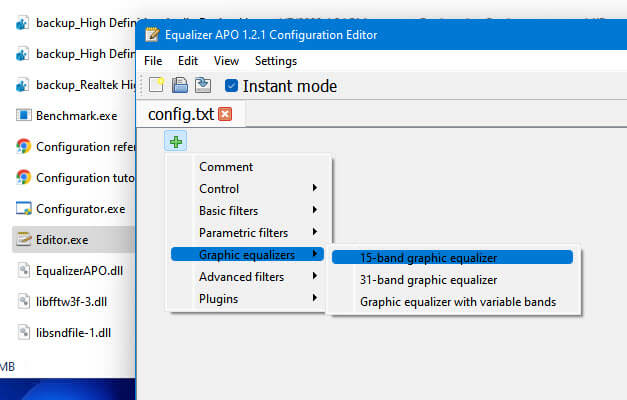
Once installed, to open the graphical equalizer in APO, go to its installation folder (usually at “C:\Program Files\EqualizerAPO“) and open the Editor.exe file. In the Equalizer APO Configuration Editor window, click the add button (plus) and select Graphic equalizers > 15-band, 31-band, or graphic equalizer with variable bands (whatever you prefer).
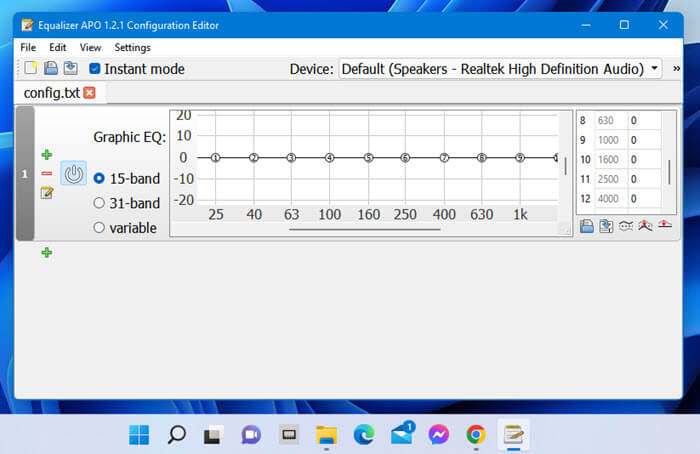
From there you can adjust the sound equalizer for Windows 11. Once you have done adjusting the sound equalizer, Click File > Save in the Equalizer APO Configuration Editor window to save the changes.
Related: How to Increase or Boost Microphone Volume in Windows 11
FxSound
FxSound is another extremely easy to use and free audio enhancer software that also provides graphical equalizer for Windows 11. It provides a very user-friendly interface that even users who are not very computer-literate would be able to use the tool. You can get FxSound from https://www.fxsound.com/.
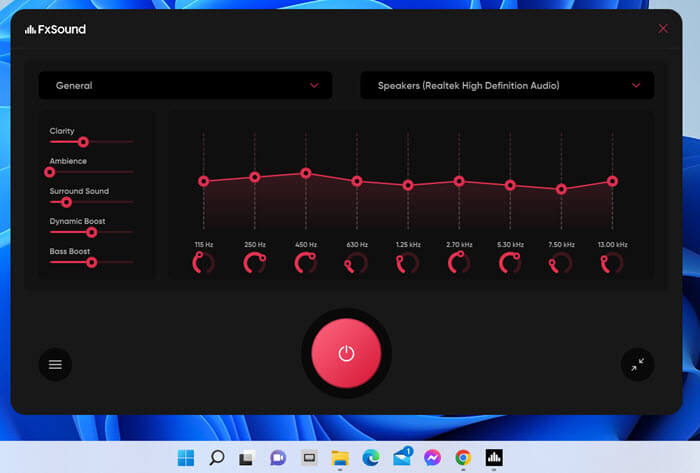
There is no specific guide needed for this tool. As soon as you open the tool, you will immediately see all the available sound enhancement options and graphic EQ on the main interface of the app. You just need to choose the speaker or headphones you want to apply the settings to and then click the power button to activate the changes.
Frequently Asked Questions
You need to install the required audio codec software driver first, and then access the equalizer settings via Sound Control Panel in Windows 11.
After installing the required audio codec, you can use the equalizer settings via Sound Control Panel to adjust the bass and treble in Windows 11.
The equalizer settings in Windows 11 can be found via Sound Settings > More Sound Settings > Speaker Properties > Enhancements > Equalizer, after you’ve installed the required audio codec driver.
