In Windows 11, when you pause the search indexing process, the pause button will become greyed-out and there will be no resume button to unpause the indexing. Although simply restarting your computer would usually allow the indexing to resume, if you are looking for a way to unpause the indexing without a reboot (or if there is an issue causing the indexing to pause itself), here’s a workaround to immediately force resume the search indexing in Windows 11 without restarting your PC.

Page Contents
Unpause indexing in Windows 11
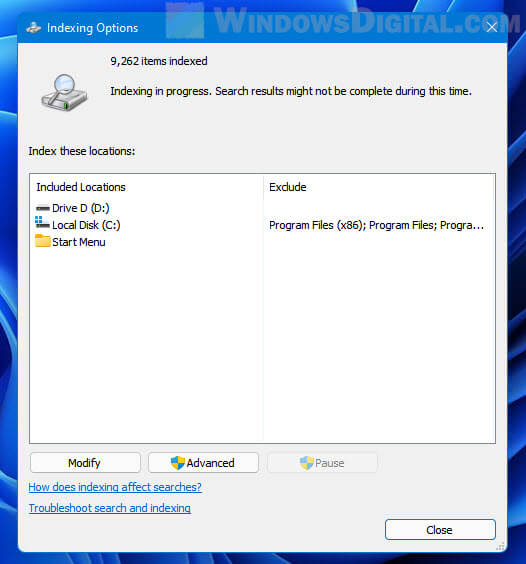
If the Indexing Options window shows “Indexing is paused” and there is no button or whatsoever to unpause it, you can simply restart the Windows Search service to force resume the search indexing again. The instruction below shows how to unpause indexing in Windows 11 by manually restarting the Windows Search service.
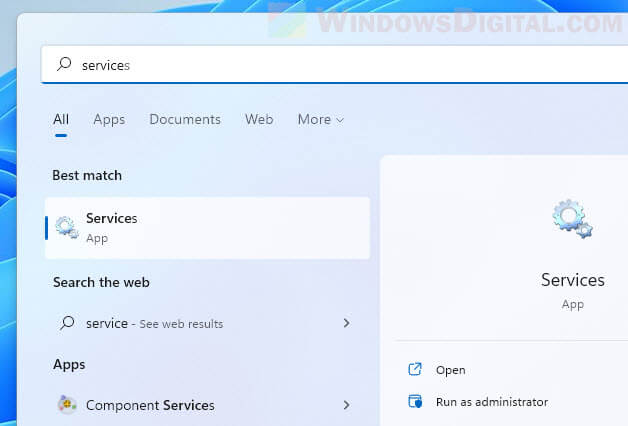
1. In Windows 11, search for “Services” via Start and open it.
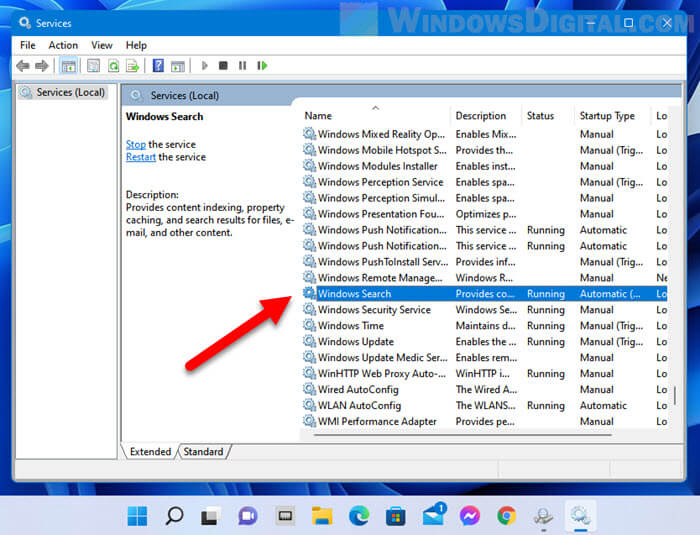
2. In the Services window, select Services (Local) on the left pane, then look for Windows Search service from the list of services. Double-click the service to open its properties.
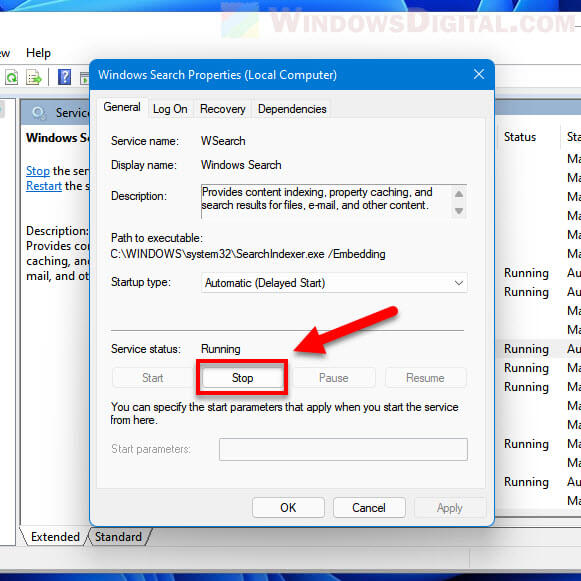
3. In the Windows Search Properties window, the service status should be showing Running. Click the Stop button to stop the service. The key to unpause the indexing is to force restart the Windows Search service by first stopping the service then start it again.
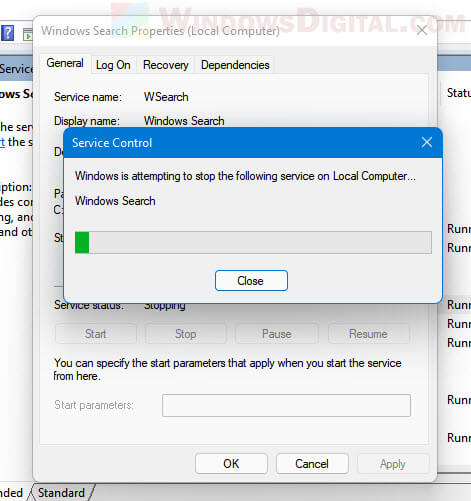
4. It may take a few seconds for the Service Control to stop the service. You will see the following message: “Windows is attempting to stop the following service on Local Computer…” while Windows 11 is attempting to stop the Windows Search service.
5. Once the service is stopped, click the Start button to start it again.
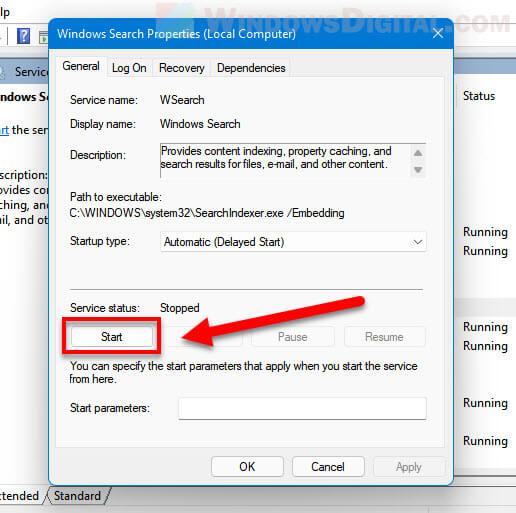
6. Similar to when you stop the service, it may take a couple of seconds for the service to start. The service control will show “Windows is attempting to start the following service on Local Computer…” while it is trying to start the Windows Search service.
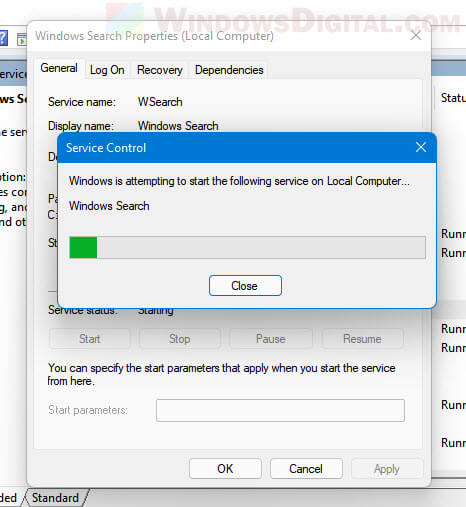
7. Once the Windows Search service has successfully started, check Indexing Options again. The Indexing should be unpaused now. If the Indexing Options window shows “Indexing in progress. Search results might not be complete during this time“, it means the indexing has resumed and is currently in progress.
Restart Windows Search service via Command Prompt
While the Services app allows you to stop and start a service through a GUI (graphical user interface), another quicker method to stop or start a service in Windows 11 is by executing a command line in the Command Prompt or Windows Terminal.
To unpause indexing in Windows 11 by restarting Windows Search service via Command Prompt, follow the steps below.
1. In the Start menu, search for “Command Prompt” or “CMD“. Right-click Command Prompt from the search result and select “Run as administrator”. Administrative privileges is required to execute the following command lines.
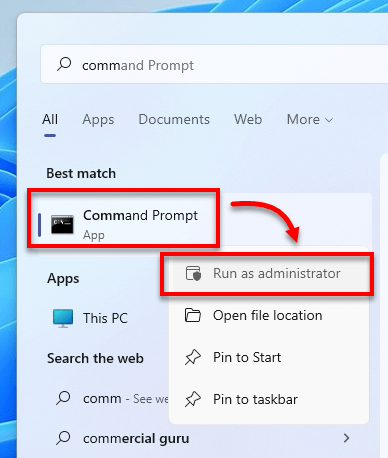
2. In the elevated command prompt window, enter the following command line to stop the Windows Search service.
net stop "Windows Search"
3. To start the service again, enter the following command line.
net start "Windows Search"
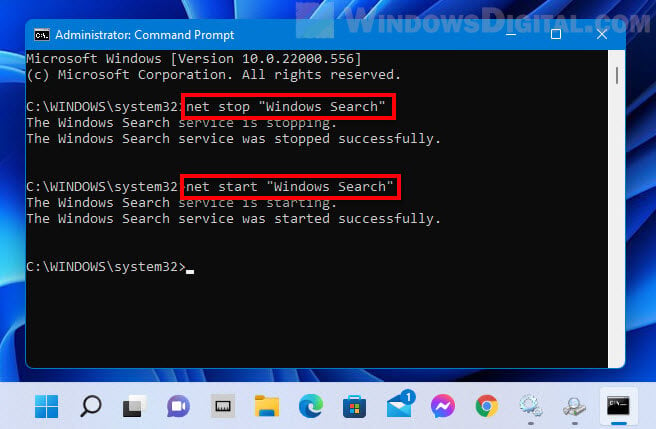
4. Once the service is restarted, check the Indexing Options window again. It should now display “Indexing in progress” if the indexing has resumed.


