When your C: drive is low on disk space and if the physical drive of where the C: partition is has unused free space (unallocated space) or if there is another logical drive (e.g. D: drive) on the same physical drive that you wish to “transfer” the free space over to your C: drive, you can extend your C: drive for more disk space.
Extending a volume, for example, the C: volume requires the free space (or unallocated space) you want to add to C: to be on the same drive as C:. You cannot extend C: drive and add free space to it from another physical drive.
Two methods to extend C: drive in Windows 11
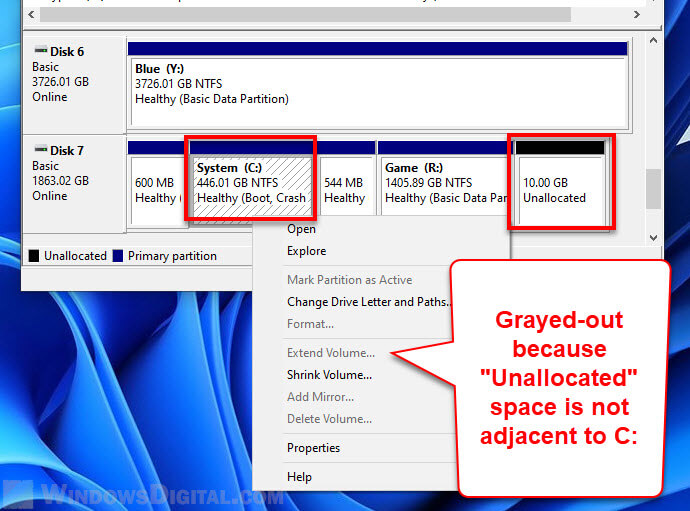
Listed below are two methods on how to extend a drive in Windows 11. The first method uses the Windows built-in Disk Management utility to extend volume of a drive. However, the extend volume option will only be accessible if the unallocated space partition is directly next to the partition you want to extend. For example, if you want to extend C: drive using Disk Management, the unallocated space has to be adjacent to the C: partition on the same Disk. Otherwise, the “Extend Volume” option will be grayed-out.
If the unallocated space is not adjacent to your C: partition, or if you just want to add space to C: drive from D: or other drive that is on the same disk as C:, you need to use a third party partition manager software instead. The second method in this guide will show you how to do so.
Also see: How to Merge Two Drives in Windows 11
Page Contents
Method 1: Extend C: volume using Disk Management
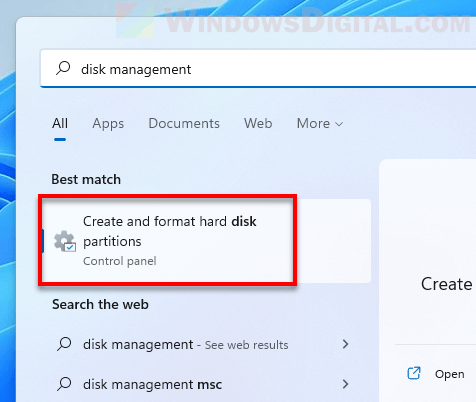
1. In Windows 11, search for and open Disk Management via Start.
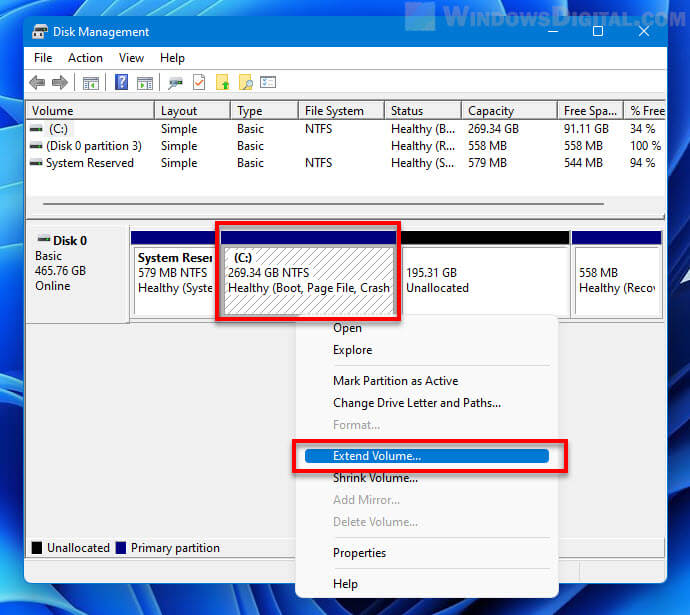
2. In the Disk Management window, if there is an unallocated space partition next to your C: drive, it means you can extend your C: drive to include the unallocated space. Right-click your C: drive and select Extend Volume.
3. Follow the on-screen instruction in the Extend Volume wizard to complete the task. When the wizard prompt you to Select Disks, make sure the selected disk is added to the right column.
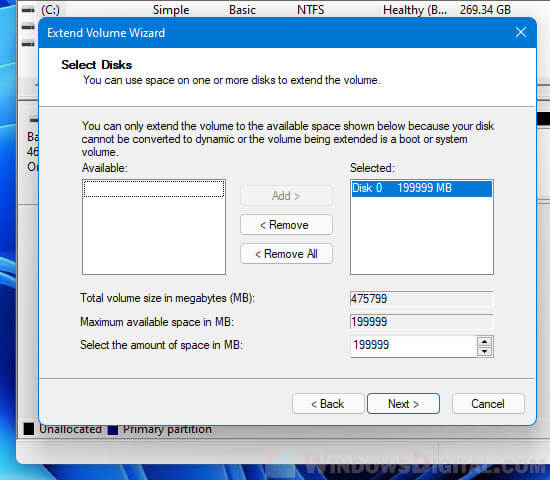
4. After clicking Finish in the final step, Disk Management will begin to extend the volume. It may take a while (usually only a couple of seconds) depending on the size of the selected disk. Once completed, you should see that your C: drive is now larger in size after including the previously unallocated space.
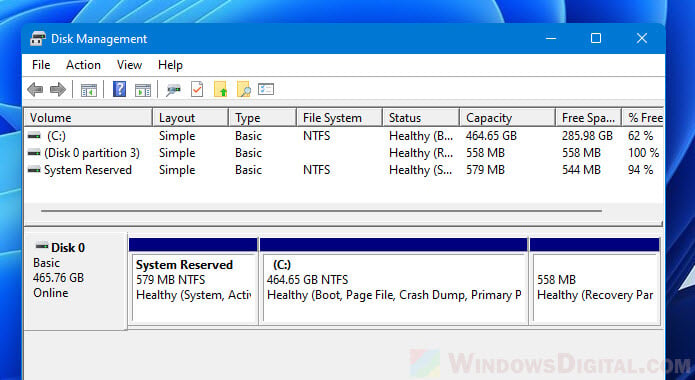
If the Extend Volume option is grayed-out and cannot be selected, it is commonly because the unallocated space partition is not directly adjacent to your C: drive. In that case, use the method below instead.
Method 2: Extend C: drive using third party partition manager
If you want to add space to C: drive from D: or whatever drive that is on the same physical disk as C:, or if the unallocated space partition you want to add to C: is not adjacent to your C: partition on the same disk (commonly due to a “Recovery Partition” blocking in between the partitions), since the Windows built-in Disk Management tool is unable to perform this task, you need to use a third party partition manager instead to extend C: drive in that case in Windows 11.
There are plenty of disk partition manager software out there, but most are not free to use. For simple tasks such as extending volume of a partition, we recommend to use the free version of AOMEI Partition Assistant. You can get the software from https://www.diskpart.com/download-home.html. Once you’ve installed the software, run it from the desktop shortcut or from Start.
Case scenario 1: Add space to C: drive from D: drive
First and foremost, to achieve adding free space to C: drive from D: drive, the D: drive has to be on the same physical hard disk or SSD as your C: drive. If this is true, follow the steps below to extend C: drive from D: drive using AOMEI partition assistant.
1. Right-click C: drive and select Resize/Move Partition.
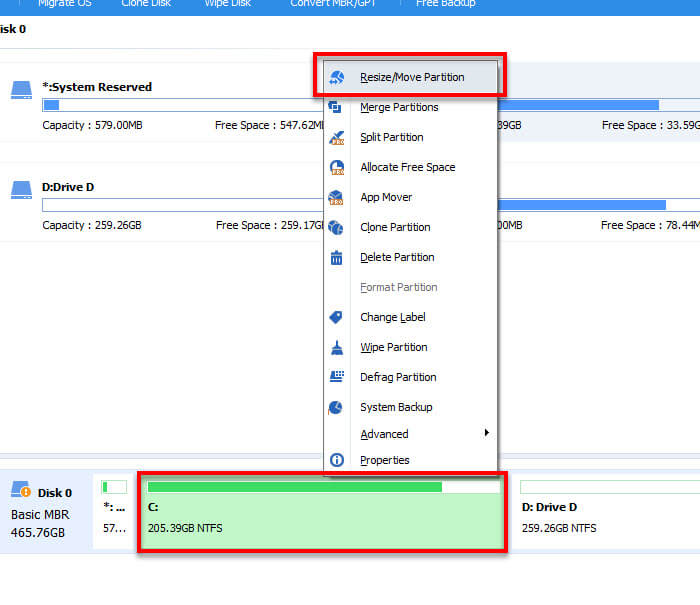
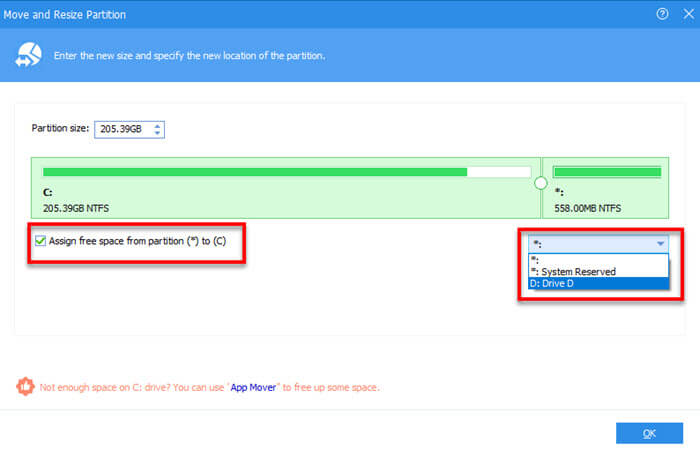
2. In the Move and Resize Partition window, enable the checkbox that says “Assign free space from partition (*) to (C)“. Then, on the right side, click the drop-down menu and select the drive you want to assign free space from.
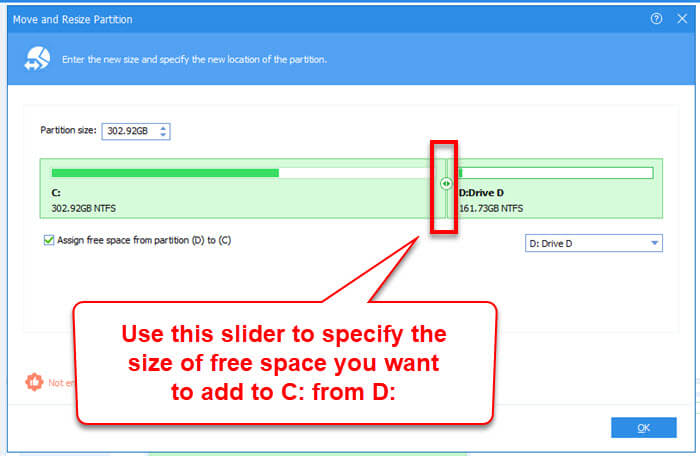
3. Next, use the slider (as shown in the screenshot below) to specify the size of free space you want to add to C: from D:. Click OK to proceed.
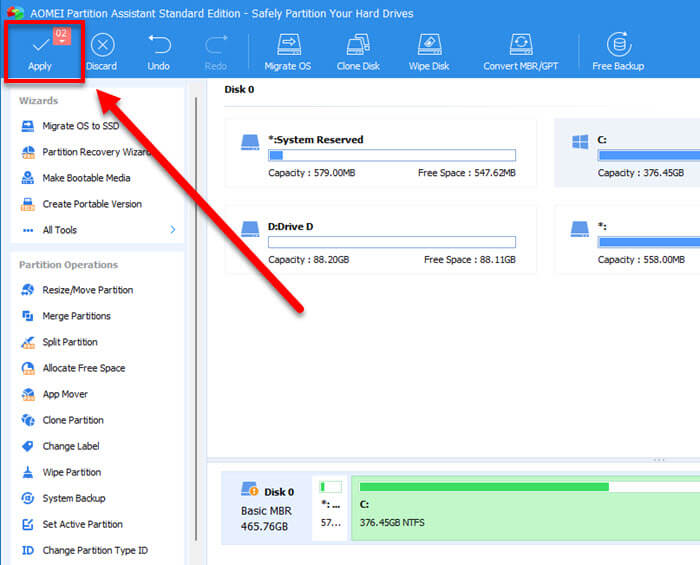
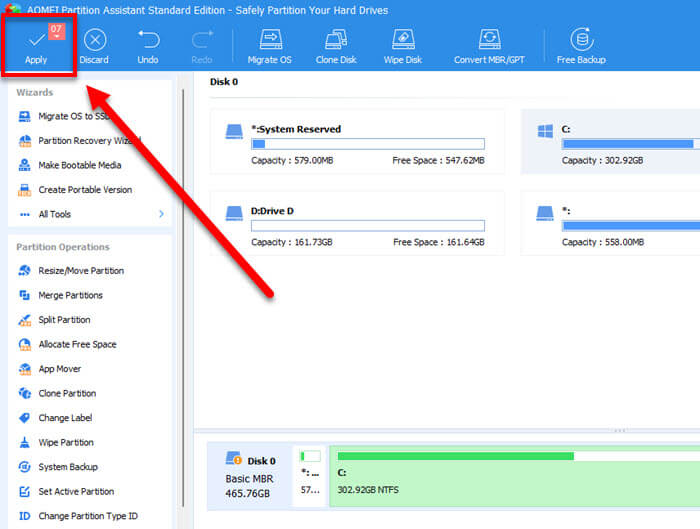
4. Once you have completed the wizard, the software will show you a preview of outcome after applying the changes. To complete the task and apply the changes, click Apply at the top left corner of the window.
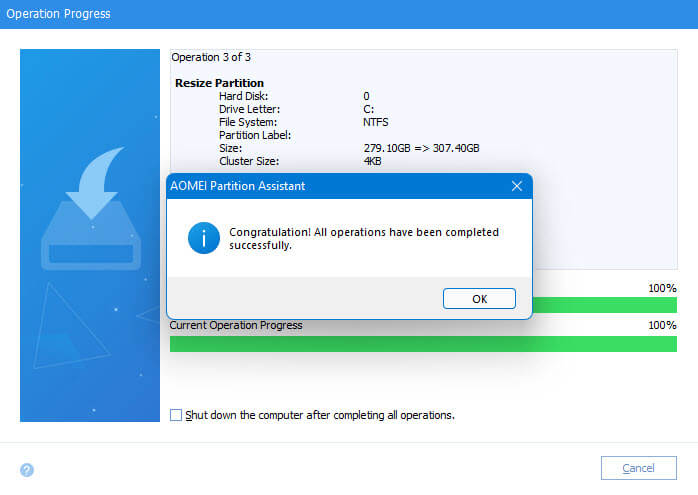
5. In the Pending Operations window, click Proceed to continue. Once the process is completed, you will receive a message telling you that the operations have been completed successfully.
Case scenario 2: Unallocated space is not adjacent to C: drive
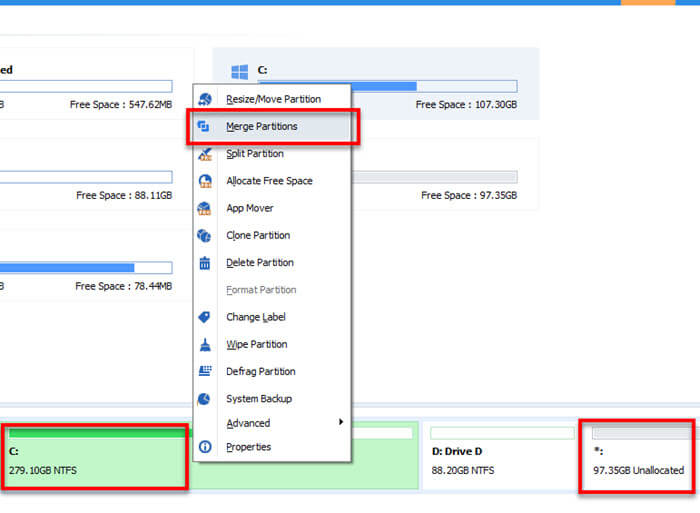
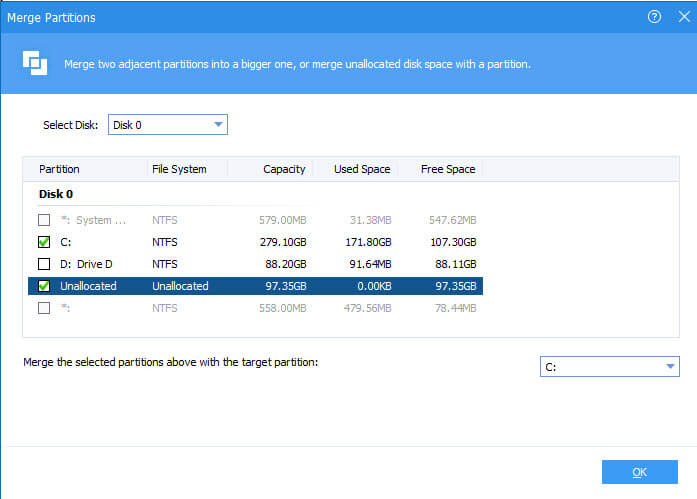
If there is already an existing unallocated space partition that is not directly next to your C: drive due to other partition(s) blocking in between them, follow the steps below to merge your C: drive and the unallocated partition using AOMEI partition assistant.
1. Right-click C: drive and select Merge Partitions.
2. In the Merge Partitions window, select the partitions you want to merge or combine, in this case, the C: and Unallocated partitions, and click OK to continue.
3. Next, click Apply at the top right corner of the window to apply the changes.
