There are often times when you need to choose which version of setup or installer of a software you should download based on your computer’s system type and processor type. For example, a 64-bit software will not work on 32-bit operating system, while a computer or device with a ARM-based processor can only run software designed for ARM-based PC. This guide will show you how to check if your computer is 64-bit, 32-bit, ARM64 or ARM in Windows 11.
Most modern computers and devices have one of the following CPU architectures:
- 32-bit (x86-based)
- 64-bit (x64-based)
- ARM-based
There are several differences between these CPU architectures. If you have a 32-bit processor, you will only be able to install 32-bit OS and use 32-bit software. However, 64-bit will be able to handle both 32-bit and 64-bit operating system and software. It’s worth noting that Windows 11 can only run on 64-bit CPU.
Another major difference between 32-bit and 64-bit is that there is a limit of RAM that a 32-bit operating system can use. A 32-bit architecture can only utilize up to 4 GB of memory, while a 64-bit architecture can theoretically utilize up to 16 exabytes of memory. That said, it is recommended you install 64-bit operating system if you have a 64-bit processor in order to fully utilize your RAM and other hardware resources.
How to check if your processor is 64-bit, 32-bit or ARM in Windows 11
Method 1: System > About
The easiest way to quickly check the system and processor type of your computer is by going to Settings > System > About in Windows 11. For detailed instructions on how to open the System’s About page, follow the steps below.
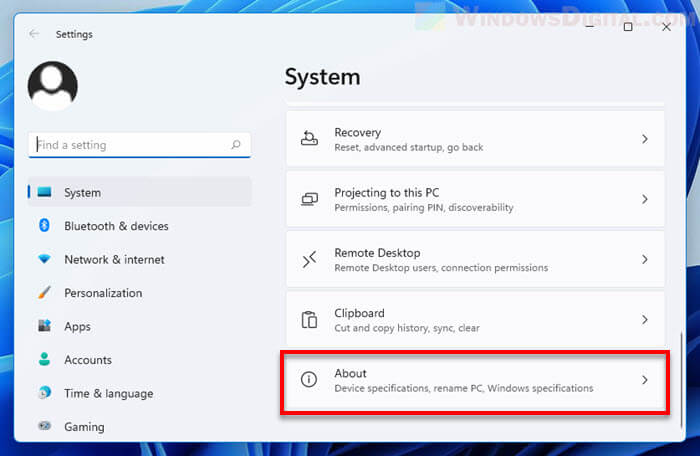
1. Press Win + i keys to open Settings app. On the right pane, scroll down and select About.
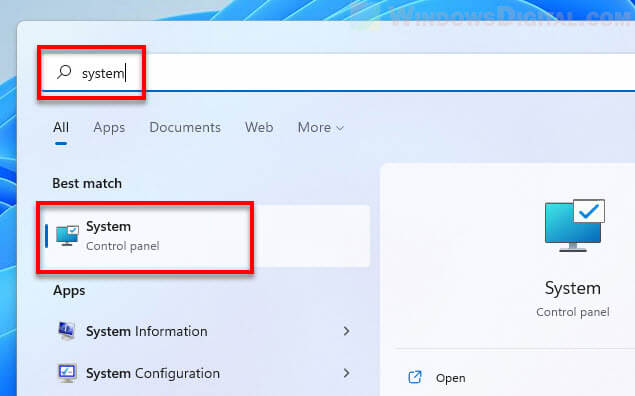
Alternatively, you can search for and open System directly from the Start menu.
2. In the System > About page, the System type along with the processor type is listed under Device specifications.
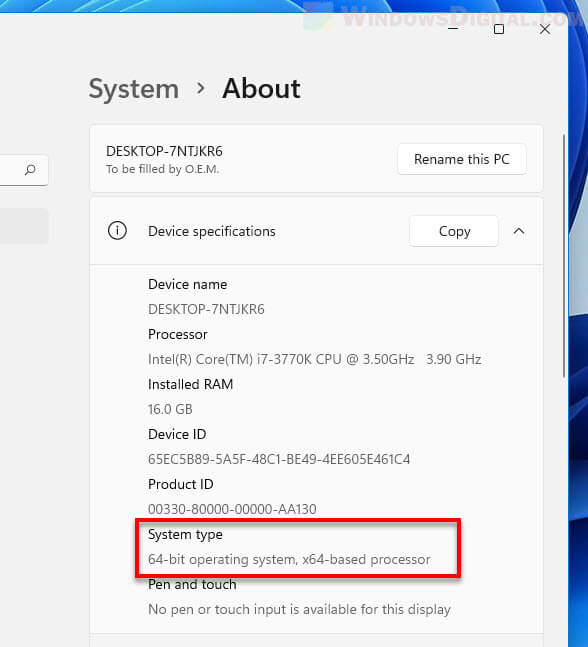
For instance, in the screenshot above, my computer is running 64-bit Windows 11 on a x64-based processor.
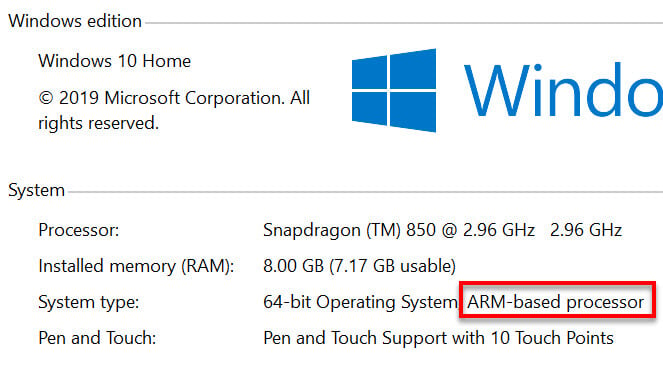
On the other hand, if your computer is running a ARM-based processor, it will show “ARM-based” next to the system type. For example, the screenshot below shows the system and processor type of my ARM-based (ARM64) Lenovo laptop computer.
Method 2: System Information
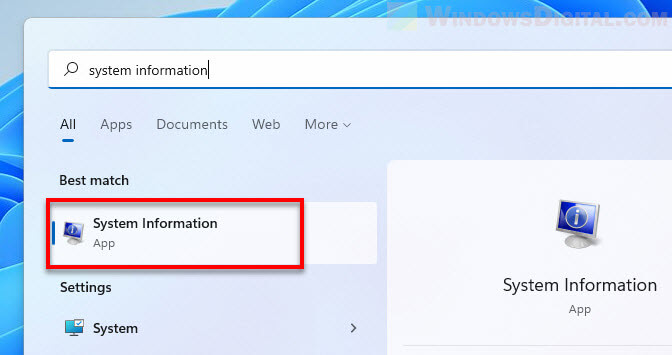
Another way to check your computer’s details including the system architecture and processor type is by opening the System Information app. Simply go to Start, search for “System Information” and open it.
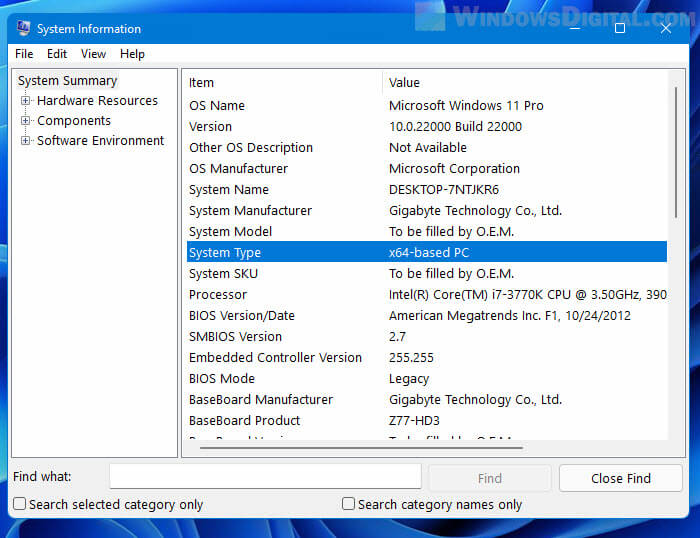
Next, select System Summary in the left pane. You can then check if your system is a x64-based, x86-based or ARM-based PC next to “System Type” in the right pane as shown in the screenshot below.
Method 3: Command Prompt (CMD)
Apart from checking the system type via apps, you can check the CPU architecture type using a command line instead in Command Prompt.
1. Search for “CMD” and open Command Prompt via Start. The command to check processor architecture does not require administrative privilege. Thus, you don’t need to run command prompt as admin in this case.

2. In the command prompt window, enter the following command line.
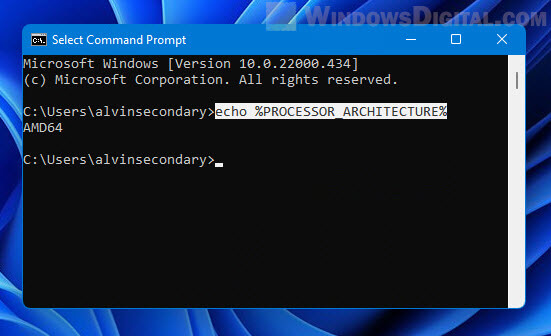
echo %PROCESSOR_ARCHITECTURE%
3. This command will output one of the following values based on the processor architecture you have.
- x86 if you have a 32-bit based processor
- AMD64 if you have a 64-bit processor
- ARM64 if you have a ARM-based processor
